Tricky Transparency, Part Two
My Secret Searching Weapon
by Jen White
Learn to think outside the box when searching for potentially good photo masks. In Part Two of my Tricky Transparency series, I’ll show you where and how to search for potentially good complex photo masks that are FREE.
NOTE: Understanding Part One of this series is important to understanding Part Two.
Part Two includes:
- The Surprisingly Simple Search Engine for Finding FREE Masks
- Not-So-Secret Search Words for Masks
For this tutorial you will need:
- A computer.

Surprisingly Simple Site for Finding FREE Masks
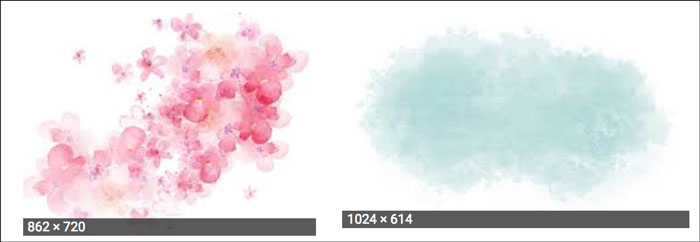
Complex photo masks, like the three shown above, can be found in a large variety of places, but here is the biggest one:
Google Images for FREE Masks
Google Images is often overlooked as a powerhouse source of creative supplies. Here’s how it works.
- Go to Google.com.
- Then, click on Images in the top right corner.
Next, you’ll get a dialog box asking for key words or phrases that describe what you are looking for.

- In the dialog box, enter “watercolor” and press Enter or Return on your keyboard. We’ll talk more about why I chose the word “watercolor” in a little bit.
Maybe it’s just me, but my heart just did a little happy dance. Did yours?
In light of what we talked about in Part One of this series, are you seeing any potential here?
Well hold that thought, let’s make a few adjustments.
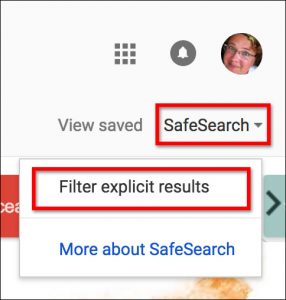
Google Images Filter #1–Safe Search
There is a point when someone can see too much. You’ve heard of TMI, right? Too Much Information.
There’s a LOT of TMI on the web, so let’s filter that out before we go any further.
- In the Google Images menu bar, click on SafeSearch and click on Filter Explicit Results.
After turning on the filter, this menu item will say “SafeSearch On.”
Now we can happily continue without TMI creeping into our fun.
Google Images Filter #2–Usage Rights
Here’s the thing many people do not realize about Google Images—they are not all for you to have. Most people want to show you their image (like on a website), but they don’t really want you to HAVE it.
KEY THOUGHT: Most images on Google are privately owned. They are “Hands off,” so to say.
But, there is a way to know who is willing to let you play with what they’ve created.
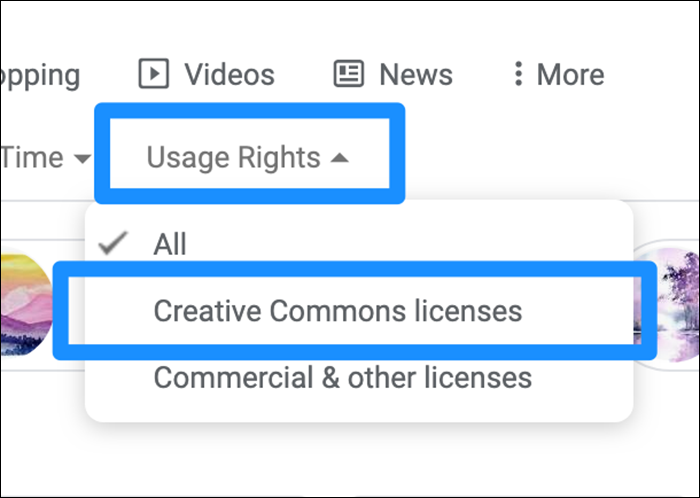
- In the Google Images menu bar, click on Tools. This will bring up an additional menu bar below the main one.
- Click Usage Rights > Creative Commons licenses.
Note: If you plan to use the image commercially — on your website or blog OR selling your design — then you need to click on Commercial & other licenses.
Google Images Filter #3–Show Sizes
The last thing we are going to concern ourselves with is size.
This “size” is referring to the dimensions of the file, as in length and width. But this setting is mostly just to make you aware. I’ll show you how to look for larger sizes of an image in a minute.
Caution…you might need to pull up a little bit of middle school math. Here are some things to consider:
- The digital world is all about pixels.
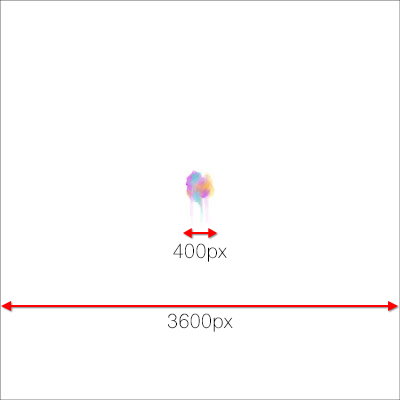
- A typical 12×12 inch scrapbook page is 3600 pixels wide. That’s because 12 inches x 300 ppi = 3600 pixels.
Don’t start hyperventilating. Stick with me!
Therefore, if you dragged a 400 pixel wide image onto a scrapbook page, this is what it would look like in size comparison.
So, let’s turn on the File Sizes filter before going any further so that we have an idea of what we are getting ourselves into.
- In the Google Images menu bar, choose More Tools > Show Sizes.
The Size Might Be Deceiving
You may be wondering, “what size is too small to bother with?”
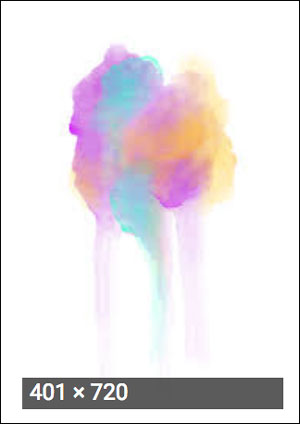
This image was shown above on a 12×12 scrapbook page. A 400px wide (potential) mask is probably too small to mess with.
But, don’t entirely overlook small images like this. The owner might have other sizes that you can download.
For this particular example, here is how I checked:
- Click on the image to open up the popup window.
- Click on Visit to go to the website that contains the image.

- On the Pixabay website, click on the green Free Download button. Now you will see a list of available sizes for download.
- Click on the largest size (1674×3000) and then click Download.
Now you have a 1674px wide image to play with instead of a 400px image.
NOTE: I cannot possibly help you along with every scenario you will encounter. My best advise is to just use common sense and patiently search for options available to you.
NOTE: Some websites may ask you to register before downloading free images or products.
Recall Part One
As you look through the images shown, keep in mind the characteristics mentioned in Part One of this series.
The image should have:
- a white or transparent background,
- varied edges,
- varied saturation,
- and, varied insides.
Save Potentially Good Complex Photo Masks
As you browse the images in this search, find ones you think would make potentially good complex photo masks and save them in the folder you created in Part One. Here’s how:
- Click on an image you’d like to save.
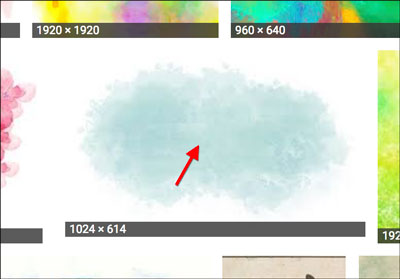
- In the popup window, Right click (Mac: Ctrl click) on the image on the left and choose Save Image.

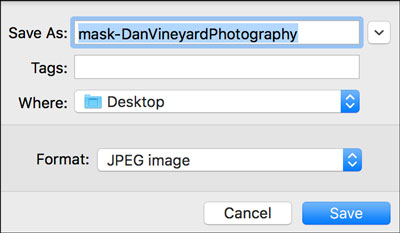
- In the dialog box, give the image a descriptive and unique name.
- I’m using “mask” because I’m planning to use this image as a mask.
- I’m using “DanVineyardPhotography” because I can see from the popup window (above) that this is who created the mask. I can use the creators name later in the credits of my scrapbook page.
NOTE: When in doubt, ALWAYS credit the original designer or creator of the file.
- I’ll save the image in JPEG format (or PNG if it’s offered) to my Desktop because I’m not given the opportunity to navigate to my Complex Photo Masks folder. Later I can click and drag the file from my Desktop into that folder.
- Click Save.
Key Words to Search For
As you may already know, using Google effectively is really all about what you type into the search bar.
Google Images is no different. The word or words you use can make or break your search.
I’ve started you out with the word “watercolor.” Why do you think I chose that word?
Think of characteristics of masks that you’ve seen and liked.
Watercolor masks are my favorite, so I chose to try the word “watercolor.”
Other keywords to try could include: paint, splatter, brush stroke, and splash.
Why not choose the word “mask?”
The word mask is more of a Photoshop term. It’s too specific. It’s not widely used to describe files like the ones we’re looking for.
Just give it a try!
Simply brainstorm and try different ideas. If you come up with a goldmine, let us know what keyword(s) you used so we can try them ourselves!
Get Ready for Part Three
With all this info and inspiration in mind, try and spend some time searching the World Wide Web for hidden treasures that could potentially be good complex photo masks.
- Save any potentially good masks into your Complex Photo Masks folder.
- Find any surprisingly good keywords? Do share in the comments below!
In Part Three of this series we’ll take a look at the contents of your mask folder and start measuring your treasures up with a transparency test.
We’re just getting revved up, there’s MUCH more fun to come! See you in Part Three.
_____________________________________________
 Author: Jen White | Contact Us
All comments are moderated.
Please allow time for your comment to appear.

18 Responses
KATHY
Hi Jen, thank you so much for sharing your valuable information.
Deborah
Update:
1. Usage of the image in Creative Commons license:
Under the following conditions:
attribution – You must give appropriate credit, provide a link to the license, and indicate if changes were made. You may do so in any reasonable manner, but not in any way that suggests the licensor endorses you or your use.
share alike – If you remix, transform, or build upon the material, you must distribute your contributions under the same or compatible license as the original.
So, you MUST give attribution and, if you change it, you have to re-upload it to Creative Commons.
2. There are some differences to the ways you get to the images. Maybe it’s just that I use Firefox. Keep looking around for the ways to get to things.
Jessica Trotter
I searched on “clouds” and searched for them in a PNG format. Makes a great mask too! 🙂 Great tips in this lesson.
zita B
Thank you! I’m with Judy – other things I should be doing, but enjoying catching up on these tutorials instead..
Dorrie Harden
Jen, I have a question. You have said that a good mask should have either a White or Transparent background. My question relates to the White background and how you would handle using it on a colored background paper. Do you have to turn it into a .png file first, so the White Rectangle Background doesn’t show?
Jen White
I’m glad you’re thinking, Dorrie! You’ll learn more about that very question in both Part Three (released 8/6) and Part Four (released 8/13). So be watching for it. 😀
Klazien
Thanks a lot. It was very interesting. I am looking forward for part three.
Therese Arsenault
Wow just goes to show you that you can always teach an old dog (me!!!) some new tricks. Did not know that you could filter searches this way in Google. Thank you so much for this information….and free!!! That is way we love you.
Judy Collier
Jen, I have been a subscriber of Digital Scrapper for many years and though I love everything about it, I don’t often comment. I just want to let you know how much I enjoyed this tutorial. As you indicated, when I searched for “watercolor”, it was like discovering a wonderful treasure! Though I have a ton of things to do today, I dropped everything and enjoyed saving one image after another to use in the near future for my next layouts. Thank you so much!
Bill Burns
Thanks, Jen!
Bill
Denise
I just signed up for Pixabay, but I do not see a green button to click.
Jenifer Juris
The green button is the usually the download button. You will only see that when you have one specific image pulled up. It’s usually on the right hand side. 🙂
Judy Luecke
Wow, never thought about all the things you could do in Google images. This was so informative and so much fun! Thank you, Jen. Judy
Mary
Hi, Jen — This is very useful information. One question: why does size matter when you can change it in Photoshop Elements? Will it be clearer if a larger size is selected?
Thanks,
Mary
Jenifer Juris
Hi Mary! The reason size matters is that if you were to try to make a small pixel image bigger, the quality will be greatly reduced if you transform it larger. For something like 400 px on a 3600px X 3600px document, if you make it bigger, it will look pretty bad and probably look pixelated. You can always make an image smaller without losing quality but going bigger than it’s original size produces a loss of quality. I hope that helps! 🙂
Lori
This was so helpful! Thank you for all these tips.
Bill Burns
Hi Jen
When I click on the ‘Download PDF Manual’ button, I get a message saying the page does not exist.
Tech glitch or am I doing something wrong?
Apart from that I am really enjoying the blog!
Regards,
Bill
Jen White
Thanks Bill. 😀 The PDF is now ready for download. Enjoy!