
Sketch Effect, Part 1
by Karen Schulz
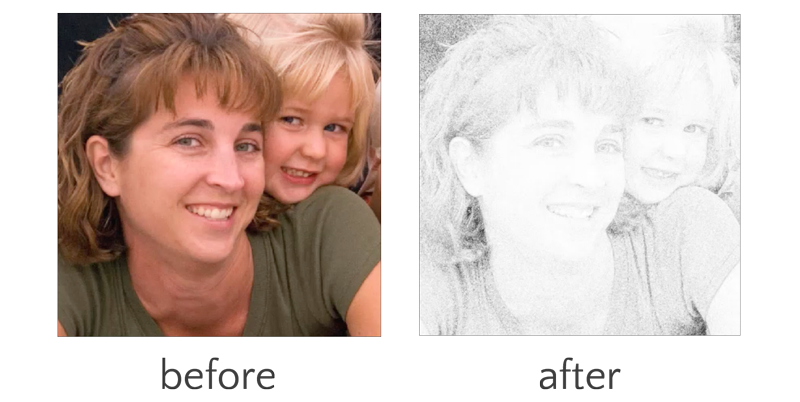
Create an artsy sketch effect in seconds with the use of the little-known Minimum Filter.
For this tutorial you will need:
- The dst-sketch-effect-photo.jpg in the download
- PhotoshopElements or AdobePhotoshop
Want to see what others are creating with this tutorial?
- Join & visit our Community on Facebook.
- Search and post using hashtag #DST and/or #SketchEffect
Click Here for the All-In-One Download
(video, photo & manual)
Watch the Video Tutorial
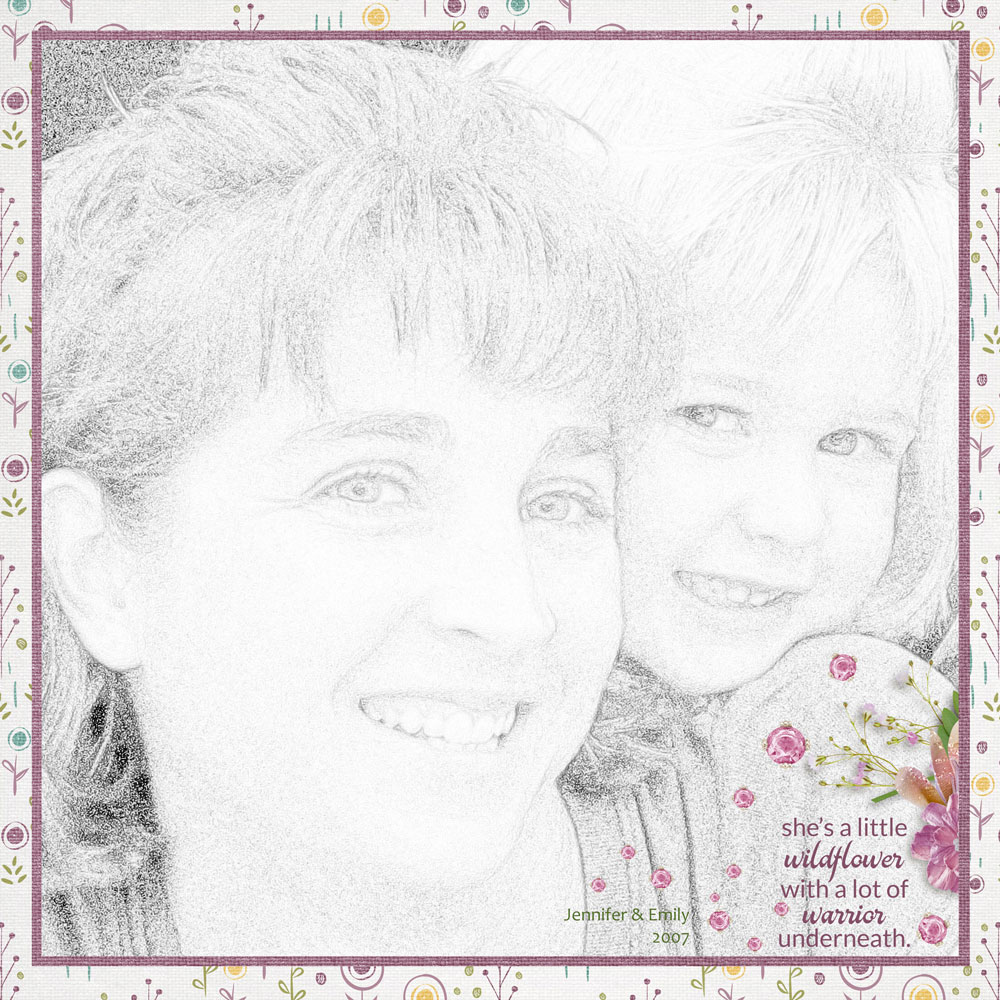
Page & Photo: Karen Schulz
Kit: Mothers and Daughters by Karen Schulz
Font: Candera Regular
More pages created using this tutorial:

Page & Photo: Nancy Briechle
Template: Scenic #9 by Anna Aspnes
Kit: Fotographie by Anna Aspnes
Fonts: Fredericka the Great, Arial Narrow
Page: Felicity Farnsworth
Photos: J Glessal and F Farnsworth
Templates & Kits: Anna Aspnes, Rachel Martin, Connie Price, Elif Sahin
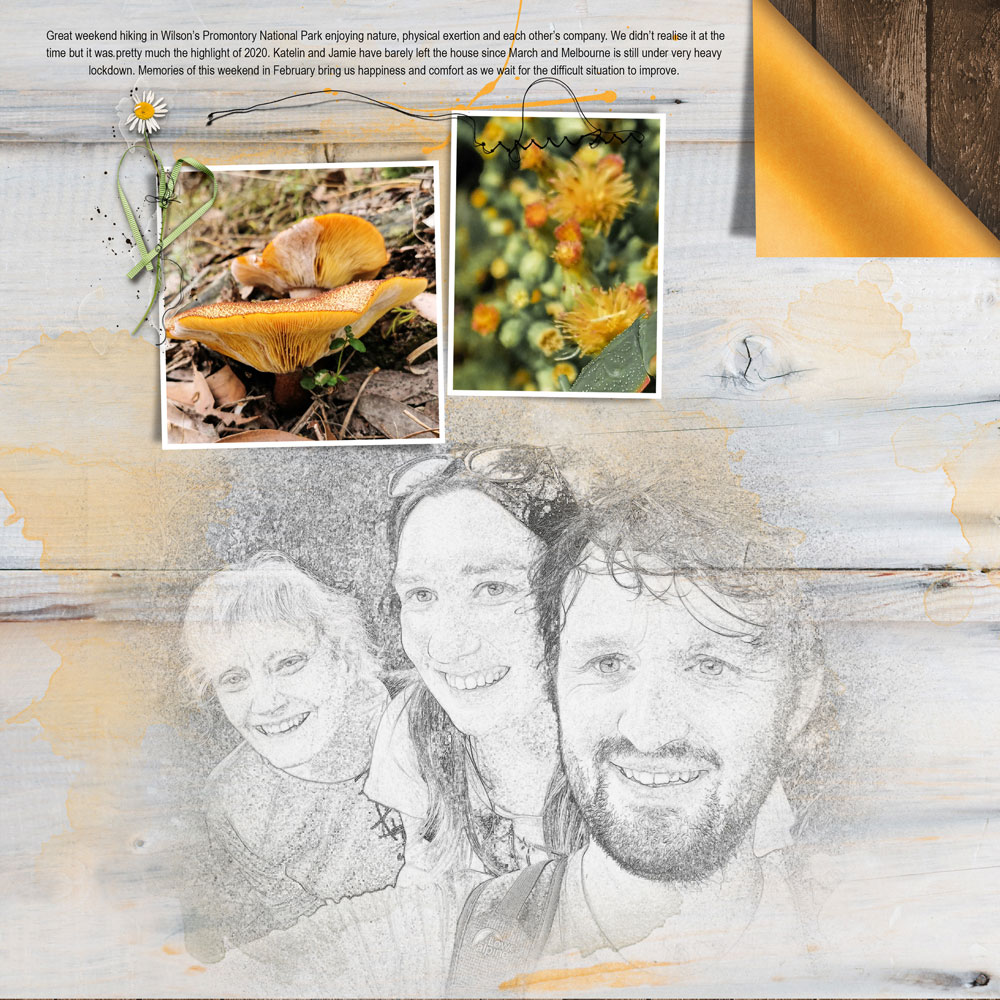
Photos and layout: Val Sleger
Kit: Capture the Journey – Digiscrap Parade Designers
Fonts: Joyful Heart, Silver Forte Grunge, Aline Signature
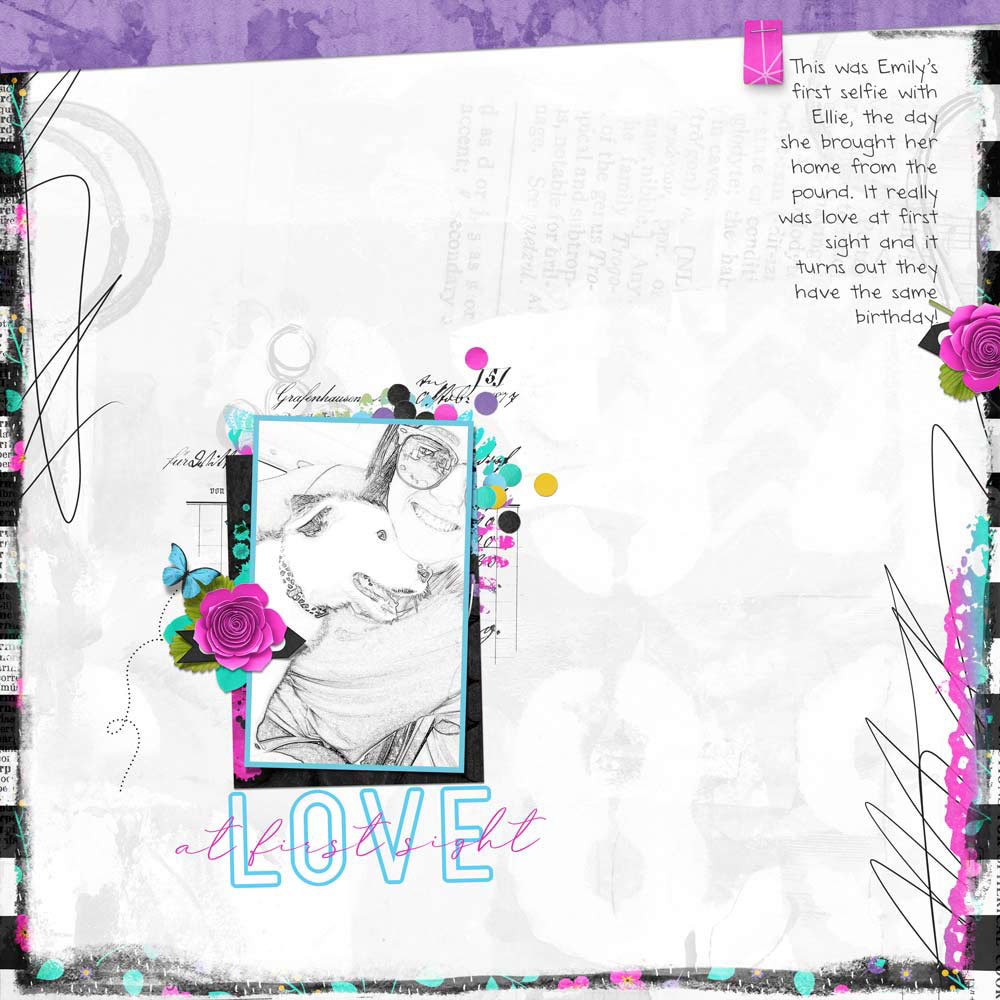
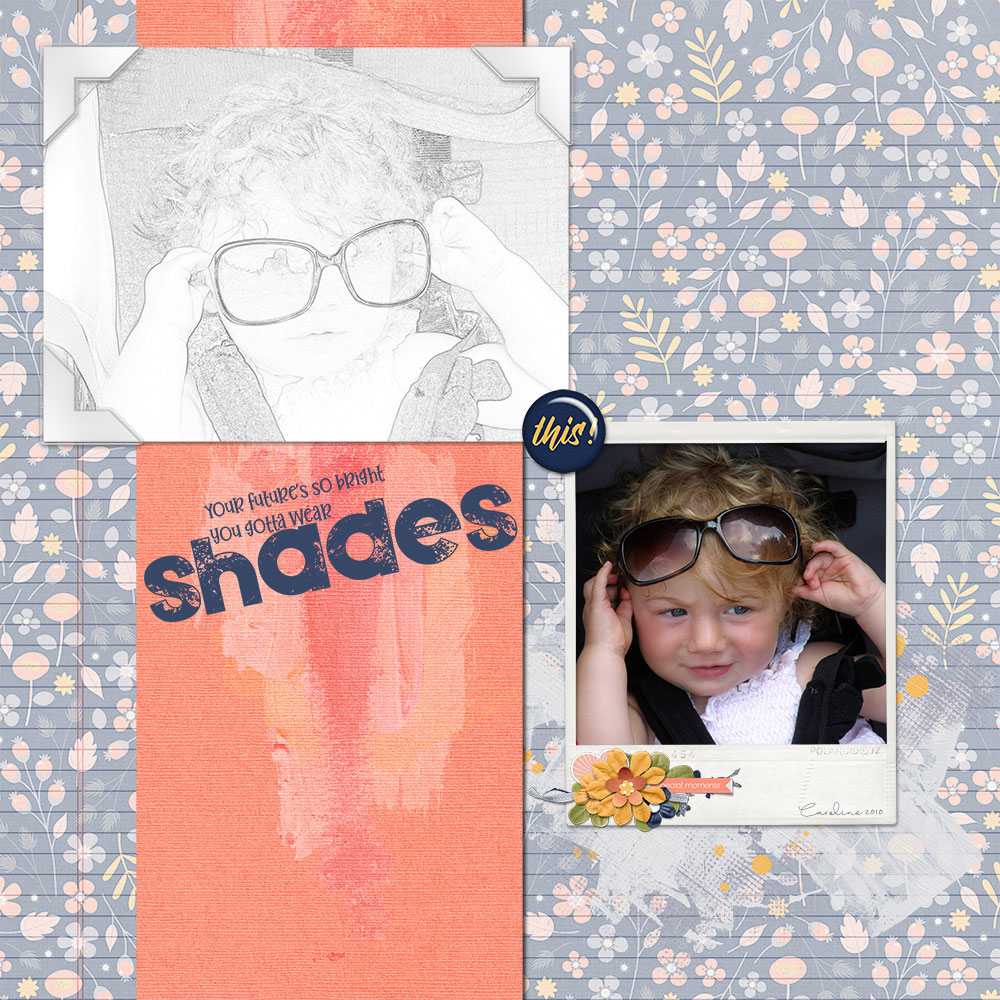
Page: Kellie Linn
Photo: selfie from my daughter
Template: Minimal Design from Design Beautiful Pages
Kit: A Splash of Color from River Rose Designs
Fonts: Grand Junction, DJB Annalise the Brave
Tab: Page Design Class Digital Scrapper

Photo & Page: Terri Fullerton
Kit: Anna Aspnes ArtPlayPaletteVeranda, ArtsyPaper2, Transfer 1, Purple Flower
Font: NightamoreBrush, Arial Narrow
Ready to start learning Photoshop Elements or Adobe Photoshop?

_____________________________________________

Author: Karen Schulz | Contact Us
All comments are moderated.
Please allow time for your comment to appear.
26 Responses
Shirley Kimbrough
I am still trying to figure out how I missed this tutorial. Each layout is unique but clearly defines your tutorial in the most positive way. So thankful that the link was posted on Facebook page. Thank you for including everything within the download. 🙂
Karen Schulz
Hi Shirley, I’m so glad you saw the tutorial on FB, and I hope you have fun with it! Karen
Bonnie Ripp
Love it and thank you very much. I have one question on Part 1. At the end of the tape you say to add the level layer, but then how do you attach it. Yours disappears. My level is still in my layers panel.
Thank you
Karen Schulz
Hi Bonnie! I’m glad you like the sketch tutorial. If you look at your layers panel, the Levels layer will still be there. What disappears is the Levels adjustment box/options. I hope that clears up the confusion. If not, let me know. Thanks for your question. If you had it, others did too, I’m sure!
zita B
Great tutorial! Thank you so much Karen!
Karen Schulz
I’m glad you liked it. You’re welcome!
Renee
Thanks Karen – I love the simplicity of creating this effect and getting such fun results! Thank you!
Linda Franks
I always forget how to do this and have to find it! Thank you so much for the tutorial!
Norma Keevers
Fabulous tutorial on this sketch effect! Love the examples. Will have to try it soon.
Karen Schulz
Great! I will look forward to seeing what you do, Norma!
Deanna
Thanks Karen! I did a sketch a few years ago, but when I tried to do another one, I couldn’t remember how to do it!!
Karen Schulz
You’re welcome, Deanna. Now you will always find this on the DS YouTube channel!
Kay
Fabulous tutorial… Another tool in the tool box now. Thanks.
Karen Schulz
So glad you like it, Kay!
Glori
I’m in total AWE of your layout, Karen…and all layouts created using your tutorial!! I’m excited for things to settle down for me and start scrapping again!! This is definitely a push to get back to it all!! Thank you, Karen!!
Karen Schulz
Oh, I agree, Glori! It’s so fun to see all of the layouts using this easy technique. I hope things settle for you soon, as I am looking forward to seeing what you do with this technique!
Rhondda James
Thanks Karen! I had a First Day Of Kindergarten pic of my DGD which cried out for this effect. I know we had a tutorial on it before but you saved me having to dig around.
Karen Schulz
Oh… I hope we will see your scrapbook page with your sketch in the community!
Vivian
Love this tutorial. I’m really pleased with my results so far.
Karen Schulz
I’ve so glad to hear that! Thanks for letting us know, Vivian! I hope to see your page in the Community!
DeLoris Musick
OMGoodness! I am impressed! I can’t wait to make a layout with the picture I have used! Thank you so much Karen for the awesome tutorial!
Karen Schulz
I’m so glad you liked the tutorial, DeLoris! I know you will make an outstanding page, so I’ll be looking for it in the Community!
fl_connie
Thanks very much for this quick tutorial!
Karen Schulz
You’re so welcome, Connie! I hope you enjoy using this technique.
Julie
Love this tutorial! Thanks!
Karen Schulz
I’m so glad, Julie! Thanks for letting us know.