Turn That Frown Upside Down
by Nann Dalton
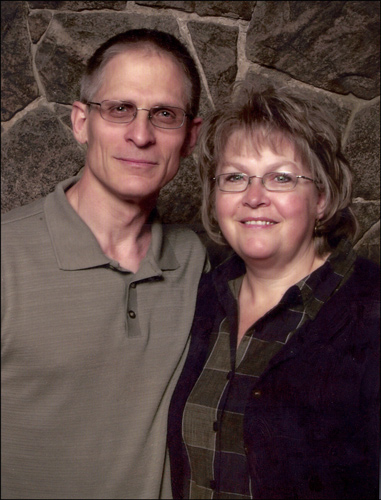
Have you ever had a family photo taken where everyone is dressed perfectly, every hair is in place, and no one is blinking, but that one person isn’t smiling? For me, it is always my husband. He doesn’t like how he looks when he smiles. He really has a great smile, so it drives me crazy that he refuses to smile. Well, I have a simple solution that will nudge just a bit of a smile out of him.
The tool we will be using is the Liquify filter. One little caution: Don’t overdo the image adjustments (unless you are going for a crazy funny look). Subtle use of the Liquify filter can make a big difference.
Step One: Open and Duplicate the Image
- Open the image (File > Open) you want to work with.
- In the Menu Bar, choose File > Duplicate and click OK. (Photoshop: Choose Image > Duplicate.)
Here is my photo. He needs just a bit of cheering up, don’t you think?
- Close the original image.
- Press Ctrl J (Mac: Cmd J) to duplicate the background layer. This step is optional but helps you to compare your changes with the original photo.
Step Two: Apply the Liquify Filter
- In the Menu Bar, choose Filter > Distort > Liquify. (Photoshop: Choose Filter > Liquify.)
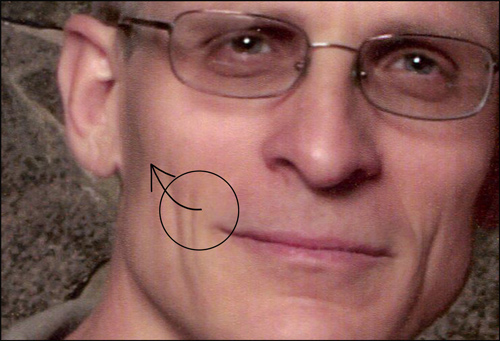
- In the dialog box, get the Warp tool and set the Brush Pressure to 100.
- Press the Left Bracket key to decrease or the Right Bracket key to increase the size of the brush.
Note: The appropriate size of the brush will be determined by the image on which you are working. Go for a size that looks similar to the circle below. You may also want to zoom in with the Zoom tool before working on your image.

- On the image, click on the corner of the mouth and drag slightly out and up.
Note: Do not center the brush on the corner of the mouth; that will distort the lips and look fake. Try not to adjust too much. If you make a correction that looks too exaggerated, press Ctrl Z (Mac: Cmd Z).
- Click OK to commit the changes.
Step Three: Review and Save the Image
- In the Layers panel, click on the Visibility icon of the layer to which you applied the filter. By toggling the Visibility icon on and off, you can see the difference between the two images, even though it is subtle.
- In the Menu Bar, choose Layer > Flatten Image.
- Choose File > Save As. In the dialog box, choose a name and location for your image, and click Save.
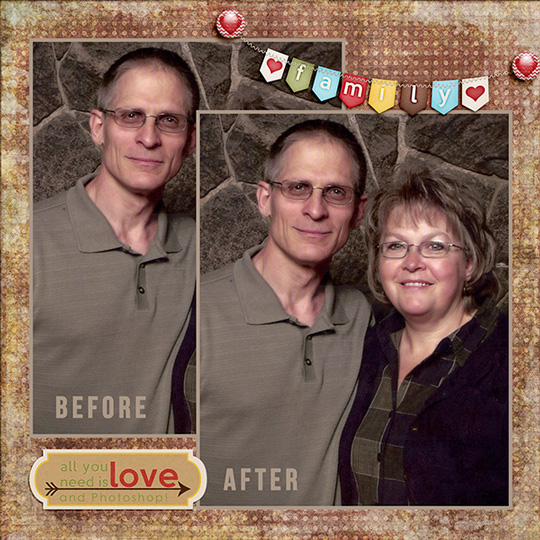
There! I think he looks much happier to be with me!
Show us your before and after photos in the Digi Scrap Tutorial Gallery at Digital Scrapper!
Note: This tutorial was originally published June 2013.
Credits:
Digi Scrap Tutorial: Turn that Frown Upside Down by Nannette Dalton
Software: Photoshop Elements 11 and Photoshop CS6

If you enjoyed this tutorial, you might also like…

Use Photoshop (and Photoshop Elements) Actions to streamline your photo editing process and get a better end result. This class includes 36 photo editing actions and two BONUS classes on incorporating the Amazing Camera Raw into your editing workflow and on Editing Without Actions, for those times when you can’t use an action.
Learn more about Actions: Fix Photos Fast!
_____________________________________________
 Author: Nannette Dalton | nann@digitalscrapper.com
All comments are moderated.
Please allow time for your comment to appear.
Leave a Reply