Realistic Washi with Dodge & Burn
by Jen White
Apply a classy touch of realism to Washi tape with the Dodge and Burn tools.
For this tutorial you will need:
- Washi tape
- A frame or other elements for the Washi tape to tape down
- Photoshop Elements or Adobe Photoshop
To follow along exactly with this tutorial, download the Washi tape and frame I’m using here.
Step One: Prepare the Workspace
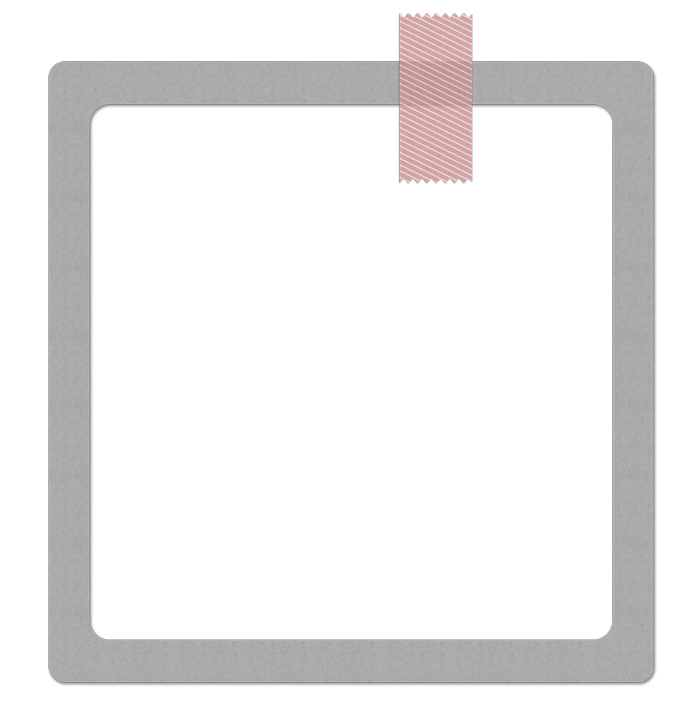
For this step you will need a piece of Washi tape traveling over another element, like a frame. You can download the tape and frame I’m using by clicking on the link above.
- Open the qt-Washi-Dodge-Burn.psd file found in the download.
Or, open a document that contains Washi tape traveling over a frame or other paper or element. - In the Layers panel, click on the Washi layer to activate it.
Step Two: Prepare for Non-destructive Edits
This step isn’t necessary, but if you don’t want to take the chance of altering the original Washi tape, I suggest working on a duplicate.
- Press Ctrl J (Mac: Cmd J) to duplicate the Washi layer.
- Click on the Visibility icon of the original Washi layer to hide it.
- Click on the duplicate Washi layer to activate it.
- Press Ctrl + (Mac: Cmd +) to zoom into the place where the Washi tape is crossing over the frame. To reposition the zoom, hold down the Space bar and click and drag on the document.
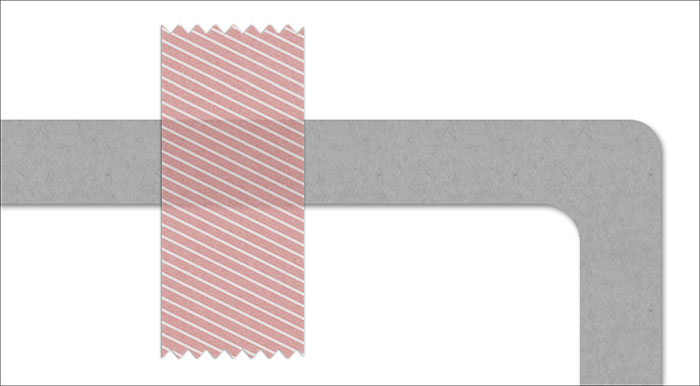
Step Three: Add a Highlight With the Dodge Tool
The Dodge tool is used for lightening the pixels of an image. In this tutorial, it will be used to add a highlight to the place where the Washi tape meets the frame.
- Get the Dodge tool. It’s nested with the Burn and Smudge tools.
- In the Tool Options, open the Brush Picker and choose a Soft Round brush from the Default Brushes. (PS: Choose a Soft Round brush from the General Brushes.)
- Set the Range to Midtones, the Size to 10 px, and the Exposure to 50%.
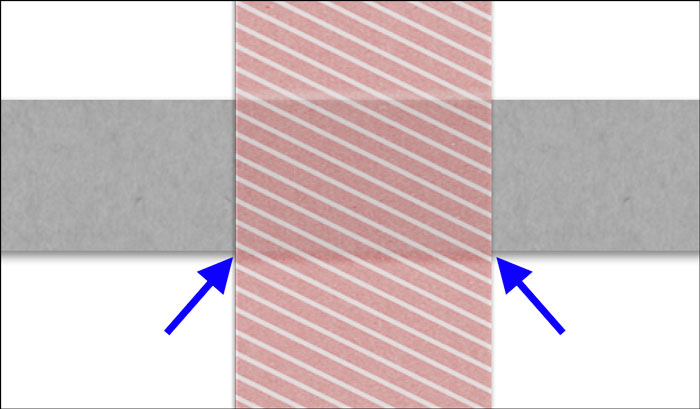
- On the document, click once at the top-left intersection where the Washi tape meets the frame.(See the image below.)
- Holding down the Shift key, click once at the top-right intersection where the Washi tape meets the frame.
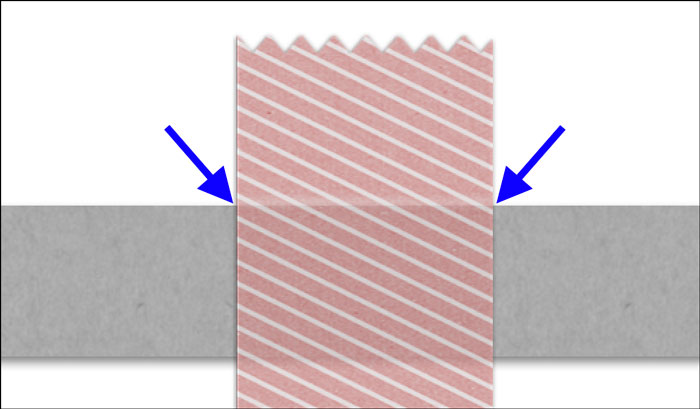
Step Four: Add a Shadow With the Burn Tool
The Burn tool is used for darkening the pixels of an image. In this tutorial, it will be used to add a shadow to the place where the Washi tape meets the frame.
- Get the Burn tool. It’s nested with the Dodge and Smudge tools.
- In the Tool Options, open the Brush Picker and choose a Soft Round brush from the Default Brushes. (PS: Choose a Soft Round brush from the General Brushes.)
- Set the Range to Midtones, the Size to 10 px, and the Exposure to 50%.
- On the document, click once at the bottom-left intersection where the Washi tape meets the frame. (See the image below.)
- Holding down the Shift key, click once at the bottom-right intersection where the Washi meets the frame.
Step Five: Save and Use
- Save the document (File > Save).
(Optional) To use the Washi tape and frame downloaded from this lesson on another project:
- In the Layers panel, click on the Washi tape layer to activate it.
- Holding down the Ctrl key (Mac: Cmd key) click on the Frame layer. Now two layers should be active.
- Get the Move tool.
- In the Tool Options, uncheck Auto-Select.
- On the document, click and drag the Washi/Frame to another document.
The Reason for the Order
- In digital scrapbooking we often design as if there is a light source coming from the top of the scrapbook page.
- Because of that, the highlight (dodging) is at the top and the shadow (burning) is at the bottom.
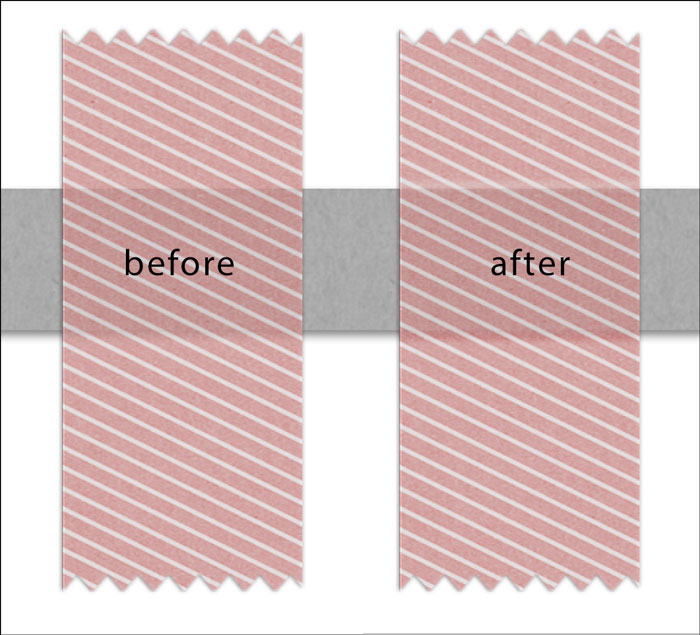
Here is the before and the after:
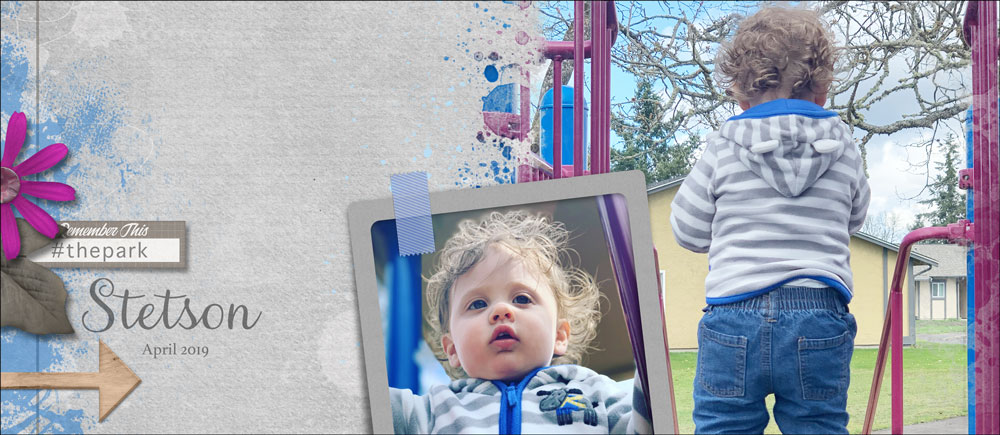
Here’s how I used this technique on my scrapbook page:
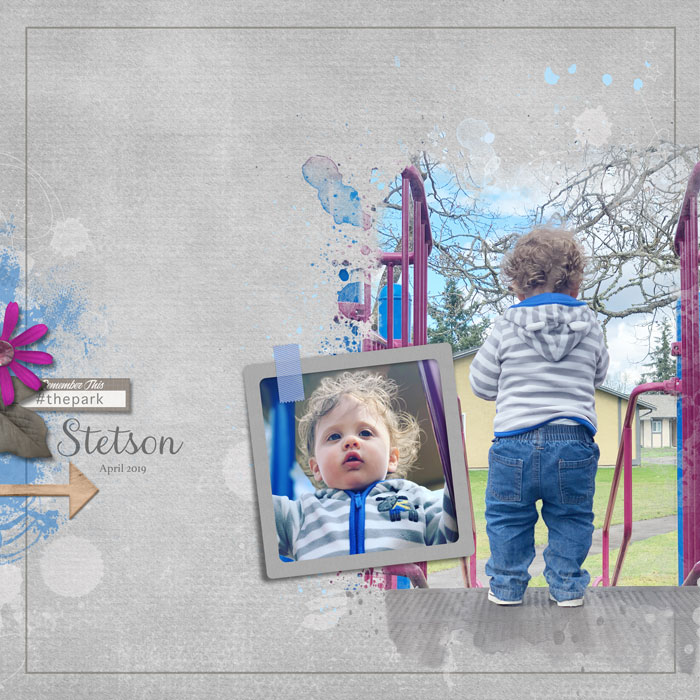
Page: The Park by Jen White
Photos: Jen White
Kits: Advenure In The Air by Ponytails Designs, Little Boys by Lorie M, Canvas Cardstocks No21 by Katie Pertiet, Choose Joy by ET Designs
Fonts: Aristelle Script, Apple Symbols, Athelas


Whether you’re just getting started in digital scrapbooking or are self taught and want to fill in the gaps in your education, our QwikLearn Photoshop and Photoshop Elements classes will help you get up to speed FAST and become the confident, competent digital scrapbooker you desire to be.
This self-paced class will take you where you want to go and is available for Photoshop Elements 11 to 2018, and Photoshop CS6 through Creative Cloud.
Learn more about QwikLearn Photoshop Elements class or QwikLearn Photoshop class!
Use Coupon Code LEARN25 at checkout to save 25% off the full price of the class. Cannot be combined with any other discount.
_____________________________________________
 Author: Jen White | Contact Us
All comments are moderated.
Please allow time for your comment to appear.
3 Responses
Robin Reitler
This was EXACTLY what I needed. Thank you so much! I’m saving this page for future reference until my brain just gets it automatically!
Barbara
Thanks for this little nugget of information, as reminders of all the useful tools is great!
Carol
Thanks Jen. As usual, a great tut. And I love that you always (when applicable) give us the starting elements (just like yours) to work with so that we can compare and see exactly what we need to see. Thank you for walking us through so many instructive tuts.