Digital Signature
By Nannette Dalton
Every once in a while I make a layout that my children love and want to hang on their walls. This makes me happy, and I am always pleased to share with them.
Since my layouts are a little bit of my art, I thought it would be nice if I could sign them. Of course I could sign them physically but, I kind of like my undo button too much. What if the signature is too dark, too light, I want to change the color, or it comes out sloppy?
The solution: a digital signature that I can use as a brush whenever I want. And voilà a new tutorial is born!
Step One: Write Your Signature
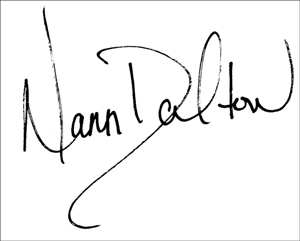
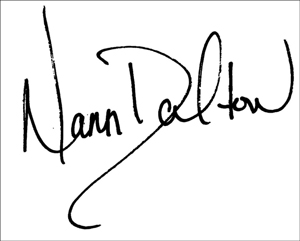
- On a white sheet of paper, using a fine point Sharpie, write your signature, making it a little larger than you ordinarily would.
- Scan the signature at a high resolution and save the JPEG to your computer.
Note: This will give you an idea of how large I wrote my signature on a 8.5 x 11 inch sheet of paper.

Step Two: Open and Crop the Signature
- Open the signature file (File >Open).
- Get the Crop tool. In the Tool Options, set the Aspect Ratio to No Restriction. (Photoshop: Set the Aspect Ratio to Ratio.)
- On the document, click and drag to create a selection outline around the signature.
- Click the checkmark to accept the crop.
Step Three: Prepare the Signature
- Press Ctl L (Mac: Cmd L) to open the Levels Adjustment dialog box.
- In the dialog box, adjust the Midtone and Highlight sliders to get rid of any gray that may be on the document. Click OK.
Note: This will be different for every scanned image. Don’t worry about how dark the image is at this point as we will improve that next.
- In the Menu Bar, choose Filter > Other > Minimum.
- In the dialog box, set the Radius to 2 pixels and click OK.
Optional Step Four: Erase Dust
If there was dust on the scanner bed or your paper when you scanned it, the dust may show up as black dots on the image. You can erase or paint white over these areas with a hard round brush.
- Get the Eraser tool.
- In the Tool Options, open the Brush Picker and choose a Hard Round brush. If you don’t see a Hard Round Brush, open the drop-down menu and choose Default Brushes. (Photoshop: Open the fly-out menu, choose Reset Brushes, and click OK.)
- On the document, click and drag to erase all the dust.
Step Five: Make and Save the Brush
- In the Menu Bar, choose Edit > Define Brush. (Photoshop: Choose Edit > Define Brush Preset.)
- In the dialog box, enter a name for the brush and click OK.
- Get the Brush tool.
- In the Tool Options, open the Brush Picker, open the fly-out menu, and choose Preset Manager.
- In the Preset Manager dialog box, activate the signature brush that you just made and choose Save Set.
- In the dialog box, choose a name and location for the brush set and click Save.
- In the Preset Manager dialog box, click Done.
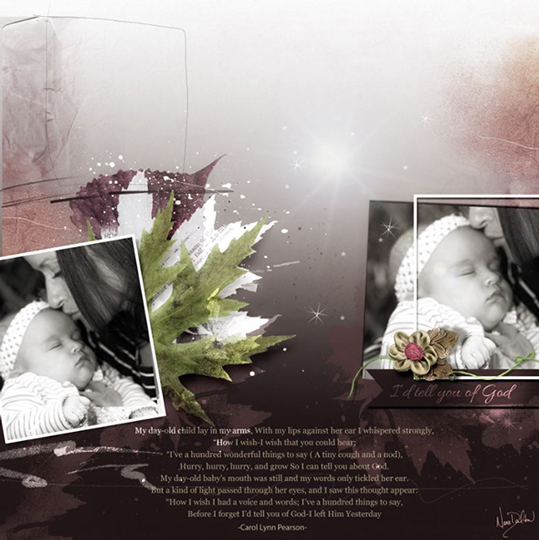
Okay! Your brush is finished and saved so you can use it anytime you want. Here is the layout that I added my signature to. It is very subtle, but it kind of makes me happy to see it there.
Credits:
Tutorials: Dramatic Gradient Mask Backgrounds by Nannette Dalton, Create a Photo Glow by Barb Brookbank, Create Some Dramatic Flair with Filters by Nannette Dalton
Kit: ArtPlay Palette Give Thanks by Anna Aspnes
Fonts: Myriad Pro, Allura
Software: Photoshop Elements 12, Adobe Photoshop CC 2014

_____________________________________________
 Author: Nannette Dalton | Contact Us
All comments are moderated.
Please allow time for your comment to appear.
12 Responses
Lidia Sari
This is awesome, Nann! Thank you for this fun tutorial to try.
SunBum
Thank you, Nann! Great tutorial! I’m definitely going to make my own signature, it’s such a wonderful idea for posterity!
Shirl
I love this concept. I can’t write clearly, but I will keep trying to at least have some kind of signature for my grands.
Cherri
Thanks for this tutorial, can’t wait to try it.
Evie
Thank you Nann, great idea!
Jen Juris
This is such a fun idea! Love it!!
Annette
Love your signature. I have essential tremors…makes it hard to have a nice signature. Maybe I will try again.
Mary Turner
Thank you Nann! I love this brush.
Linda Hickey
This is wonderful! I’ve wanted my own handwriting for some time now and this makes it possible. Thank you so much.
Mungo
What a lovely idea, thank you
Kristin
So excited about trying this!
Nann Dalton
I’m so excited that you are excited!