by Linda Sattgast
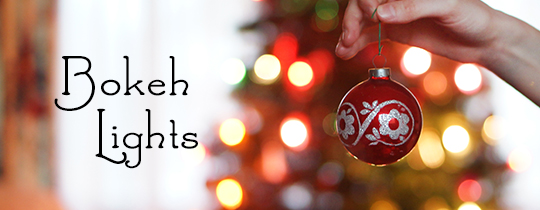
While researching what to use for a photo backdrop for a New Year’s Eve photo booth, I came across some beautiful bokeh portraits and photos. Of course, I had heard of bokeh before, and I had probably taken some unintentional bokeh photos, but the articles I read inspired me.
Even though it was after dark, I called on the first person I always turn to when I need a model. “Allison! Will you please sit for a photo shoot?”
“In my pajamas?”
“Yes. It won’t matter—no one will see them!”
You have to hand it to the girl. She’s such a trooper.
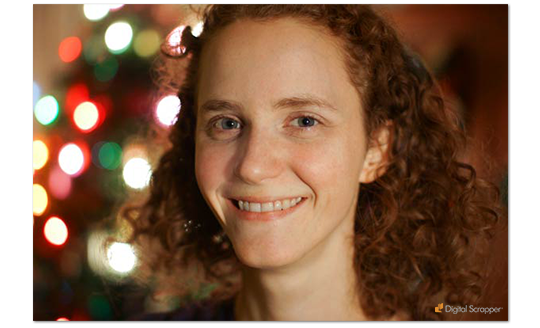
I sat her on a work stool about 10 feet from our lit tree. Since it was quite dark in the room, Charlie (my husband) pulled back the lamp shade and aimed the light at Allison.
My first shot came out terrific! Yes, it was overly yellow because of the lamp light and because I didn’t adjust the white balance on the camera. I fixed the white balance with Photoshop but left a little of the warmth because it looked so nice. Below is the minimally adjusted photo.
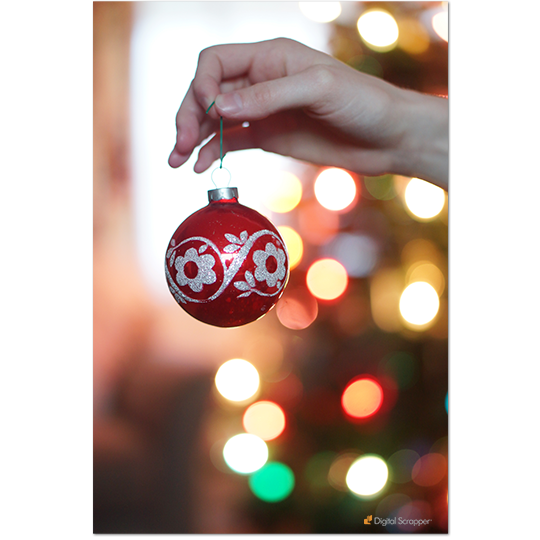
The next day I tried it again with better light. Allison held a Christmas ornament for me. The trick to creating bokeh lights is to use a low F stop (I used a 1.8 F stop) and focus on an object that is near to you and far away from the lights. The further from the lights, the larger the bokeh circles will be. You can still get some bokeh effect with a point and shoot camera, however. (More on that in a moment.)
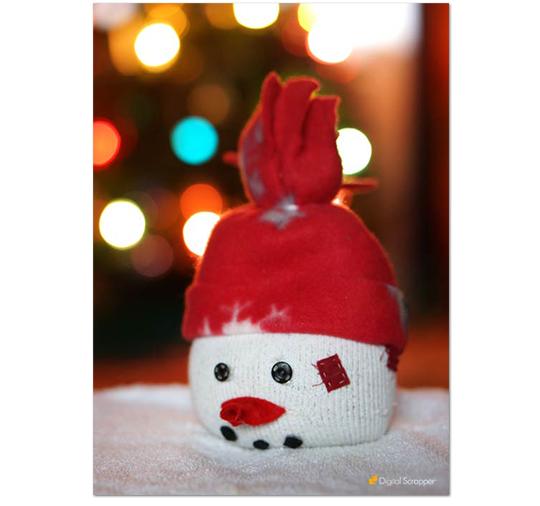
This is a great technique to use to photograph Christmas decorations. Below is a homey handmade snowman looking spiffy with all the lights around him. He’s sitting on the work stool, which I covered with a white washcloth.
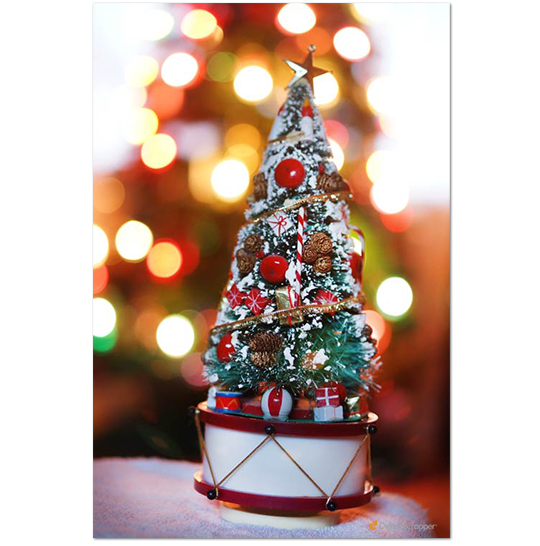
If your photos turn out a little dark, they’re easy to fix in Photoshop or Photoshop Elements. The photo below of a music box Christmas tree, for example, could be a little lighter.
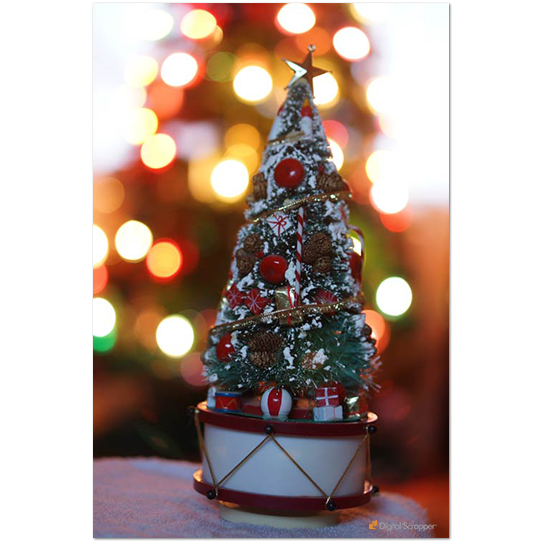
Because of the bright lights and white in the background, the easiest way to correct the light was to use the Dodge tool. I set the Range to Midtones and the Exposure to 50%, but if you’re not sure, start with 20 or 30% Exposure. Here’s my fixed photo:
Point & Shoot Cameras
It is possible to get bokeh lights with point and shoot cameras; the lights just aren’t as big and nice.
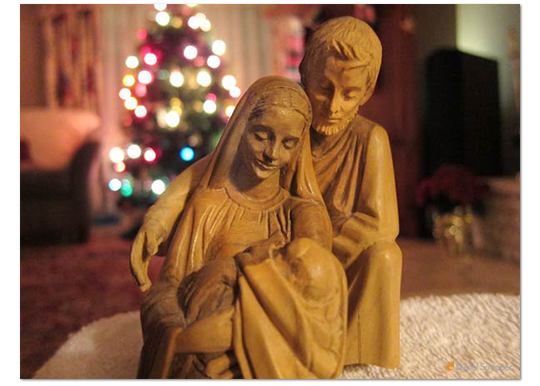
Put your setting on Macro (for shooting objects up close). If you get as close as your camera will let you and focus on your subject, you’ll get some bokeh effect from the tree lights. Here’s a photo of my favorite Christmas object—Joseph, Mary, and baby Jesus carved out of olive wood by an artist in Bethlehem, Israel.
I hope this has given you some inspiration to try your own bokeh photos! For more ideas and step-by-step tutorials, try these resources:
How to Take Beautiful Bokeh Christmas Images
Can I Achieve Bokeh with my Camera Phone?
Holiday Lights Photo Backdrop Tutorial
_____________________________________________
![]()
![]()
Author: Linda Sattgast
All comments are moderated. Please allow time for your comment to appear. Thanks!
13 Responses
Frenchie
Actually, I am no more than a point and shoot photographer. What I’d like to see is a tutorial on how to use Bokeh Overlays on photos or on background paper to fill in and enhance blank template spaces.
Donna
My niece was asking me about this last night. She wanted to take reflections in the window. I’m sending her this blog so she can look at it. Thanks for the inspiration.
pjscraps
Love this. thanks!
Loretta
Great information! Looking forward to getting some good bokeh shots this season with these helps. Thanks so much!
Linda Sattgast
Thanks, everyone! Glad you like the bokeh idea and the links!
Cathy Wood
Reminds me of my good fellow photographer friend who named her gorgeous retriever… Bokeh!
Elaine Johnston
Hi Linda! Thanks so much for sharing…will give it a go. It will be fun trying! Have a Merry Christmas!
Wana
Great article. I played around with it last year and loved the pictures. I plan on doing it again this year hopefully with some shapes.
Lynda
Thank you for your clear and easy directions Linda! I always look forward to your classes and tutorials for just those things. Wishing you a blessed Christmas & New Year.
Barb
Thanks for the tips on creating beautiful bokeh! I really like the links you provided too – thank you, Linda!
joansmor
I have been reading up on Bokeh too. Do you know you can create shapes with Bokey. Look it up on the internet. For me I would be happy just to get a regular one. Hoping the have time this weekend to try this.
Deborah Brown
Really neat. I wish there were a bokeh light background paper???
Deb
Petra
Linda, I’d love to take new Christmas photos this year and this looks like a great inspiration. One can experiment a lot with this effect. I also appreciate the link to digital-photography-school which I haven’t known, it seems very interesting. Thanks for sharing! 🙂