Two Toned Gradient Type
by Barb Brookbank
At times I like to do something a bit fancy with my journaling, but still keep it subtle.
I want my journaling to be clear and simple, but I also want some “pizzazz!” Merriam-Webster defines pizzazz as: the quality of being exciting or attractive: as glamor or vitality.
I don’t know that this is glamorous, but I love it when things match my page. Matching the colors of my journaling to the colors in my layout does the trick for me! In this tutorial I’m going to show you how to do that with the Gradient tool.
Step One: Prepare and Simplify the Type
- Create some journaling.
- Press Ctrl J (Mac: Cmd J) to duplicate the type layer.
- In the Layers panel, click on the Visibility icon of the original type layer to hide it. This is to save your original type in case you want to change it later.
- In the Layers panel, click on the duplicate type layer to activate it.
- In the Menu Bar, choose Layer > Simplify > Layer. (PS: Choose Layer > Rasterize > Type.) Once you simplify/rasterize type, it is no longer editable.
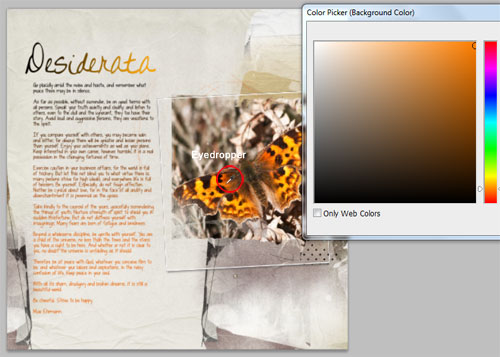
Step Two: Choose Two Colors
- Click on the Foreground Color Chip to open the Color Picker.
- When you move your cursor over the document, it will turn into the Eyedropper tool. Click on the document to sample a color and click OK.
- Click on the Background Color Chip and repeat the above steps to sample a contrasting color.
- I’m using black and orange.
Step Three: Apply the Gradient
- In the Layers panel, Ctrl click (Mac: Cmd click) on the thumbnail of the simplified type layer to select the words.
- Get the Gradient tool.
- In the Tool Options, open the Gradient Picker and choose Foreground to Background. If you do not see Foreground to Background, open the dropdown menu, and choose Default. (PS: Open the fly-out menu, choose Reset Gradients, and click Append.) Then open the fly-out menu again and choose Large List.
- In the Tool Options, click on the Linear Gradient icon. Set the Mode to Normal and the Opacity to 100%. Uncheck Reverse and Transparency, but check Dither.
- On the document, position your cursor at the top of the selected text and click and drag a line to the bottom of the selected text.
- Press Ctrl D (Mac: Cmd D) to Deselect.
Credits:
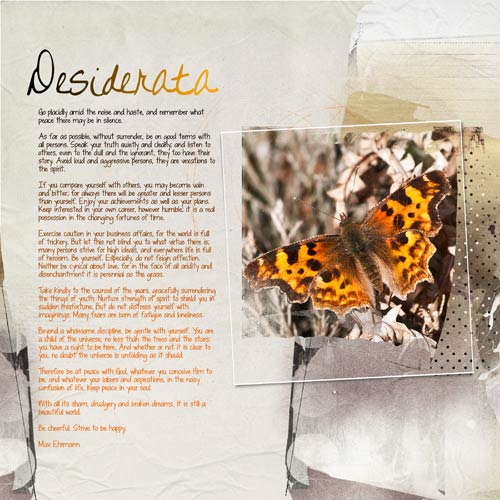
Layout: “Desiderata” by Barb Brookbank
Kit: ArtPlay Palette Family by Anna Aspnes
Font: Myriad Pro, Written on His Hands
Poem: Desiderata by Max Ehrmann
Originally Published on May 22, 2012

Interested in digging in deeper?

If you enjoyed this tutorial, you’ll love our Little Known Secrets class! In it you’ll discover new techniques for some Photoshop tools that you’ve probably never used and new uses for many familiar tools.
With over 30 tutorials that will wow you and help you become a more confident scrapbooker, you can skip trial and error and go straight to the fun.
Find out more about the Little Known Secrets class.
_____________________________________________
![]() Author: Barb Brookbank | barb@digitalscrapper.com
Author: Barb Brookbank | barb@digitalscrapper.com
All comments are moderated.
Please allow time for your comment to appear.
One Response
DorrieH.
I remember this tutorial Barb, and I did one that looked much like yours, only I used the saying “I Believe”. I really enjoyed this tutorial and I just might have to give it another try. Thanks for re-posting it.