
Triangle Design Template
by Lidia Sari
UPDATED JUNE 2021
Anyone who loves geometric shapes, colors, or quilting raise your hand, quick! Me, too! In my younger days I used to make quilts! I owned a lot of quilting books and videos. I had all kinds of rulers for quilting, a cutting mat, and several rotary cutters. A trip to the library meant borrowing more books and videos. The dining table and living room floor had double duty; they were both used for my almost-finished quilts. But then, I got arthritis. I could not sit too long, squat too long, or cut too long. My neck would complain for months! Talk about a pain in the neck! Ugh!
Today, I am going to share with you my passion for shapes and colors. If there are two or three things you are passionate about that you could incorporate into one thing, what would that be? For me, that would be this tutorial below.
Step One: Prepare the Workspace
- Create a new 12 x 12 inch document (File > New > Blank File) at 300 ppi with a white background. (Photoshop: Choose File > New.)
- In the Menu Bar, choose View > Rulers.
- Press Ctrl K (Mac: Cmd K) to open Preferences. In the dialog box,
- Choose Units & Rulers. Set the Rulers to Inches.
- Choose Guides & Grid. (Photoshop: Choose Guides, Grid & Slices.) Set the Gridline to every 1 inch and the Subdivisions to 4.
- Click OK.
- In the Menu Bar, choose View > Grid. (Photoshop: Choose View > Show > Grid.)
Step Two: Create Triangle 1
- Click on the Foreground Color Chip to open the Color Picker.
- In the dialog box, choose any color you want and click OK. I used Hex Code #b7ecde.
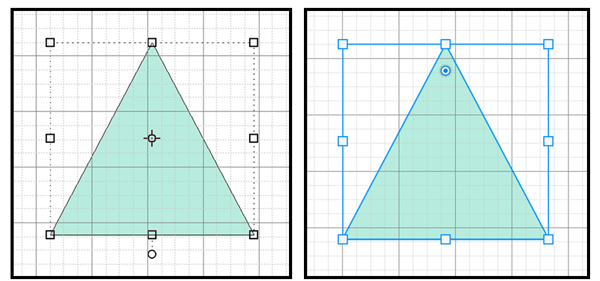
- Photoshop Elements Only: Get the Custom Shape tool. In the Tool Options, open the Shape Picker, open the dropdown menu, and choose All Elements Shapes. Choose the Triangle. To see the names of the shapes, open the flyout menu and choose Large List. Set the Style to None. Open the Geometry Options and choose Fixed Size. Set the Width to 3.66 inches and the Height to 3.46 inches. Click on the Create New Shape Layer icon.
- Adobe Photoshop Only: Get the Triangle tool. In the Tool Options, set the Tool Mode to Shape and the Style to None. Open Path Operations and choose New Layer. Open Shape Options and choose Fixed Size. Set the Width to 3.66 in and the Height to 3.46 in.
- On the document, click and drag to create the shape.
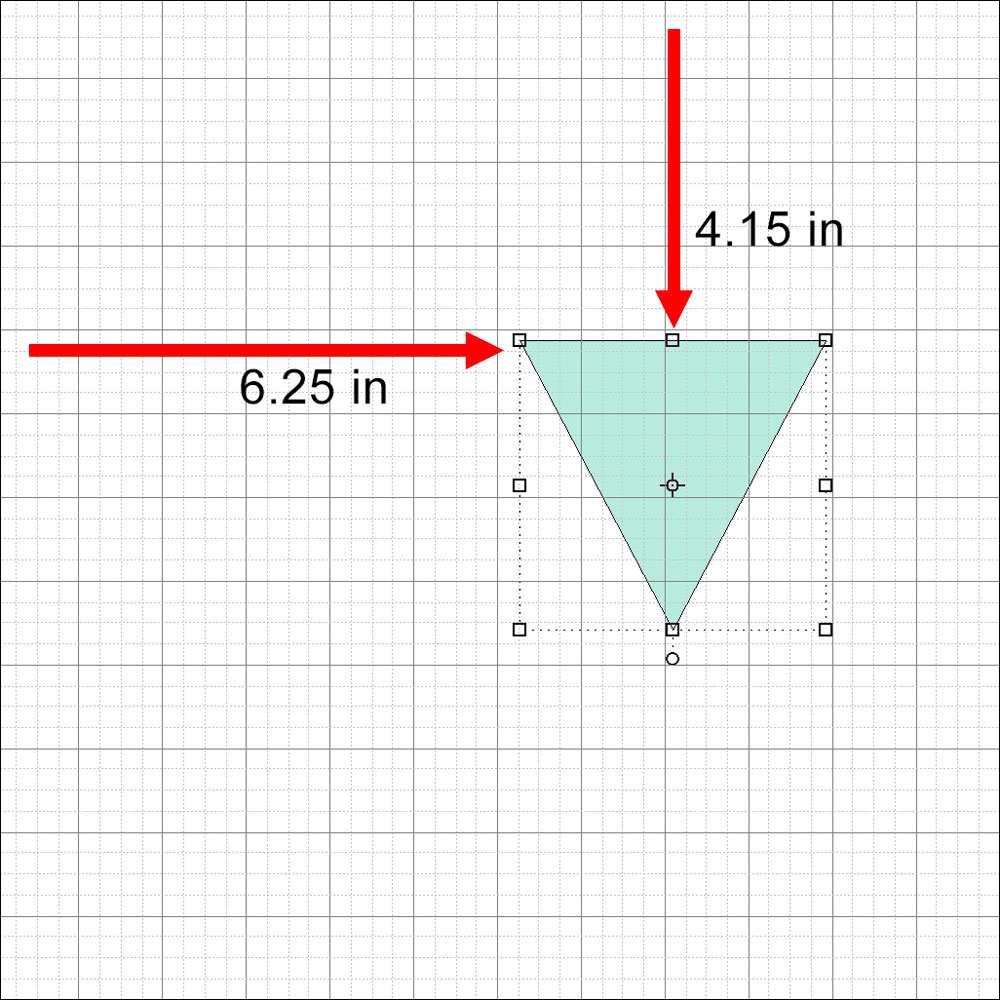
- In the Menu Bar, choose Image > Rotate > Flip Layer Vertical. (Photoshop: Choose Edit > Transform Path > Flip Vertical.)
- In the Layers panel, double click directly on the name of the triangle shape layer and rename it “Triangle 1.”
- Get the Move tool.
- On the document, click and drag the triangle it into position 4.15 inches down and 6.25 inches to the right.
Step Three: Create Triangle 2
- In the Layers panel, click on the Create a New Layer icon.
- Click on the Foreground Color Chip to open the Color Picker.
- In the dialog box, choose a different color and click OK. I used Hex Code #97e1cd.
- Photoshop Elements Only: Get the Custom Shape tool. In the Tool Options, open the Geometry Options and choose Fixed Size. Set the Width to 3.45 inches and the Height to 3.23 inches.
- Adobe Photoshop Only: Get the Triangle tool. In the Tool Options, open the Shape Options and set the Width to 3.45 inches and the Height to 3.23 inches.
- On the document, click and drag to create the shape.
- Get the Move tool.
- On the document, click on the triangle and drag it into position 3.25 inches down and 7.65 inches to the right.
- In the Layers panel, double click directly on the name of the new triangle shape layer and rename it “Triangle 2.”
- Click and drag the Triangle 2 layer below the Triangle 1 layer.
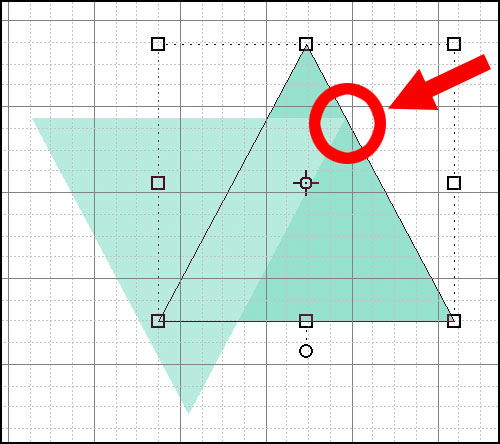
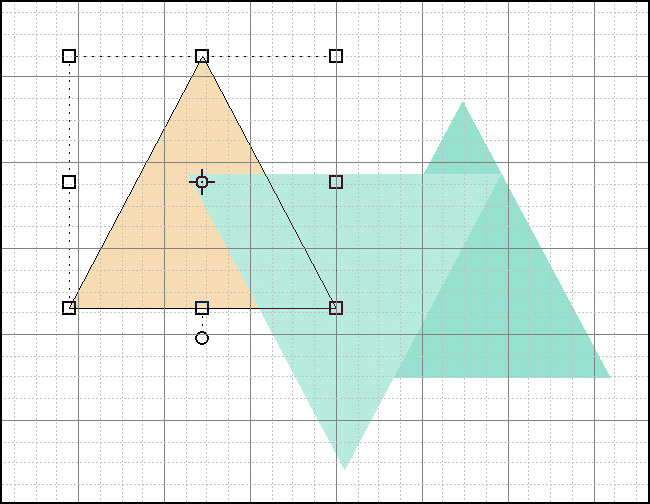
TIP: Try to get the top-right corner of Triangle 1 to line up with the edge of the Triangle 2, as shown below.
Step Four: Create Triangle 3
- Press Ctrl J (Mac: Cmd J) to duplicate the Triangle 2 layer.
- In the Layers panel, double click directly on the name of the duplicate triangle shape and rename it “Triangle 3.”
- Double click on the thumbnail of the Triangle 3 layer to open the Color Picker.
- In the dialog box, choose a different color and click OK. I used Hex Code #f7dcb2.
- Press Ctrl T (Mac: Cmd T) to get the Transform options.
- In the Tool Options, uncheck Constrain Proportions. (PS: Deactivate the Maintain Aspect Ratio icon.) Set the Width to 90.05% and the Height to 90.95%. Click the checkmark to commit the change.
- Get the Move tool.
- On the document, click on the triangle and drag it into position 2.75 inches down and 4.85 inches to the right.
Step Five: Create Triangle 4
- In the Layers panel, click on the Triangle 1 layer to activate it.
- Click on the Create a New Layer icon.
- Click on the Foreground Color Chip to open the Color Picker.
- In the dialog box, choose a different color and click OK. I used Hex Code #f8ecda.
- Photoshop Elements Only: Get the Custom Shape tool. In the Tool Options, open the Geometry Options. Set the Width to 1.32 inches and the Height to 1.293 inches.
- Adobe Photoshop Only: Get the Triangle tool. In the Tool Options, open the Shape Options. Set the Width to 1.32 inches and the Height to 1.293 inches.
- On the document, click and drag to create the shape.
- In the Layers panel, double click directly on the name of the new triangle shape layer and rename it “Triangle 4.”
- Get the Move tool.
- On the document, click on the triangle and drag it into new position 5.25 inches down and 6.15 inches to the left.
- In the Layers panel, click and drag the Triangle 4 layer below the Triangle 1 layer.
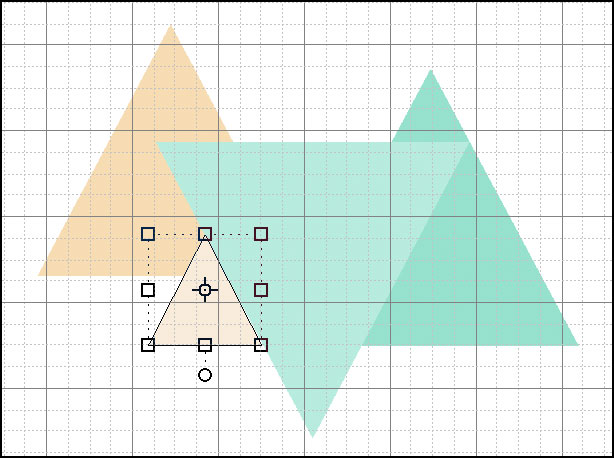
Tip: Try to align the right edge of Triangle 4 with the left edge of Triangle 1.
Step Six: Create Triangle 5
- Press Ctrl J (Mac: Cmd J) to duplicate the Triangle 4 layer.
- In the Layers panel, double click directly on the name of the duplicate triangle shape and rename it “Triangle 5.”
- In the Menu Bar, choose Image > Rotate > Flip Layer Vertical. (PS: Choose Edit > Transform > Flip Vertical.)
- On the document, click and drag Triangle 5 into position 3.25 inches down and 1.35 inches to the right.
TIP: Try to align the tip of Triangle 5 with the right tip of Triangle 2.

Step Seven: Reset the Options and Save
Because the Transform ratio option is sticky, you’ll want to put it back to the default setting.
- Press Ctrl T (Mac: Cmd T) to get the Transform options.
- In the Tool Options, check Constrain Proportions and click the checkmark to commit the change. (PS: Activate the Maintain Aspect Ratio icon.)
- In the Menu Bar, choose View and uncheck Rulers.
- Choose View and uncheck Grid. (PS: Choose View > Show and uncheck Grid.)
Now save the triangle design template.
- Save the template (File > Save) as a PSD file.

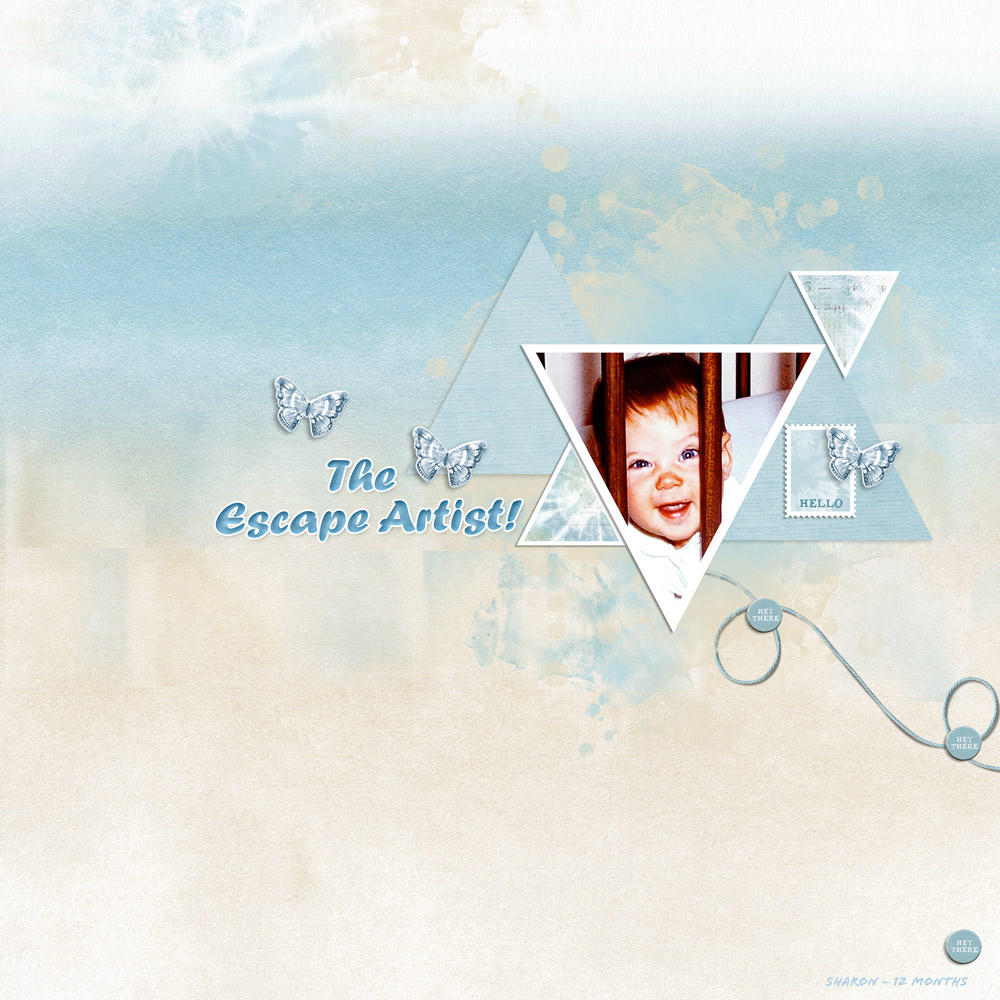
Here’s what I did with the template. As you see, I used the triangles as clipping masks. I also added drop shadows and a stroke outline to some of the triangles. It is fun to try different shapes as well as different colors to freshen up your layout.

Credits:
Page & Photo: Lidia Sari
Tutorial: Triangle Design Template by Lidia Sari
Kits: Live, Love by Kitty Designs, Spirit Of Christmas by Laurie Ann, Thankful by Karla Dudley, Cardstock-Blank Canvas by Susie Roberts
Fonts: DJB Marilyn Print, Source Sans Pro, PT Serif Caption, Lucida Sans

More layouts using this template:

Tutorial: Triangle Design Template by Lidia Sari
Kits: SimplePleasureDesigns-TheLittleThings, TiramisuDesign-HappyPlace
Font: DJB Annalise

Triangle Template tutorial by Lidia Sari
Kit–Collab Blue Jeans & Butterflies–Shabby Princes Designs, Tiramisu design, PST Designs, Jumpstart Designs, Angie Briggs
Fonts: Bell MT
Template: Triangle Design Template Tutorial
Kits: Ombre Essentials 02 PP, ARToptions MiniMix 14 by Katie Pertiet Designs
Fonts: Flood Std Regular, Forte Regular

Kits: Read and Write Fantasy Stories paper 4 by Cali Designs; Autumnal Artistry by Katie Pertiet.
Fonts: DJB Miss Liz

Kits: Flergs-I will survive, Antebellum Press-Spring Skies and Naturally Curious, Jumpstart Designs-Besties
_____________________________________________
 Author: Lidia Sari
All comments are moderated.
Please allow time for your comment to appear.
10 Responses
Laura
Awesome tutorial!
Patsy A Bolden
Love these pages! I will be trying real soon!
Olga Litvin
Love this! Thank you very much for the tut!
Terri
Lidia, thanks so much for sharing your ideas and expertise. I gave this tutorial a try and I really like the results. Just love your ideas.
SunBum
Thank you for wonderful instructions! I’m off to make this right now! So helpful to gain knowledge to help me use my software better and better!
Glorie
THANK YOU!!! I loved the tut and a more unique LO created using it!!! It’s great to learn new things and loving the outcome!!
Shirl
I just downloaded a template with triangle shapes, but you have given me directions to make my own. This is one of the few graphic designs that I love. Thanks for a perfectly explained and demonstrated tutorial. Hugs.
Jen Juris
Lidia – this is amazing! I will have to use this template!!! 🙂
Nannette
What a fresh fun look! You have inspired me!
Barb7
Thank you Lidia! I love triangles and your tutorial is perfect, I’ve wanted to play around with them for a long time. This is a lovely template.