Retro Snowflake
by Lidia Sari
Retro graphic design always interests me. In fact, every time I see it I am always inspired by it. Why do I love this type of design so much? I guess for me retro design will always remind me of my childhood. I love the chic eclectic color schemes and the simple geometric designs. With that in mind, I would like to show you how to make a snowflake with a retro look. Let’s get started!
Step One: Prepare the Workspace
- Create a new 2 x 2 inch document (File > New > Blank File) at 300 ppi with a white background. (Photoshop: Choose File > New.)
- In the Menu Bar, choose View > Rulers.
- Press the letter D to reset the Color Chips to the default of black and white.
Step Two: Create the Line
- Get the Line tool.
- In the Tool Options, set the Width to 12 px, set the Style to None, and set the Arrow Head to No Arrow Head. (Photoshop: Set the Tool Mode to Shape, the Stroke to None, and the Weight to 12 px. Open the Arrow Head Options and uncheck Start and End.)
- On the document, while holding down the Shift key, click and drag to create a line down the middle of the page about one and a half inches long. Press and hold the Space bar to reposition the line while dragging.
- In the Tool Options, click Simplify. (Photoshop: In the Menu Bar, choose Layer > Rasterize > Shape.)

Step Three: Create the Heart Shape
- Get the Custom Shape tool.
- In the Tool Options, open the Custom Shape Picker and choose the Heart Card. If you don’t see Heart Card, open the drop-down menu and choose Default Shapes. (Photoshop: Open the fly-out menu, choose Reset Shapes, and click OK.) Set the Style to None. Open the Geometry Options and choose Fixed Size. Enter a Width of 0.18 inches and a Height of 0.18 inches. (Photoshop: Set the Tool Mode to Shape and the Stroke to None.)
- On the document, click and drag to create the heart and position it at the top center of the line. See the screenshot below.
- In the Tool Options, click Simplify. (Photoshop: In the Menu Bar, choose Layer > Rasterize > Shape.)
- Press Ctrl J (Mac: Cmd J) to duplicate the heart shape.
- In the Menu Bar, choose Image > Rotate > Flip Layer Vertical. (Photoshop: In the Menu Bar, choose Edit > Transform > Flip Vertical.)
- Get the Move tool.
- On the document, click on the new heart shape and drag it to the bottom of the line shape. See the screenshot below.
- In the Layers panel, activate the top layer. Then, while holding down the Shift key, click on the bottom shape layer to activate all the shape layers.
- Press Ctrl E (Mac: Cmd E) to merge all the shape layers together.

Step Four: Create the Retro Snowflake
- Press Ctrl J (Mac: Cmd J) to duplicate the shape layer.
- Press Ctrl T (Mac: Cmd T) to get the Transform options.
- In the Tool Options, set the Angle to 30˚. (Photoshop: Set the Rotation to 30˚.) Click the checkmark to commit the changes.
- Press Ctrl E (Mac: Cmd E) to merge the layers together.
- Press Ctrl J (Mac: Cmd J) to duplicate the shape layer.
- Press Ctrl T (Mac: Cmd T) to get the Transform options.
- In the Tool Options, set the Angle to 60˚. (Photoshop: Set the Rotation to 60˚.) Click the checkmark to commit the changes.
- Press Ctrl J (Mac: Cmd J) to duplicate the top shape layer.
- Press Ctrl T (Mac: Cmd T) to get the Transform options.
- In the Tool Options, set the angle to 60°. (Photoshop: Set the rotation to 60°.) Click the checkmark to commit the changes.
- In the Layers panel, activate the top layer. Then, while holding down the Shift key, click on the bottom shape layer to activate all the shape layers.
- Press Ctrl E (Mac: Cmd E) to merge all the shape layers together.
- In the Layers panel, click on the Visibility icon of the Background layer to hide it.

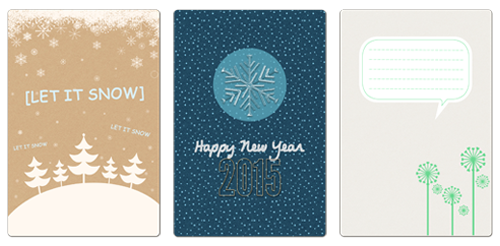
Take a look at what I did with my retro snowflake design. I used it to make background paper! First, I made it into a brush. That way, it is easy for me to change the size of the element. I also reduced the Opacity of some of the snowflakes.

For any Project Life Journaling Card fans out there, I whipped up a few more examples of what you can make. I added the DS Acrylic Style to the middle card. You can also add stems to the snowflake, which turn it into a flower.
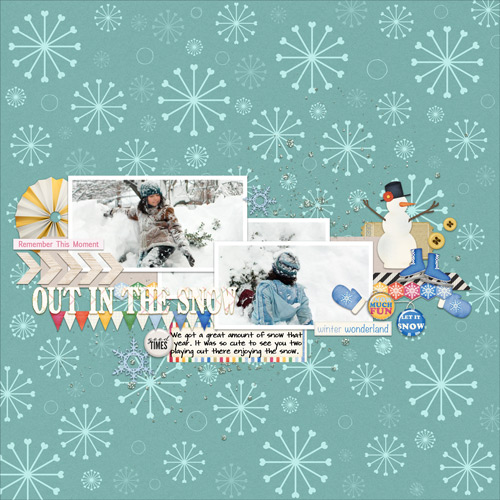
Finally, here’s how I used the paper for my scrapbook layout. I can’t wait to see all the retro snowflakes that all of you will make using this technique at the Digi Scrap Tutorial Gallery.
Credits:
Stories: 365 by Kristin Cronin-Barrow
Spirit of Christmas by Laurie-Ann
Winter Wonderland by Elise Hansen
Adaptable Acrylics Video Tutorial by Susie Roberts
Premier Tidbit November 2014—Customized Photo Clusters by Nannette Dalton
Fonts: DJB Melissa Script, Comic Sans MS

_____________________________________________
 Author: Lidia Sari | lidia@digitalscrapper.com
All comments are moderated.
Please allow time for your comment to appear.
9 Responses
Mungo
It is 35 degrees C here at the moment – those snowflakes look so cool.
Mary (cheerio54)
This was sooooooo much fun, Lidia . . . a great tutorial and so easy to follow along! I heart snowflakes. 🙂
Lidia
Thank you so much, Mary! Love your layout at the gallery! 🙂
Nannette
This is adorable Lidia and so many ways to use it! Thanks.
Lidia Sari
Thanks, Nann!
Did you see I used your ‘Customized Photo Clusters Tutorial Tidbit?’ It was so much fun to make.
pixie
I love retro graphics! I’m looking forward to trying this out!
Lidia Sari
Thanks, Pixie!
If you do make it I would love to see your layout in the gallery! 🙂
Shirl
I just look at Mary’s page and just had to click the link for your tutorial. You need to check her page out in the premier gallery. I am so frustrated because I might not be able to do this tutorial, but I am most certainly going to try. I just can’t get over the beauty contained in your tutorial results. Lidia, this is a definite winner.
Lidia Sari
I saw her layout and that really made me excited! It was certainly gorgeous! Thank you for your sweet comment, Shirl!