Quick Tip—Journaling Lines
by Jen White
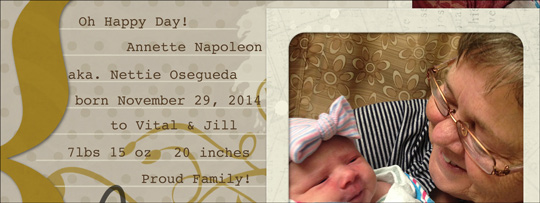
As I get older, journaling on my scrapbook pages becomes more and more of a priority. I want my photos to be accompanied by the personal touch of my “voice.”
One way to vary journaling—even if it is just the facts—is by grabbing some journaling lines from a random journal tag and adding them to your page.

This is a note element from Live, Love by Kitty Designs. Here was my thought process:
- Using the Magic Wand tool, extract the white journaling lines.
- Turn the lines black—just to make them easier to work with.
- Using the Elliptical Marquee tool, remove the outer circle.
After adding the journaling lines to my page, I adjusted them a bit further:
- Turn the lines a matchy, matchy color.
- Lower the opacity of the lines to blend them into the background.
- Adjust the Leading of the journaling to match the line height.
- Using the Eraser tool, remove parts of the lines.
Remember: You shouldn’t feel obligated to fill every inch of the lines. Less can sometimes be more.

Master the 7 most popular (and powerful)
selection tools in Photoshop or Photoshop Elements.
Save 15% on Selections 1 for Photoshop Elements
Save 15% on Selections 1 for Photoshop
*Cannot be combined with any other discount.

_____________________________________________
 Author: Jen White | jen@digitalscrapper.com
All comments are moderated.
Please allow time for your comment to appear.
One Response
Jen Juris
Great tip, Jen!! 🙂 Love the page!