
Tricky Transparency, Part Four
Creating a Brush and Improving Transparency
by Jen White
No need to throw out a potentially good mask image that failed the Transparency Test. This one simple solution will turned failed images into fanciful clipping masks. I’ll show you all the inside tricks in Part Four of my Tricky Transparency series.
NOTE: Understanding Part One, Part Two, and Part Three of this series is important for understanding Part Four.
Part Four includes:
- How To Create a Brush
- How To Improve Mask Transparency
For this tutorial you will need:
- A computer program like Photoshop Elements or Adobe Photoshop that is capable of handling layers and creating a brush.
- A small assortment of masks collected from the assignments in Part One or Part two of this series, or use the download found in Part One.
In Part Three of this series we looked at three images from the download folder (found in Part One). One of the images passed the Transparency Test and two did not.


Why did the first two images fail the Transparency Test?
A good photo mask always contains some level of transparency.
- The first image shows outer transparency, but no inner transparency. It needs both to pass the test.
- The second image neither had outer nor inner transparency.
For a review of why they passed or failed, read Part Three.
In Part Four of this series (the last part) we’ll take a look at what you can do to salvage a potentially good mask that failed the test.
Create a Brush from a Potentially Good Complex Photo Mask
If you have an image that has characteristics of a potentially good photo mask (from Part One), yet it fails the Transparency Test, then one great way to salvage the mask is to simply create a brush.
NOTE: For this solution to work, the potential mask must be on a white or transparent background (see the three colored images above).
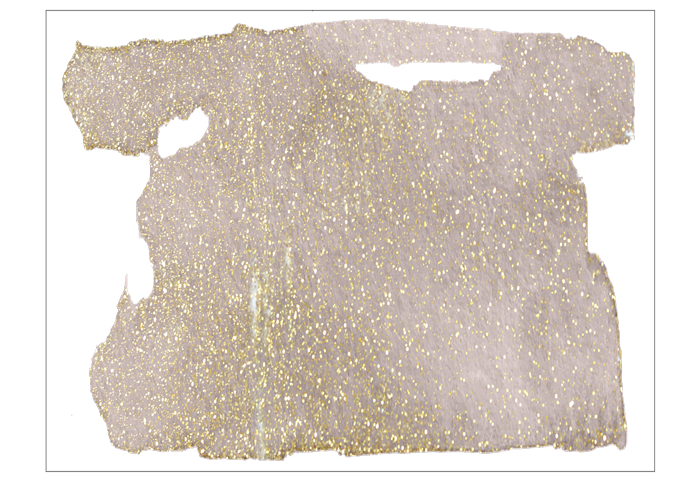
- Open an image that has potential to be a good photo mask. I’ll use the image below that can be found in the download folder from Part One of this series.
- In the Menu Bar, choose Edit > Define Brush. (PS: Choose Edit > Define Brush Preset.)
- In the dialog box, give the brush a descriptive name and click OK.
Note: I usually try to retain the name of the designer or bundle that the image was a part of.

If using Photoshop Elements or Adobe Photoshop,
- you should now have the Brush tool
- and the brush you just created should be active.
If you open the Brush Picker, you should see your new brush at the bottom of the list.
CAUTION: Save a Newly Created Brush
If you reset the brushes in the Brush Panel for any reason, your newly created brush will be lost forever. The only way to keep this from happening is to save the brush so that it can be loaded at any time. To do that:
- In the Menu Bar, choose Edit > Preset Manager. (PS: Choose Edit > Presets > Preset Manager.)
- In the dialog box, set the Preset Type to Brushes.
- Scroll to the bottom of the list and click on the new brush. To choose more than one brush to save in a set, hold down the Ctrl key (Mac: Cmd key) and click on additional brushes.

- Click Save Set.
- In the Save dialog box, name the brush set, choose a destination, and click OK.
I named my brush set as “AwaMarc Brushes” and saved them to a folder called Brushes within my scrapbooking file system.
- Click Done to close the Preset Manager.
Use a Newly Created Brush
Now let’s see what the brush looks like on a document with a photo clipped to it.
- Create a new 12×12 inch document (File > New > Blank File) at 300 ppi with a white background. (PS: Choose File > New.)
- Press the letter D to reset the Color Chips to the default of black over white.
- Get the Brush tool.
- In the Tool Options, open the Brush Picker, scroll to the bottom of the list and click on the newly created brush. Set the Opacity to 100% and the Mode to Normal. (PS: Also set the Flow to 100%.)
- In the Layers panel, click on the Create a New Layer icon.
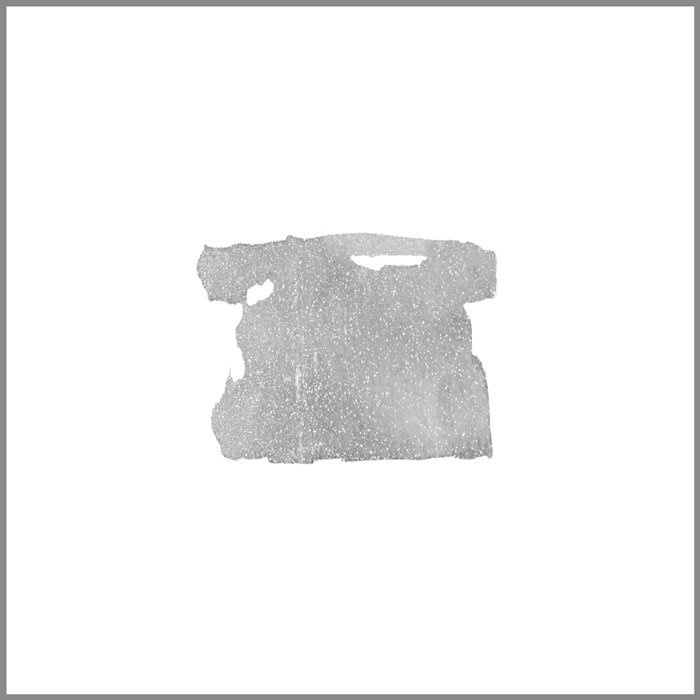
- On the document, place your cursor in the center and click to stamp the brush.
Clip a Photo to the Brush
The whole point of this series is to choose and create great photo masks. So, let’s try this new brush with a photo clipped to it.
- Open a photo (File > Open).
- Get the Move tool.
- Holding down the Shift key, click and drag the photo onto the new document.
- In the Menu Bar, choose Layer > Create Clipping Mask.
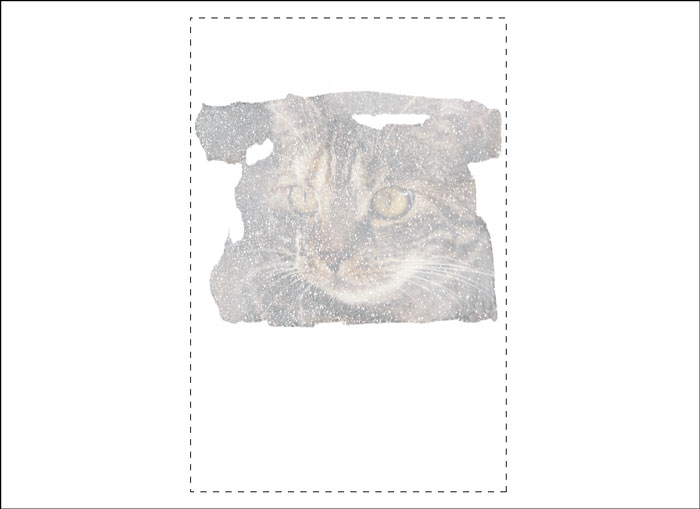
Remember: Anytime you clip a photo to a clipping mask, the boundaries of the photo need to be slightly past the boundaries of the clipping mask.
In the image below, the dashed line indicates the boundary of the photo. Notice that the boundary of the photo extends past the edges of the mask.
Improve Mask Transparency
The image of the cat clipped to the mask (above) looks nice, but I’d like for the cat to appear darker. One way to do that is to make the mask less transparent. Here’s my favorite way to do that:
VERSION Note: This technique involves the ability to create Groups in the Layers panel. Groups was first introduced in Photoshop Elements 15. Groups have always been available in Adobe Photoshop.
- In the Layers panel, the photo layer should be the active layer.
- In the Menu Bar, choose Layer > Release Clipping Mask.
- In the Layers panel, click on the mask layer to active it.
- In the Layers panel, choose Layer > Group Layers.
This should have placed the mask layer into a folder (or Group).
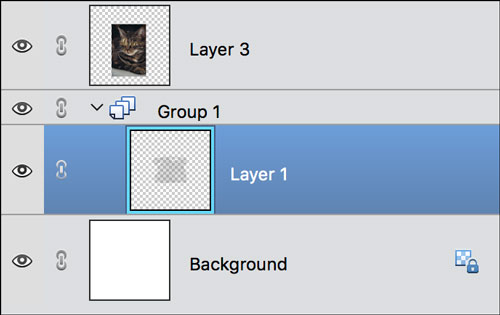
- In the Layers panel, click on the photo layer once again to activate it.
- In the Menu Bar, choose Layer > Create Clipping Mask.
Now you should be back to having the cat image clipped to the mask.

- In the Layers panel, click on the mask layer once again to activate it.
Photoshop Elements 2018 and newer:
- Press Ctrl J (Mac: Cmd J) to duplicate the mask.
Photoshop Elements 15:
- In the Menu Bar, choose Layer > Duplicate.
- In the dialog box, click OK.
Notice how the cat is less transparent overall, but there are still varying degrees of transparency.
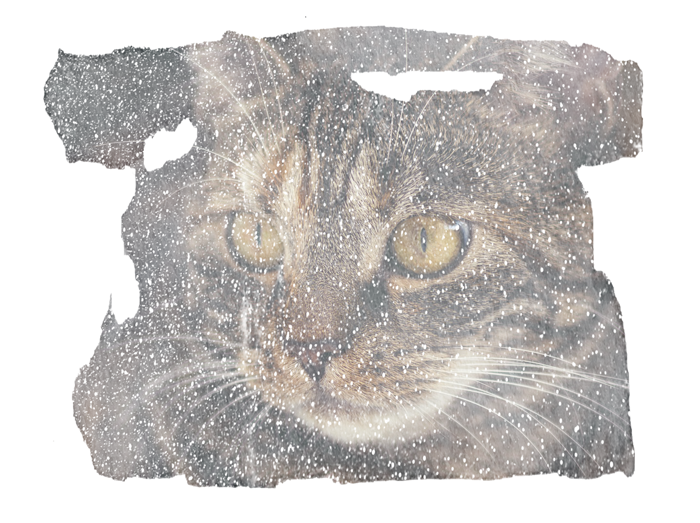
Try duplicating the mask several more times using the instructions above and see what happens.
So, you may be wondering . . .
Why Should I Create a Brush?
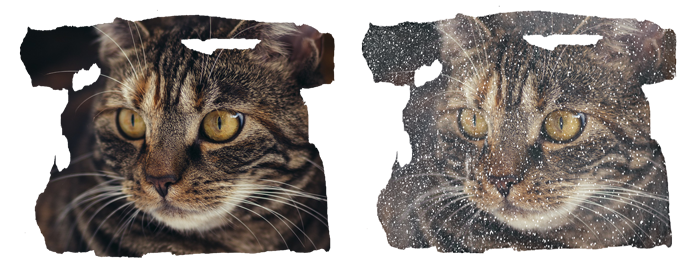
Here is a before and after of the cat clipped to the mask.
- The first image shows the cat clipped to the mask before it was made into a brush. Notice how there are only solid jagged lines and no varied transparency.
- The second image shows the cat clipped to the mask after it was made into a brush. I duplicated the mask four times within the Group folder. This gave the image nice definition and varied transparency. It made a HUGE difference.
Continuing On
- Take some time turning failed masks into brushes.
- Try clipping photos to them and see if you like the results.
- Save the brushes that make nice masks.
- If you discover a great find, show us your before and after shot (like the one above). Post the composite image in Community and link back to it in the comments below.
Check back for the PDF Download.
_____________________________________________
 Author: Jen White | Contact Us
All comments are moderated.
Please allow time for your comment to appear.

6 Responses
Carol
Jen, this entire series has been awesome. Each part is teaching me things I can use in so many ways. Thank you for taking the time to explain it all so thoroughly.
Dorrie Harden
Jen, I am not getting the same results as you have above using the same mask and also a cat image. I was aware that I cannot use PScs5 as it does not allow clipping a mask to a group, so I used PSE-15. Yet my results were not as yours.
When I duplicated the mask, it did not stay within the mask group. It appeared above the created mask group and I had to drag the duplication’s into the mask group. But even after duplicating the mask four times the photo did get a little darker, however small white dots were still visible. Not clear and sharp as your image indicates. I must be doing something wrong, but not sure what it is.
Jen White
Hi Dorrie. I just put it to the PSE15 test. And I’m glad I did! Thanks for the prompt.
RE: PSE15 — Apparently, if you use the keyboard shortcut (Ctrl/Cmd J) to duplicate a layer within a group, the duplicate layer lands above the group, not inside it. I’m glad they fixed that in PSE16.
Instead, try — In the Menu Bar, choose Layer > Duplicate Layer and then click OK. I’ll fix that in the tutorial and redo the PDF.
Also, my guess, as to why your image did not turn out clear and sharp, is — with all the extra moving around of layers, they probably did not end up inside the group. In my opinion, it’s really difficult to know if a layer is in a group or not — especially if you keep your Layers panel condensed as I do.
I think that if you use these alternate instructions, you will find a much clearer and sharper result. Let me know how that goes.
Dorrie Harden
Jen, that is really weird that Ctrl+J doesn’t work. I did as you suggested, and while the results were certainly much better the image still had some white dots showing, and I duplicated 6 times. Also you said it was fixed in PSE 16….do you not mean 2018? I don’t know of a PSE 16. 🙂
Jen White
yes. sorry. PSE2018…. even though the Welcome Screen says v16. HA . 0.o
Dorrie Harden
Well you got me there, as I don’t have PSE-2018. Adobe likes doing strange things I guess.
Jen, feel free to delete these message, and just make the corrections as mentioned above. I’m good to go from here. Your are awesome!!!