Filled-In Sticker Doodle
by Jen White
Add an instant touch of cuteness to your next digital project by creating a custom sticker doodle.
For this tutorial you will need:
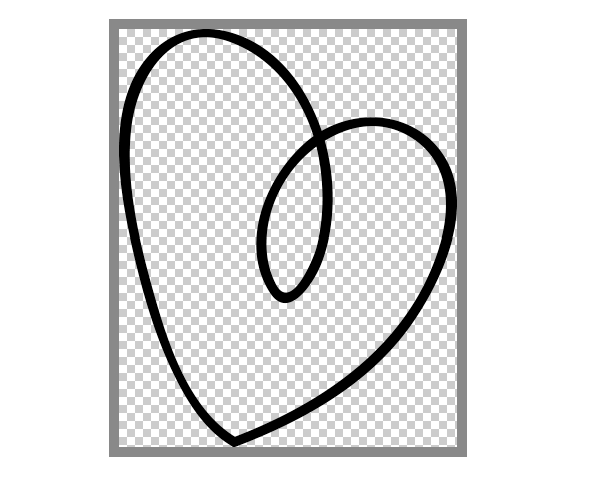
- A closed-lined doodle (see Step One)
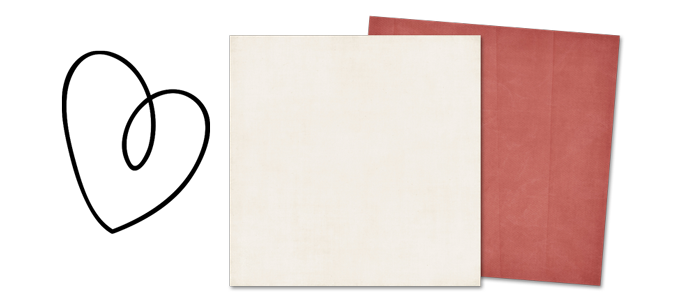
- A light colored background paper
- A dark colored background paper
If you’d like to follow along with this tutorial exactly, download the sticker doodle pack that I’m using.
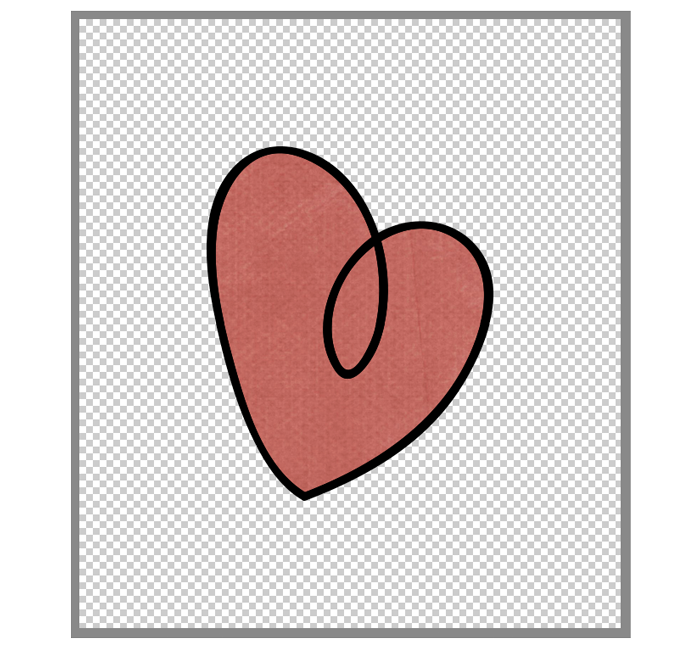
Step One: Open a Closed-Lined Doodle
- Open a closed-lined doodle (File > Open).
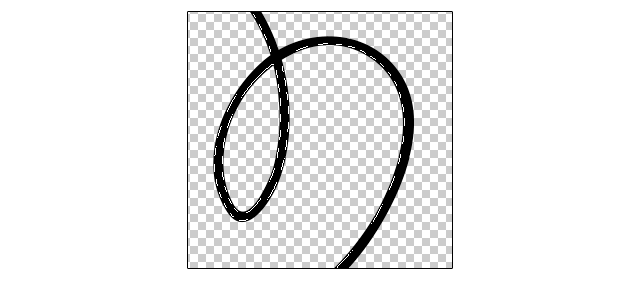
What is a closed-lined doodle?
A closed-lined doodle has no breaks within the line.
Here are some good and bad examples of a closed-lined doodle:

- In the Menu Bar, choose File > Duplicate. (PS: Choose Image > Duplicate.)
- In the dialog box, click OK.
- Close the original.
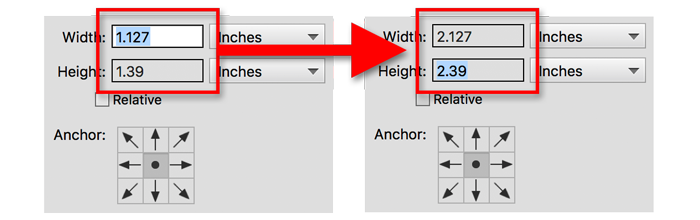
Step Two: Add Extra Padding
You will need extra space (padding) around the doodle in order to complete this tutorial. If your doodle already has extra padding, you can skip this step.
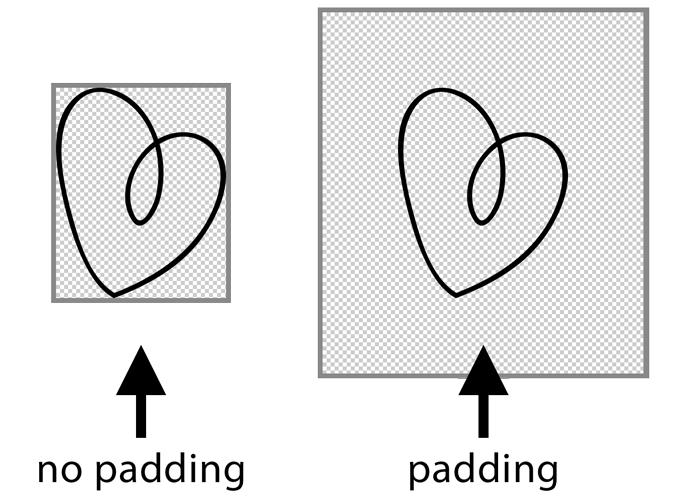
To add padding to a doodle:
- In the Menu Bar, choose Image > Resize > Canvas Size. (PS: Choose Image > Canvas Size.)
- In the dialog box, adjust both the Width and the Height to be 1 inch larger. Uncheck Relative and set the Anchor to the center. Click OK.
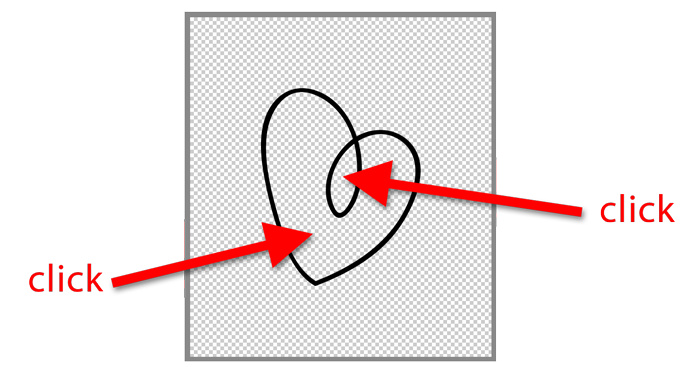
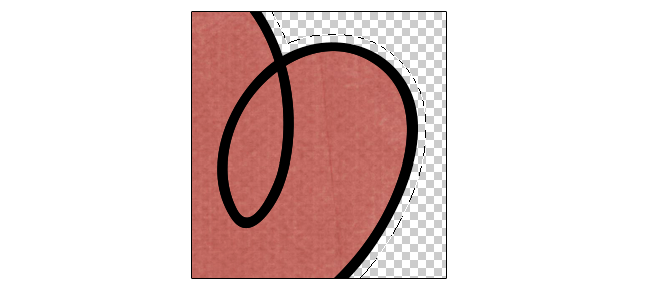
Step Three: Select the Inside of the Doodle
- Get the Magic Wand tool. It’s nested with the Quick Selection tools.
- In the Tool Options, click on the Add To Selection icon. Set the Tolerance to 32. Uncheck Sample All Layers. Check Contiguous and Anti-aliasing.
- On the document, click in all the areas of the doodle you want to fill in.
Note: Because this doodle has two areas, I’ll need to click twice.
Step Four: Expand and Fill the Selection
- In the Menu Bar, choose Select > Modify > Expand.
- In the dialog box, set the Expand By to 2 px and click OK.
- In the Layers panel, click on the Create a New Layer icon.
- Double click directly on the name of the new layer and rename it FILL.
- Click and drag the FILL layer below the doodle layer.

- Press the letter D to reset the Color Chips to the default of black over white.
- Press Ctrl Backspace (Mac: Cmd Delete) to fill the selection with white.
- Press Ctrl D (Mac: Cmd D) to deselect.
Step Five: Clip a Dark Paper to the Fill Layer
- Open a dark background paper (File > Open).
- Get the Move tool.
- Holding down the Shift key, click and drag the paper onto the doodle document.
- In the Menu Bar, choose Layer > Create Clipping Mask.
Step Six: Add a Sticker Effect
- In the Menu Bar, choose Layer > Merge Visible.
- In the Layers panel, Ctrl click (Mac: Cmd click) on the thumbnail of the remaining layer to get a selection outline around the entire filled-in doodle.
- In the Menu Bar, choose Select > Modify > Expand.
- In the dialog box, set the Expand By to 8 px and click OK.
- In the Layers panel, click on the Create a New Layer icon.
- Double click directly on the name of the new layer and rename it STICKER.
- Click and drag the STICKER layer below the filled-in doodle layer.
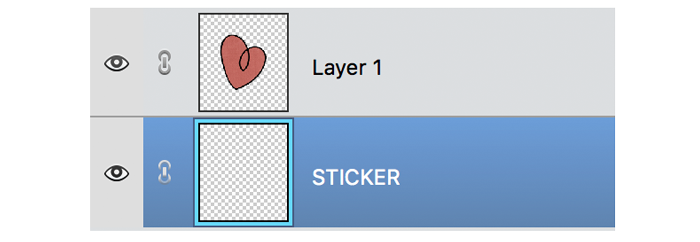
- Press Ctrl Backspace (Mac: Cmd Delete) to fill the selection with white.
- Press Ctrl D (Mac: Cmd D) to deselect.
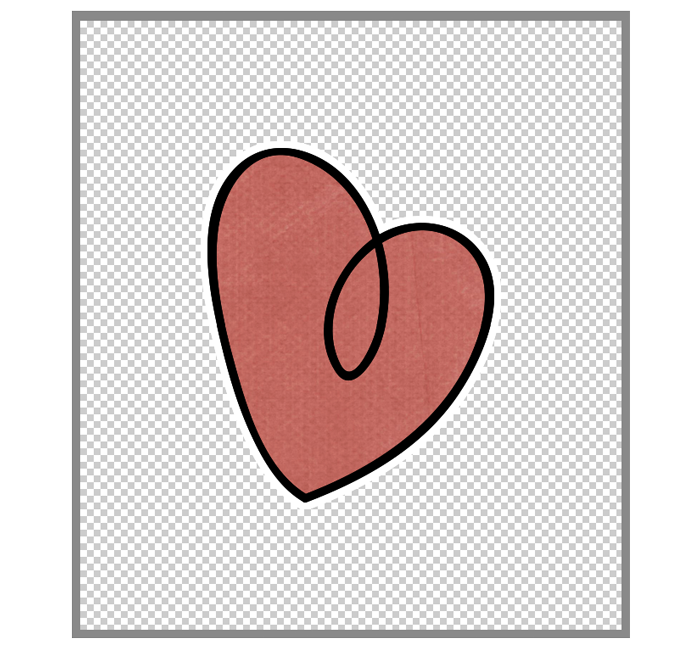
Step Seven: Clip a Light Paper to the Sticker Layer
- Open a light background paper (File > Open).
- Get the Move tool.
- Holding down the Shift key, click and drag the paper onto the doodle document.
- In the Menu Bar, choose Layer > Create Clipping Mask.
Step Eight: Save the Filled-In Sticker Doodle
- Save the sticker (File > Save As) as a PNG file with a unique name.
- Close the working file without saving.
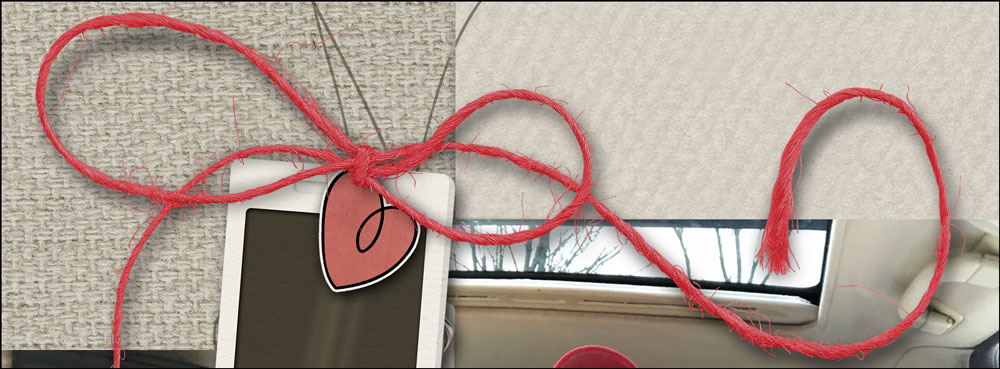
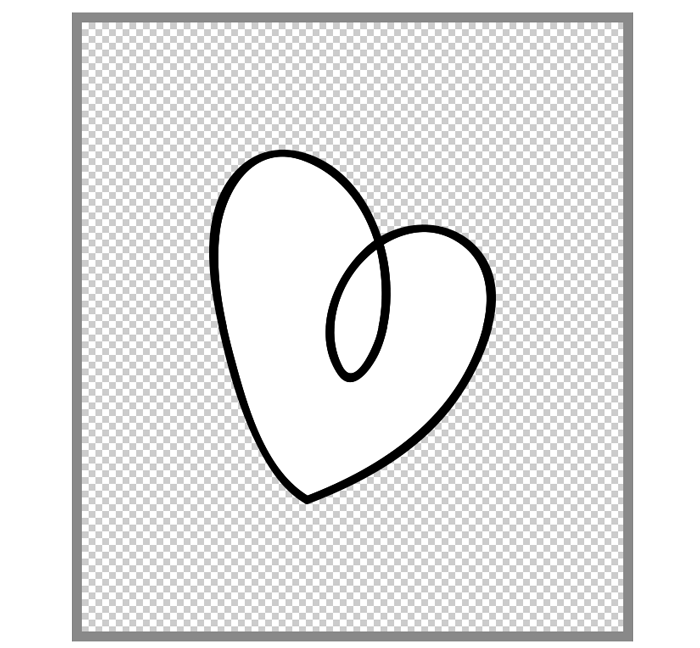
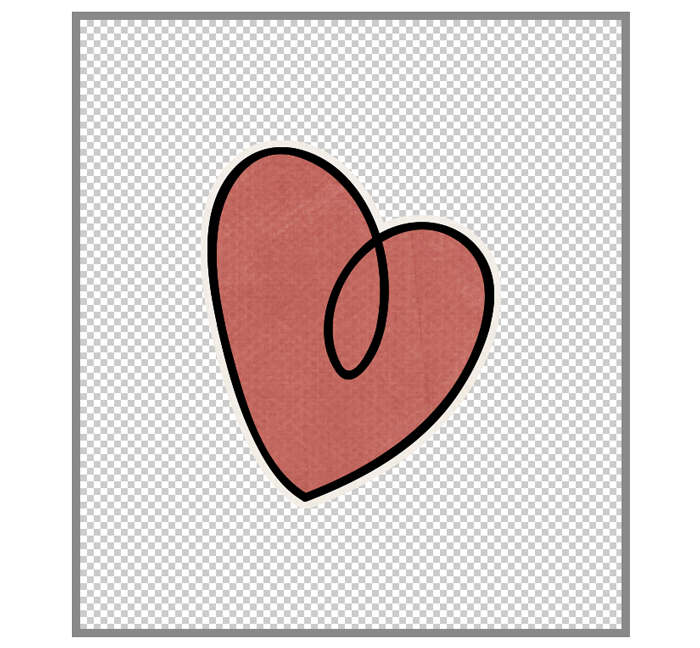
Here is the sticker after I’ve added a drop shadow.

And here is what the filled-in sticker doodle looks like on my scrapbook page.
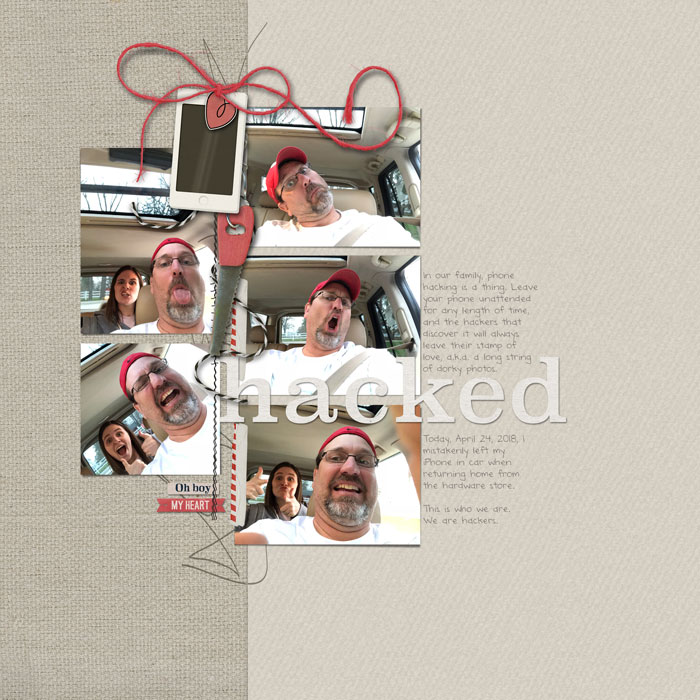
Page: Hacked by Jen White
Photos: Jen White
Kits: Charming-KimBDesigns, Epic-JBStudio
Fonts: Superclarendon, DJB ANNALISE
Master the 7 most popular (and powerful)
selection tools in Photoshop or Photoshop Elements.
Save 15% on Selections 1 for Photoshop Elements
Save 15% on Selections 1 for Photoshop
After posting your results online,
return here and include the link in the comments.

_____________________________________________
 Author: Jen White | Contact Us
All comments are moderated.
Please allow time for your comment to appear.
8 Responses
Linda Pawley
Hi Jan. I’m having a problem downloading the doodle pack. When I click on the link, another window opens with exactly the same page I left from. I’m using Chrome on an iMac.
Thank you,
Linda
Jen White
Hi Linda. I’m glad you asked. Have you looked in your downloads folder? The zip file should be there. 😀 Everything appears to be working great on this end. Let me know.
Linda Pawley
Yup – 7 copies! I figured it was something simple. Just like me today . . . simple! lol Thank you.
Jen White
Yay. I’m glad it was easy! 😀
Dorrie Harden
Thanks Jen for another easy tutorial. However, I’m wondering why you did not say in Step Eight to Merge all Visible as you did in Step Six, before saving the finished doodle.
Jen White
Great question, Dorrie.
In Step Six, merging the layers is necessary in order to get the correct selection outline.
In Step Eight you could merge the layers, but it is an unnecessary step. A PNG file is easily created from a layered file.
Does this answer your question?
Dorrie Harden
Yes, it does Jen. Thanks so much. Didn’t think of that.
Terri
What a fun idea. Goes right along with your delightful photos and story!