Quickly remove part of a pattern to reveal a fun and eye-catching anchor for your projects.
For this tutorial you will need:
- a solid background paper,
- a patterned background paper, and
- a complex mask.
To follow along with this tutorial exactly, download the papers and mask I’m using here.
Step One: Create a New Document
- Create a new 12×12 document (File > New > Blank File) at 300 ppi with a white background. (PS: Choose File > New.)
- Press the letter D to reset the Color Chips to the default of black over white.
Step Two: Add a Solid Background Paper
- Open a solid background paper (File > Open).
- Get the Move tool.
- Holding down the Shift key, click and drag the paper onto the document.

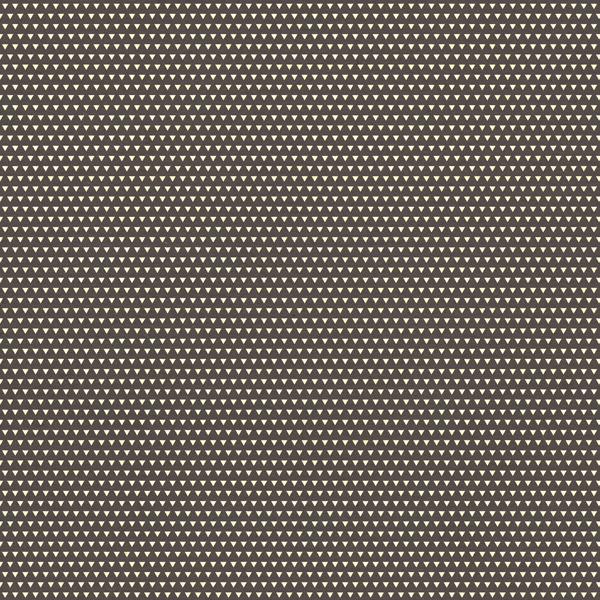
Step Three: Add a Patterned Background Paper
- Open a patterned background paper (File > Open).
Note: The pattern needs to be clearly defined with simple edges. An artistic style pattern with blurry edges won’t work well here.
- Holding down the Shift key, click and drag the patterned paper onto the document.

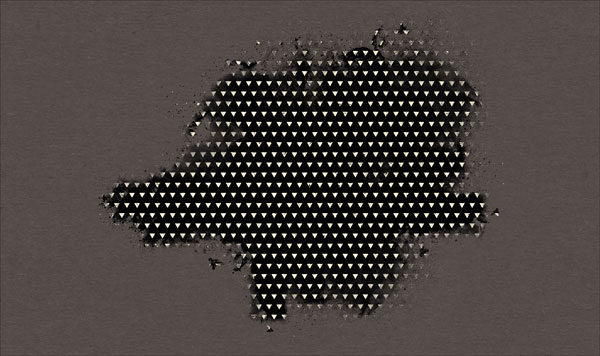
Step Four: Select the Pattern
- Get the Magic Wand tool.
- In the Tool Options, make sure the New Selection icon is checked, set the Tolerance to 30, Uncheck Sample All Layers and Contiguous, but check Anti-Alias. (Photoshop: Set the Sample Size to Point Sample.)
Note: You may have to set the Tolerance to a lower number if the color of the pattern you wish to select is very close in color to other parts of the paper.
- On the document, click once on the part of the pattern you wish to keep. In my case, I’m clicking on a small cream colored triangle.
- In the Layers panel, click on the Add Layer Mask icon.
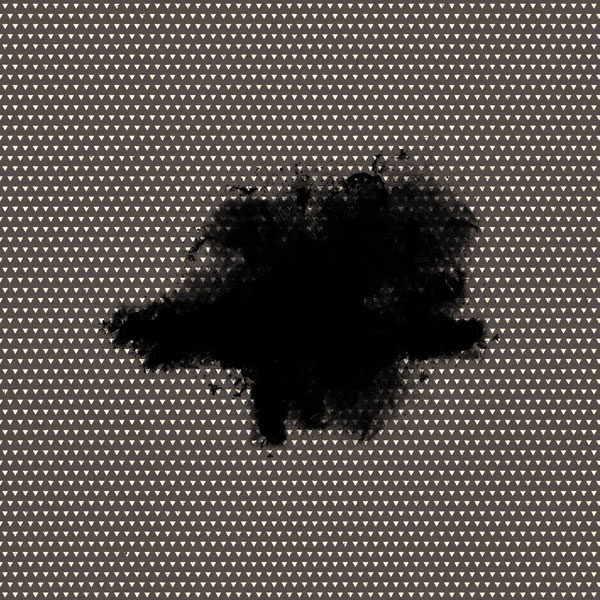
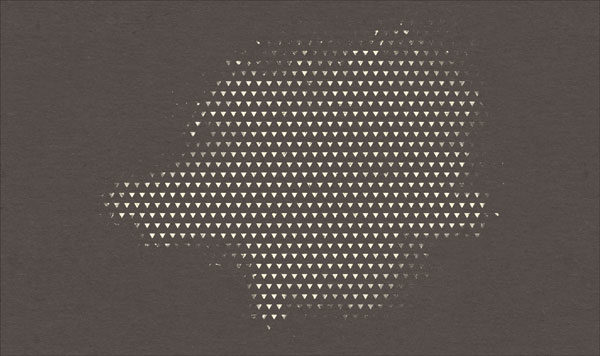
Step Five: Add a Complex Mask
- Open a complex mask (File > Open).
- Get the Move tool.
- Holding down the Shift key, click and drag the mask onto the document.
Step Six: Clip the Pattern to the Mask
- In the Layers panel, click and drag the mask layer below the patterned paper layer.
- Click on the patterned paper layer to activate it.
- In the Menu Bar, choose Layer > Create Clipping Mask.
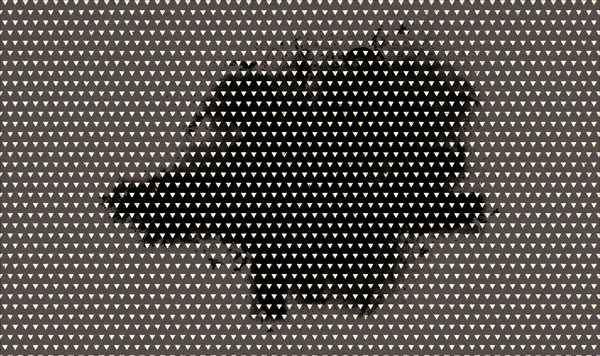
- In the Layers panel, hold down the Alt key (Mac: Opt key) and click and drag the solid paper in between the mask layer and the patterned paper layer.
This should automatically clip a duplicate of the solid background paper to the complex mask.
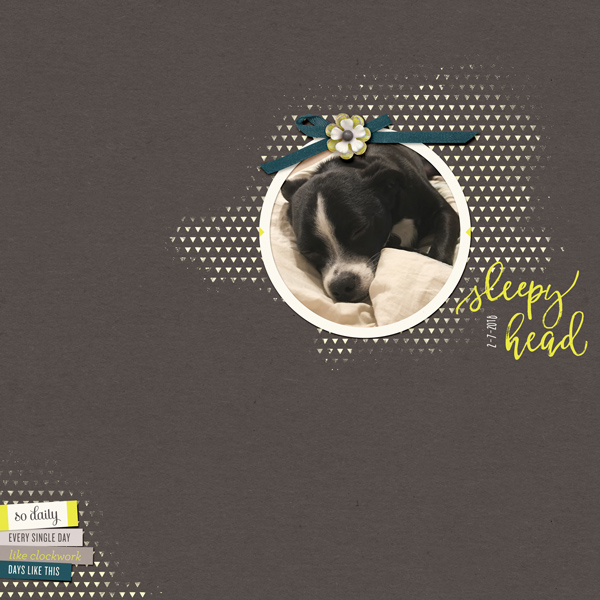
Finish the Project
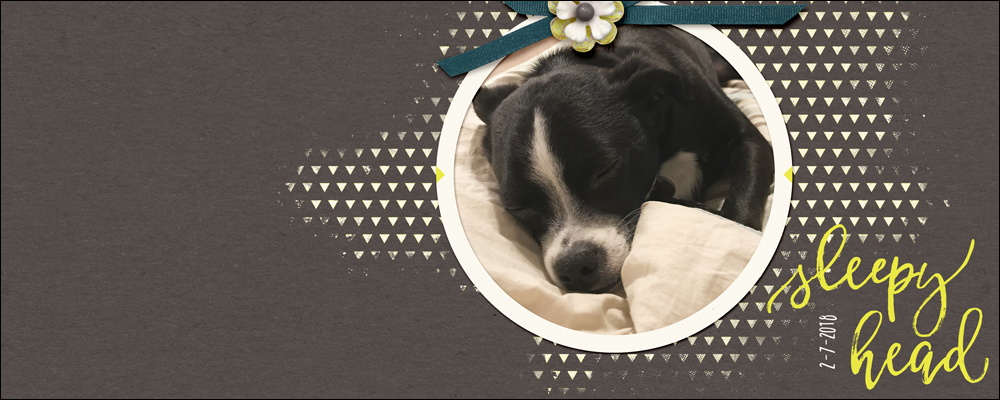
Once the above steps are done, you can continue creating a page, card, or other project from there. Here is how my final page turned out:
Credits:
Page & Tutorial: Jenifer Juris
Photo: Jenifer Juris
Kit: Per Diem by One Little Bird
Extras: Mask from Junk in the Trunk by Brandy Murry
Fonts: Betterfly Narrow, Butterfly Draft

Master the 7 most popular (and powerful)
selection tools in Photoshop or Photoshop Elements.
Save 15% on Selections 1 for Photoshop Elements
Save 15% on Selections 1 for Photoshop

_____________________________________________
 Author: Jenifer Juris | Contact Us
All comments are moderated.
Please allow time for your comment to appear.
6 Responses
Lettie
What a good tutorial, thanks for this, I’m a newbie, so much to learn.
Jenifer Juris
I’m so glad you enjoyed it! Welcome to the hobby and Digital Scrapper! 🙂
pixie
I love this look! And your explanation is so clear. I will be trying this soon.
Jenifer Juris
I’m so glad you like it! I can’t wait to see how you use it. 🙂
Carol
Many thanks for all of your helps, Jen. I am always looking to expand my knowledge whenever I have a few minutes to grab. Having the tuts on PDF allows me to refer back to what you taught and try it over again until it finally “sinks in!” 🙂
I appreciate this site so much for the instructions, classes and clarity. I learn the most right here at the Digital Scrapper.
Jenifer Juris
You’re so welcome!! 🙂 We’re glad to have you here. 🙂