Lucky Little Shamrock with Shapes and Pivots
by Jen White
Brush up on your shape and pivot skills with this quick tutorial showing you how to create a lucky little shamrock step by step using either Photoshop Elements or Adobe Photoshop.
For this tutorial you’ll need:
- Photoshop Elements or Adobe Photoshop
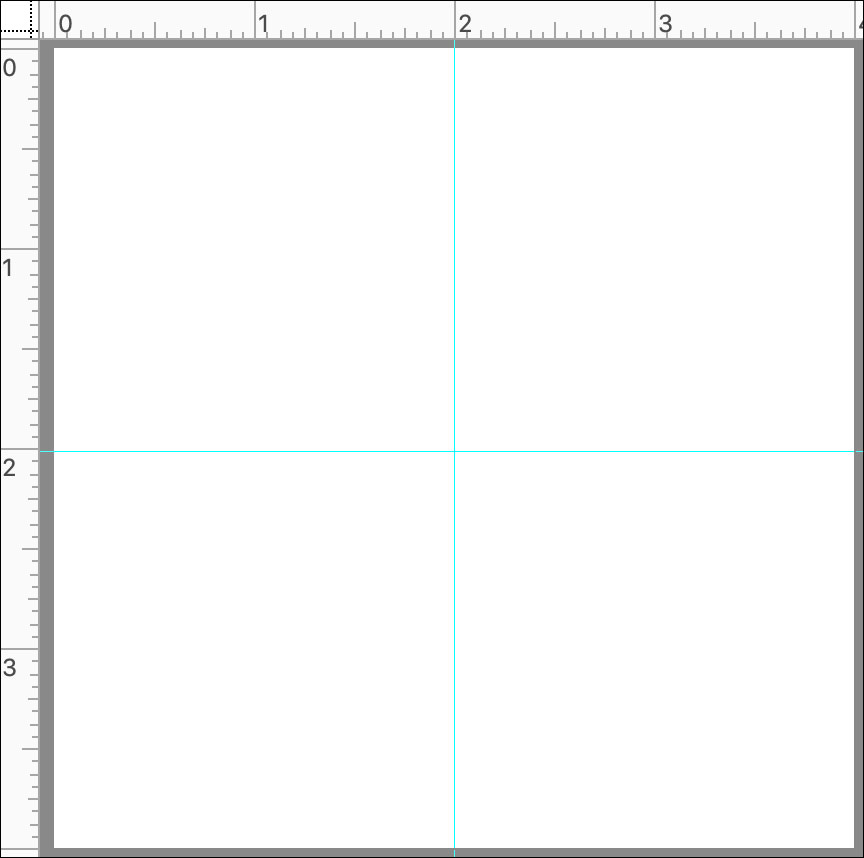
Step One: Create a New Document
- Create a new 4×4 inch document (File > New > Blank File) at 300 ppi with a white background. (PS: Choose File > New.)
- Press the letter D to reset the Color Chips to the default of black over white.
- In the Menu Bar, choose View and place a checkmark next to Rulers.
- On the document, click and drag a guide from the Horizontal Ruler to the 2 inch mark.
- Click and drag a guide from the Vertical Ruler to the 2 inch mark.
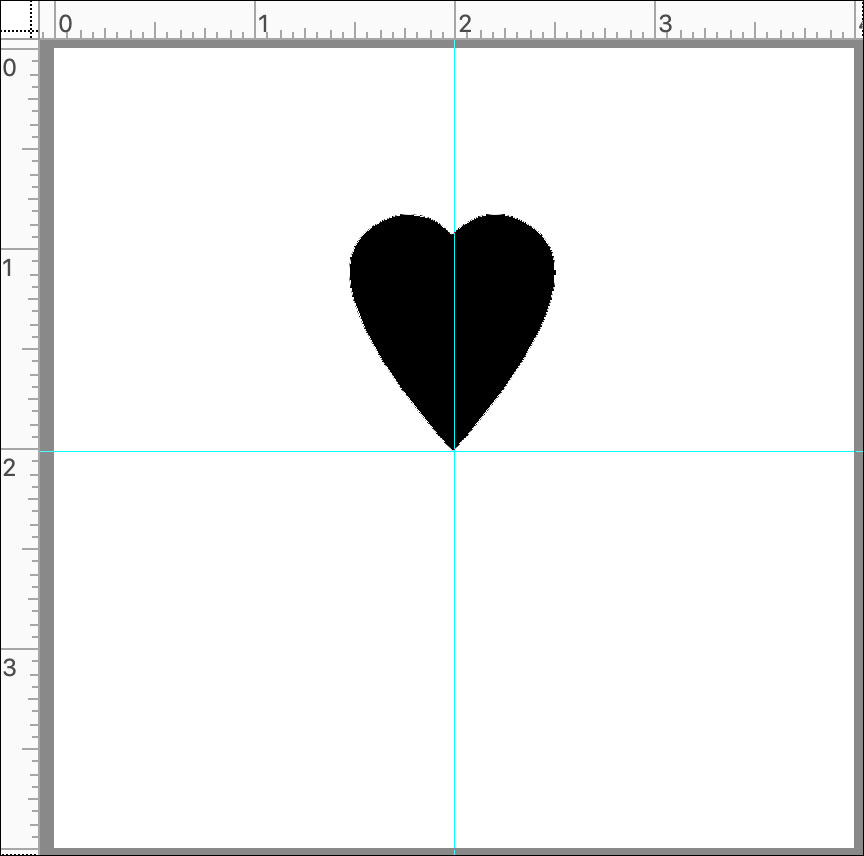
Step Two: Create a Heart Shape
- Get the Custom Shape tool. It’s nested with the other Shape tools.
Photoshop Elements Only:
- In the Tool Options, open the Shape Picker. Open the dropdown menu and choose Shapes. Choose Heart (not Heart Card). If you don’t see the names of the shapes, click on the flyout menu and choose Large List.
- Set the Style to None. Open the Geometry Options and choose Unconstrained. Click on the Create New Shape Layer icon.
Adobe Photoshop Only:
- In the Options Bar, set the Tool Mode to Shape, the Fill to Color, and the Stroke to None. Open the Path Operations and choose New Layer. Open the Settings and choose Unconstrained.
- Open the Shape Picker. Open the flyout menu and choose Shapes. Click OK to replace the shapes. Choose Heart (not Heart Card). If you don’t see the names of the shapes, click on the flyout menu and choose Large List.
Both:
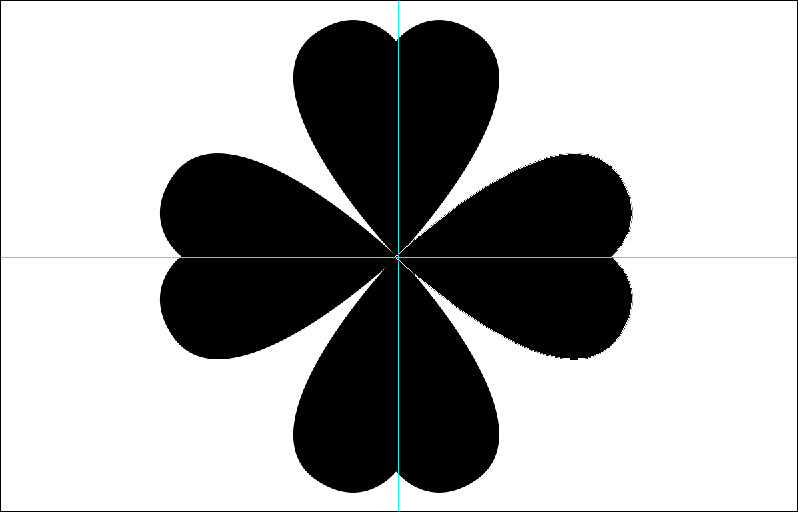
- On the document, hold down the Shift key and click and drag out a 1 inch heart. To reposition while dragging, hold down the Space bar. Position the heart so that the point is at the intersection of the two guides.
Step Three: Duplicate and Transform the Hearts
- Press Ctrl J (Mac: Cmd J) to duplicate the original heart shape.
- Press Ctrl T (Mac: Cmd T) to get the Transform options.
- On the document, hold down the Alt key (Mac: Opt key) and click and drag the Reference Point to the point of the heart.
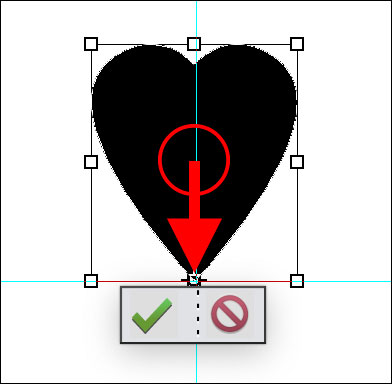
- Right click (Mac: Ctrl click) inside the bounding box and choose Flip Layer Vertical. (PS: Choose Flip Vertical.)
- Click the checkmark to commit.

- In the Layers panel, hold down the Shift key and click on the second shape layer. Now both shape layers should be active.
- Press Ctrl J (Mac: Cmd J) to duplicate the two layers.
- Press Ctrl T (Mac: Cmd T) to get the Transform options.
- Right click (Mac: Ctrl click) inside the bounding box and choose Rotate Layer 90˚ Right. (PS: Choose Rotate 90˚ Clockwise.)
- Click the checkmark to commit.
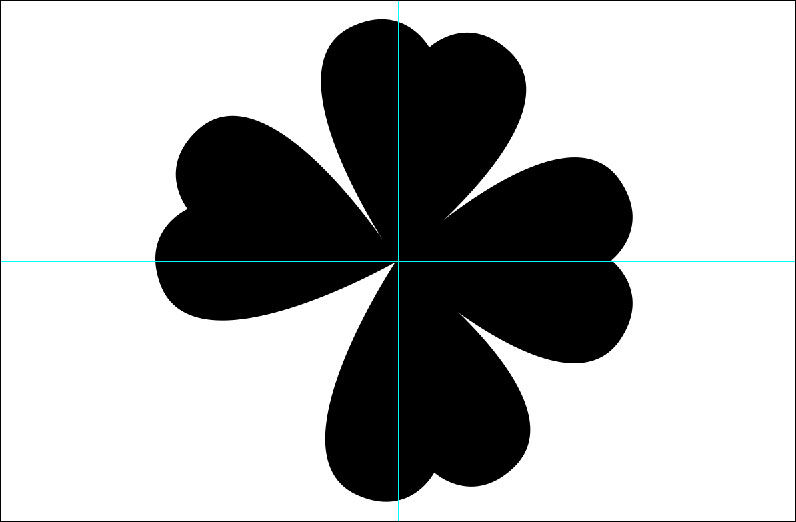
Step Four: Offset the Rotation of the Hearts
In this step I’ll slightly alter the tilt of the individual hearts to give the shamrock a more random appearance. This step is optional.
- Get the Move tool.
- In the Tool Options, check Auto Select Layer.
- On the document, click on the bottom heart to activate it all by itself.
- Press Ctrl T (Mac: Cmd T) to get the Transform options.
- Hold down the Alt key (Mac: Opt key) and click and drag the Reference Point to the point of the heart.
- Hover your cursor near a corner handle of the bounding box. When you see a curved double-headed arrow, click and drag to slightly rotate the heart.

- Click the checkmark to commit.
- Repeat this step to rotate any other hearts.
Step Five: Add a Stem
- In the Layers panel, click on the Background layer to activate it.
- Get the Custom Shape tool.
- Open the Shape Picker and choose the Checkmark shape from the Symbols shapes.
- On the document, click and drag out a checkmark that’s approximately 3/4 inch wide and 2 inches tall.
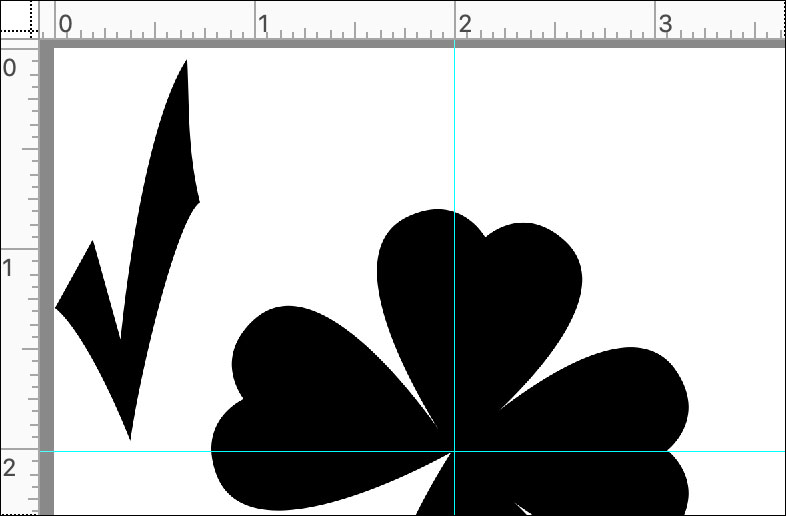
- Press Ctrl T (Mac: Cmd T) to get the Transform options.
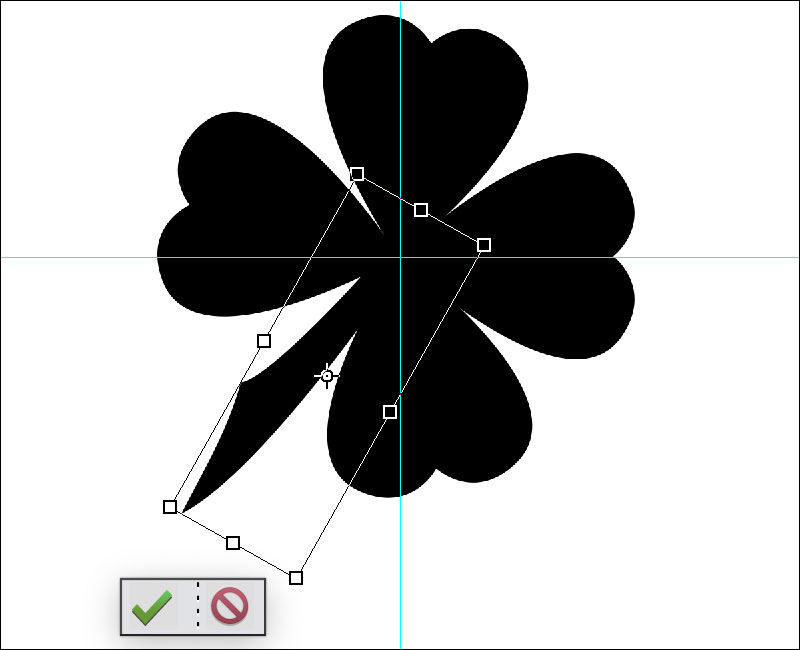
- Position the shape as shown.
- Click and drag inside the bounding box to reposition the shape.
- Hover your cursor near a corner handle of the bounding box. When you see a curved double-headed arrow, click and drag to slightly rotate the shape.
- Click the checkmark to commit.
Step Six: Group and Save the Shamrock
Grouping was first introduced in PSE 15. If you have version 14 or earlier, you will not be able to group.
- In the Layers panel, the stem layer should be active.
- Holding down the Shift key, click on the top shape layer. Now all five layers should be active.
- Click on the Group Layers icon.
When layers are grouped, they can easily be moved and transformed as a set.
- Double click directly on the name of the new group and rename it Shamrock.
- Save the document (File > Save) as a layered PSD document with a unique name in an easy to find location.
To use the shamrock on a project:
- Open the shamrock document.
- Get the Move tool.
- On the document, click and drag the shamrock onto a new document. (PS: Click and drag the group from the Layers panel onto the new document.)
NOTE: If the layers are not grouped, activate all the shape layers before moving them to a new document.

Option 1: Use the Shamrock as a Clipping Mask
This is the simplest use of the shamrock. A paper or a photo can be clipped to the group.
- Add the shamrock group to a new document.
NOTE: If the layers are not grouped, activate all the shape layers and merge them together. - Open a paper (File > Open).
- Get the Move tool.
- Click and drag the paper over the shamrock.
- In the Menu Bar, choose Layer > Create Clipping Mask.
Add a drop shadow to the group (or merged layer) and decorate.

Credits: The Good Life by Marisa Lerin
Option 2: Use the Shape Layers as Individual Clipping Masks
This option is a great way to add whimsy to a shamrock. Search for papers in your stash that provide a good variety of pattern and texture. Try to keep the colors in the same family.
- Add the shamrock group (or layers) to a new document.
- In the Layers panel, click on the arrow to open the Shamrock group.
- Click on an individual shape layer to activate it.
- Open a paper (File > Open).
- Get the Move tool.
- Click and drag the paper over the shamrock.
- In the Menu Bar, choose Layer > Create Clipping Mask.
- Repeat for each individual layer.
Add a drop shadow to each individual layer and decorate.

Credits: Effortless by Angie Briggs
Option 3: Use the Shamrock as a Grungy Stamp
This option will give you an idea of the versatility of this tutorial.
- Add the shamrock group to a new document.
NOTE: If the layers are not grouped, activate all the shape layers and merge them together. - Get the Brush tool.
- In the Tool Options, open the Brush Picker. Open the dropdown menu and choose the Plastic Wrap – Dark brush from the Faux Finish Brushes. (PS: The Faux Finish Brushes can be found in the Legacy Brushes.)
- Set the Size to 200, the Opacity to 75, and the Mode to Normal. (PS: Also set the Flow to Normal.)
Note: Try other Faux Finish Brushes. They are super fun!
- In the Layers panel, the Shamrock group (or merged layer) should be active.
- Click on the Add Layer Mask icon.
- The Foreground Color Chip should be black, if it’s not, press the letter X.
- On the document, click to mask away parts of the shamrock. Do not click and drag.
- In the Layers panel, click on the Create New Fill or Adjustment Layer icon and choose Solid Color.
- Click OK to close the Color Picker.
- In the Menu Bar, choose Layer > Create Clipping Mask.
- In the Layers panel, double click on the thumbnail of the Color Fill layer to open the Color Picker.
- Choose a color from the Color Picker or sample a color from your document. Click OK.
Never add drop shadows to a stamp. Decorate as desired.

Credits: Romantique by Brandy Murry

Credits: Effortless by Angie Briggs

Learn how to slice geometric shapes to create
stunning scrapbook page designs.
Save 15% on Easy As Pie

_____________________________________________
 Author: Jen White | Contact Us
All comments are moderated.
Please allow time for your comment to appear.
22 Responses
Steph
I had fun making this shamrock design and using it on a card . Celebrating St. Patty’s Day. Designs from Little Scraps of Heaven
https://www.pinterest.com/pin/319051954850200858
Charlene Reeves
Love this. I use to sit in clovers and count them. I am not from Ireland but this is as close as I can understand
Jeanne Rice
Here’s my shamrock. Hope the link works – not sure what I’m doing.
https://www.facebook.com/photo.php?fbid=10214835709067739&set=a.10203364399012157&type=3&theater
Nanci Radford
This was a quick fun project! Loved seeing everyone’s creations! (not sure if this link will work) https://www.facebook.com/photo.php?fbid=10213726810947646&set=gm.691606004587253&type=3&theater&ifg=1
RACHELLE GUIREMAND
Thank you. So much fun!
https://www.facebook.com/photo.php?fbid=10156051456232724&set=p.10156051456232724&type=3&theater
Plm1
Here’s my entry. The link is with Dropbox. Hope it works. Paper used was from Snickleddoodle, Artist in Me and the texture from KK Sonnet sample.
https://www.dropbox.com/s/0nqriql26e8cmqv/Shamrockcard.web.JPG?dl=0
Nannette Dalton
Okey Dokey…. here is mine. (https://www.pinterest.com/pin/169940585927262011/)
Lou
Thanks for the tutorial, mine here (https://www.facebook.com/photo.php?fbid=2040000236300157&set=p.2040000236300157&type=3&theater)
Maggie
I really enjoyed this tutorial. Here’s my link – hopefully it works
https://flic.kr/p/24z1442
Lurline Gatling
This was a fun tutorial. I did all 3 to try out new things but I don’t see how to link the image here. You will just have to imagine it. :}
Jen White
Lurline, try uploading your shamrock to Pinterest, Flickr, or any other public gallery. Then return here and edit your comment and insert the image link. Including a link enters you into the Challenge ending 3/17/2019. Hope this helps!
Woodie Sprague
I’ve been a premier member for 8 + years and would love it if you would reference the “old” class name so that I can see where I have archived it! Thank you so very much…am loving all that you do!
penny parello
Love your work, Jen, but I must say that your shamrock is a four leaf clover. Shamrocks have three leaves representing the Holy Trinity.
Lisa McGuinness
Thanks for the tutorial – it was fun! Here’s my go at it:
https://www.pinterest.com/pin/174866398017946543/
Julie Singco
Perfect timing on this tutorial. I’ll post the page I used it on shortly. Here’s my shamrock over at Pinterest. https://www.pinterest.com/pin/275493702192625569/
Connie Garlitz
Fun tutorial, Jen. Here is my shamrock 🙂 https://www.designerdigitals.com/digital-scrapbooking/ideas/showphoto.php?photo=257378&title=lucky-charms&cat=1236
Joann
my shamrock the link is from flicker so it should work
https://www.flickr.com/photos/49188658@N06/32412290907/in/dateposted-public/
Kathy
Too cute!! Thanks for sharing!
Joann
my shamrock I am hoping that this link works
https://www.dropbox.com/preview/myshamrock.jpg?role=pehttps://www.dropbox.com/s/cbrhevdmwv6xag9/myshamrock.jpg?dl=0rsonal
Jen White
Joann, I think you will have to make your image public in DropBox in order for the link to work. But, I’m not exactly sure how that works.
pat rech
Thanks for the great tutorial. Here is my shamrock effort…. https://tucsondesertrat.smugmug.com/Digital-Scrapping/i-4kwLp7B/A
Jen White
Your shamrock is so festive! LOVE it. Love Smugmug also!