Don’t be restricted by the boundaries of your photo clipping mask. Let your image bust out of bounds and bleed into a complex mask.
Step One: Add a Complex Mask
- Create a new 12×12 inch document (File > New > Blank File) at 300 ppi with a white background. (PS: Choose File > New.)
- Open a complex mask (File > Open). You can download the complex mask I’m using here.
TIP: A mask is anything you can clip a photo to. A complex mask has fancy edges and varying degrees of transparency. The color of the mask does not matter unless you are planning to blend it.
NOTE: This element was originally created by Susie Roberts as a flat overlay you can put on a page for decoration or blend into the background, but we’re going to co-opt it to use as a complex mask.
- Get the Move tool.
- Holding down the Shift key, click and drag the mask onto the document.
NOTE: Holding down the Shift key while adding something to a document ensures that the item will land in the center of the document.
- Press the letter D to reset the Color Chips to the default of black over white.
- (Optional) Press Shift Alt Backspace (Mac: Shift Opt Delete) to fill the complex mask with black. Although this step is technically not necessary, it can be visually helpful since it removes the image and makes the overlay look more like a complex mask. It’s also less distracting as you follow the rest of the steps.
- In the Layers panel, lower the Opacity of the complex mask to 50%.

Step Two: Add a Photo Mask
- In the Layers panel, click on the Create a New Layer icon.
- Get the Rectangular Marquee tool.
- In the Tool Options, click on the New Selection icon. Set the Feather to 0 and the Aspect to Normal. (PS: Set the Style to Normal.)
- On the document, click and drag out a rectangle within the boundaries of the complex mask.
TIP: The goal is to let the artsy parts of the mask peek out from behind the sharp edges of the rectangle. See the image below.
- Press Alt Backspace (Mac: Opt Delete) to fill the selection with black. This is now a simple clipping mask.
- Press Ctrl D (Mac: Cmd D) to deselect.
- Photoshop Elements Only: In the Layers panel, choose Layer > Layer Style > Style Settings. Set the Lighting Angle to 120 and check Drop Shadow. Set the Size to 9, the Distance to 5, and the Opacity to 50. Click OK.
- Adobe Photoshop Only: In the Menu Bar, choose Layer > Layer Style > Drop Shadow. Set the Blend Mode to Multiply, the Opacity to 50, the Angle to 120, the Distance to 5, and the Size to 9. Click OK.
TIP: This mask is a simple clipping mask. It can handle a drop shadow. But, you should never add a drop shadow to a complex mask.

Step Three: Clip a Photo to the Photo Mask
- Open a photo.
- Get the Move tool.
- Holding down the Shift key, click and drag the photo onto the new document.
- In the Menu Bar, choose Layer > Create Clipping Mask.
Step Four: Clip the Photo to the Complex Mask
- In the Layers panel, hold down the Alt key (Mac: Opt key) and click and drag a copy of the photo layer above the complex mask.
- In the Menu Bar, choose Layer > Create Clipping Mask.
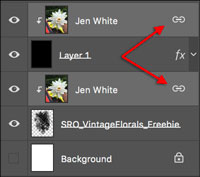
Step Five: Link the Photo Layers
- In the Layers panel, click on one of the photo layers to make it active.
- Holding down the Ctrl key (Mac: Cmd key), click on the other photo layer. Now both photo layers should be active.
- Click on the Link Layers icon.
NOTE: Now that the two photo layers are linked, if you adjust the size and position of one, you’ll also be adjusting the size and position of the other.
At this point you may need to make adjustments to the size and/or position of the photo or one/both of the masks. If so, here is how to do that.
Step Six: Adjust the Photo
- In the Layers panel, click on one of the photo layers to make it active.
- Press Ctrl T (Mac: Cmd T) to get the Transform options. If you cannot see the bounding box handles, press Ctrl 0 (Mac: Cmd 0).
- On the document, click and drag from a corner handle of the bounding box to change the size of the image. (PS: Also hold down the Shift key to maintain proportions while dragging.)
- Click and drag inside the bounding box to reposition the photo.
- Click the checkmark to commit.
TIP: The boundaries of the photo should not be larger than the boundaries of the complex mask, otherwise you will see the harsh edges of the photo.
Step Seven: Adjust the Masks
- In the Layers panel, click on the complex photo mask to activate it.
- Press Ctrl T (Mac: Cmd T) to get the Transform options.
- On the document, click and drag from a side handle of the bounding box to change the size of the mask.
- Click the checkmark to commit.
- Repeat to adjust the size of the photo mask.
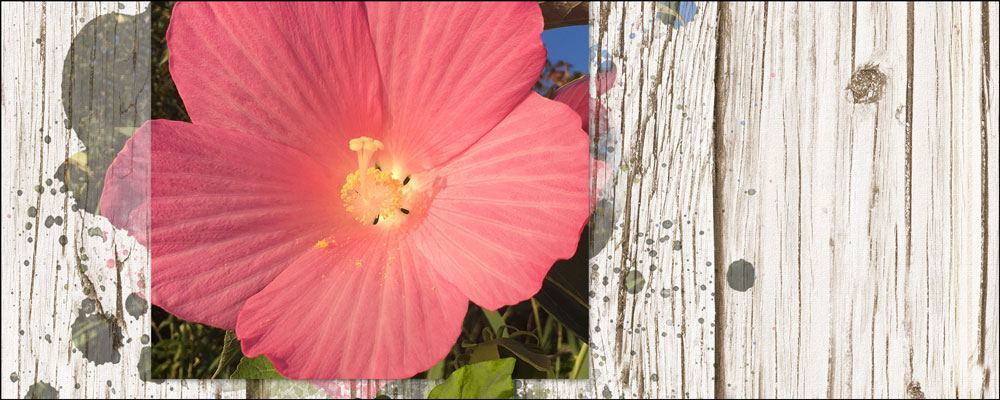
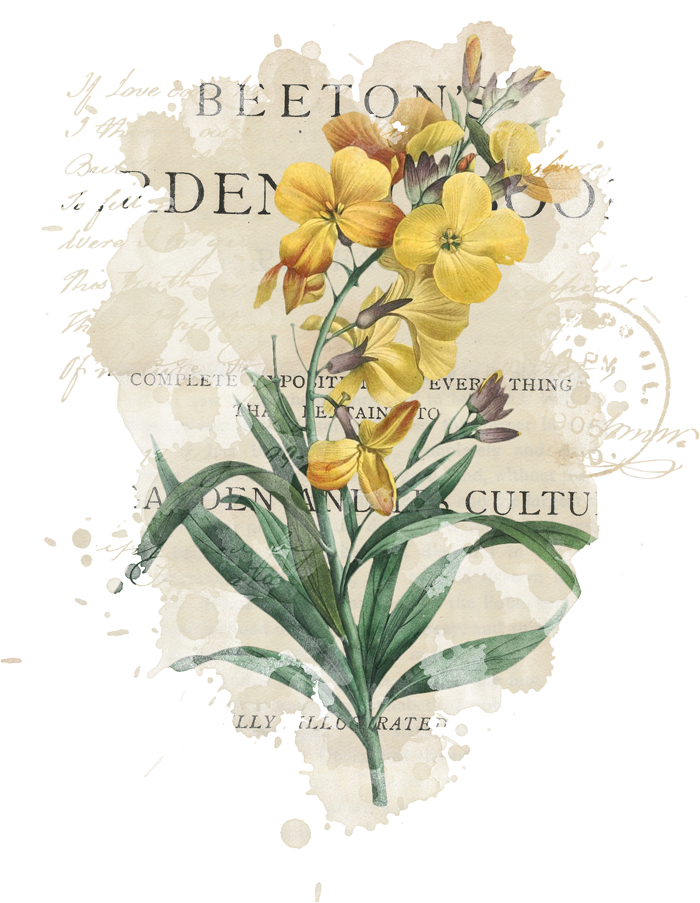
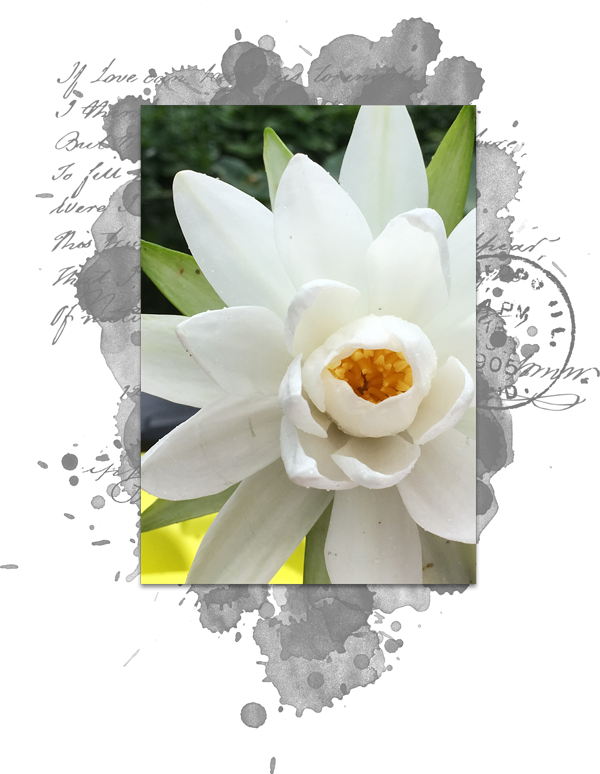
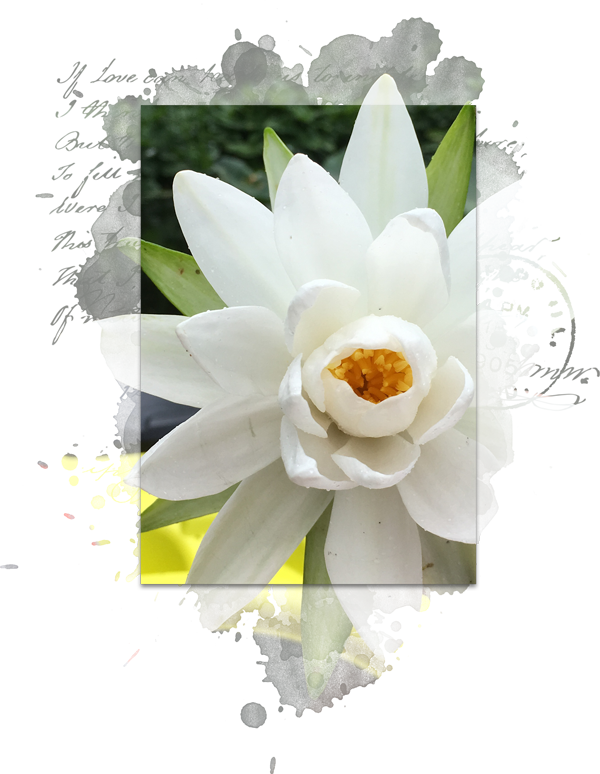
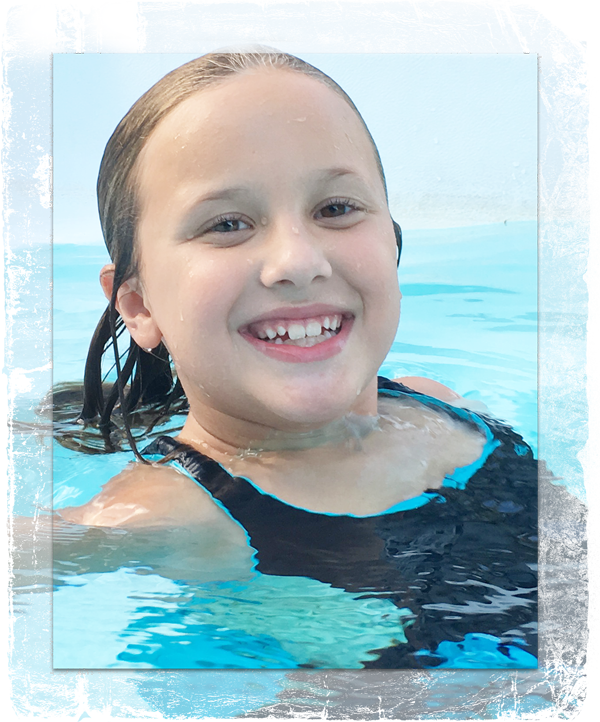
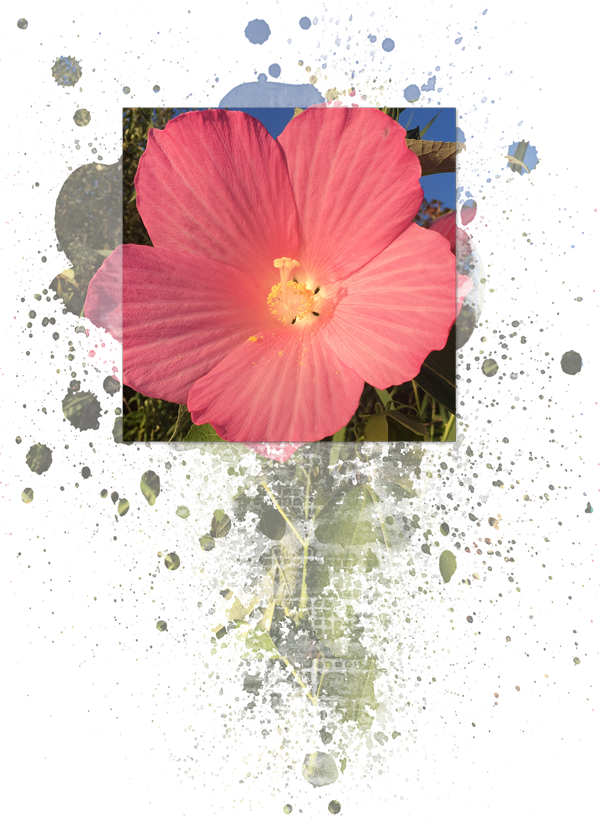
Here are a couple more examples of this technique.
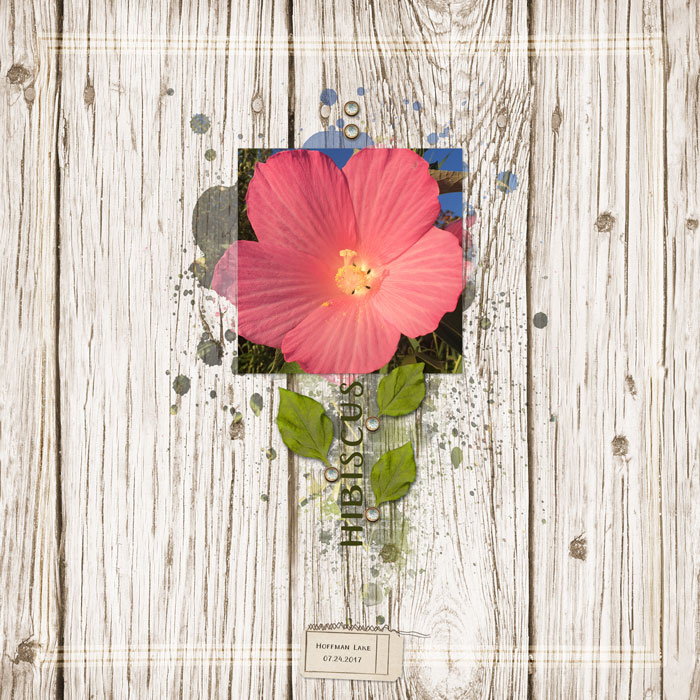
And here is a scrapbook page I made using that last example.
Credits – Photo/Mask Examples
Photos: Jen White
Masks: Susie Roberts
Credits – Scrapbook Page
Page: Hibiscus by Jen White
Photo: Jen White
Kit: Musings by Etc By Danyale
Font: Aristelle Sans

_____________________________________________
 Author: Jen White | Contact Us
All comments are moderated.
Please allow time for your comment to appear.
3 Responses
Karen
Thank you so much. I have seen this technique used on layouts and thought I’d have to teach myself how to do it. This is a great tutorial.
Barbara
Thank you for a fun idea!
Jessie
Love this tutorial! Makes my scrapbook page look so fancy yet simple! 🙂
https://qwiklearn.com/forums/gallery/showphoto.php?photo=93402&title=cga-when-the-flower-blooms&cat=1825