Blended Crinkle Effect
by Jen White
Add character to any digital paper or element by blending a crinkle to it. This tutorial will have you searching your stash for lots of fun elements to realistically enhance.
For this tutorial you will need:
- White cardstock or copy paper
- A camera or camera phone
- A background paper (Download the one I’m using here.)
- Photoshop or Photoshop Elements
(or any other software program with layers and blend modes)
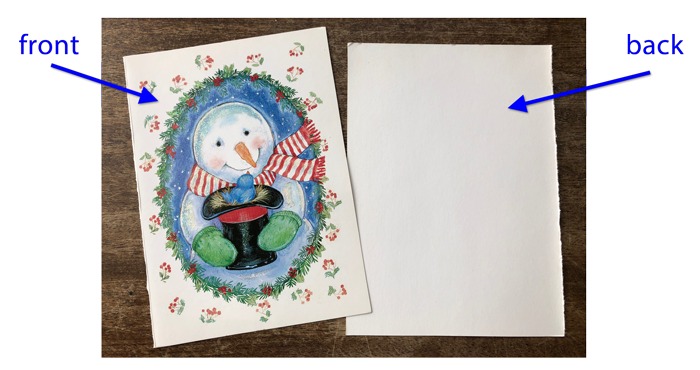
Step One: Crinkle and Photograph a Piece of Paper
- Gather some pieces of white card stock or copy paper.
NOTE: The key is to use paper that is completely white. Any writing or stains are going to show up in the finished product.
I’m using the blank inside of some old Christmas cards. They work great because they are thicker than copy paper and will create a more defined crinkle.
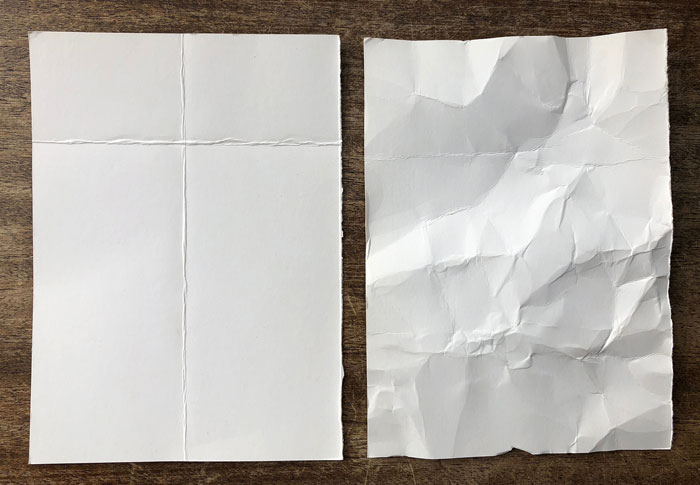
- Crinkle the paper.
For the creased example, I folded the paper backward and forward to create creases.
For the crumpled paper, I wadded the paper up and then flattened it back out.
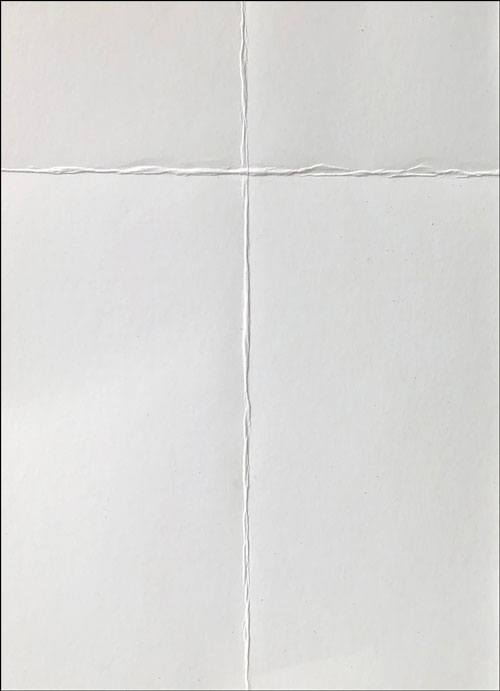
- Take a photograph of the crinkled paper.
TIP: Place the paper on a flat surface next to a window. This provides great natural light with no glare and it will give your paper the shadows necessary to make a great texture.
Step Two: Crop the Photograph
In the next two steps we’ll crop and save the photo you took so that you can use it over and over again to add texture to images, papers, and elements.
- Open the photo you took of the crinkled paper.
- Get the Rectangular Marquee tool.
- In the Tool Options, click on the New Selection icon. Set the Feather to 0 and the Aspect to Normal. (PS: Set the Style to Normal.)
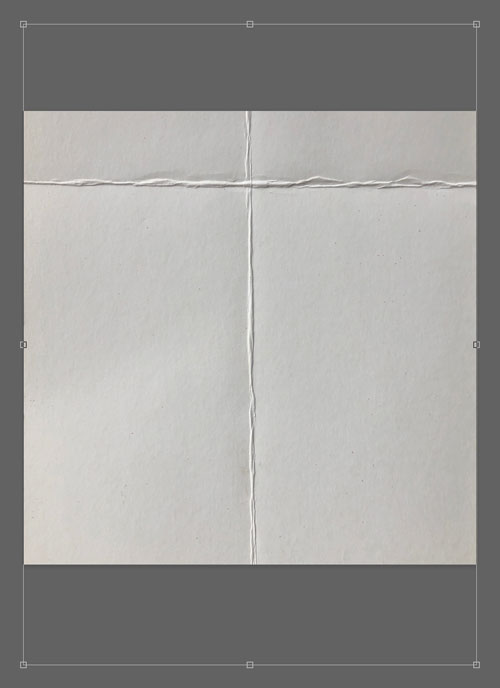
- On the image, click and drag an outline just inside the boundary of the paper. To reposition while dragging, press and hold the Space bar.
NOTE: Make sure no parts of the selection outline extend past the edge of the paper. For example, I do not want to select any part of my desk.
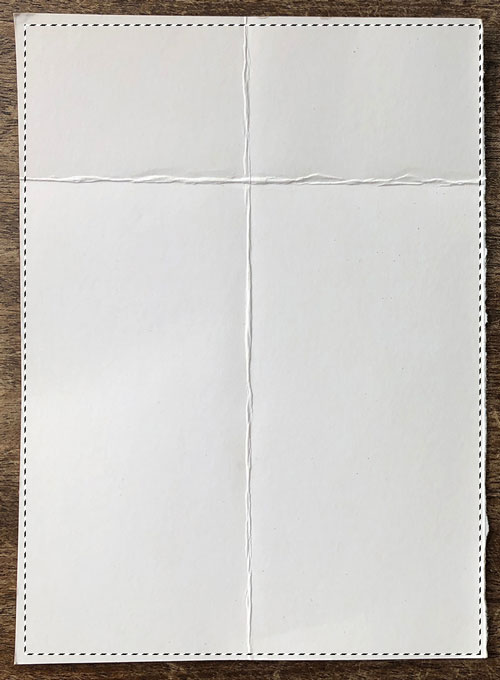
- In the Menu Bar, choose Image > Crop.
- Press Ctrl D (Mac: Cmd D) to deselect.
Step Three: Save the Image As a Texture
- Save the image (File > Save As) as a high quality JPEG file with a unique name.
NOTE: I named my image “texture-paper-creased.jpg” and saved it in a folder called Textures within my scrapbooking stash.
Repeat this process to save more textures.
Step Four: Place the Texture Over a Paper
- Open a background paper (File > Open).
Note: To follow along exactly, download the paper I’m using at the top of this tutorial.
- Open one of the texture images you created in Step Three.
- Get the Move tool.
- Holding down the Shift key, click and drag the texture image onto the background paper.
The size of your texture image in comparison to a 12×12 background paper will vary depending on the quality of the camera you used to photograph the paper.
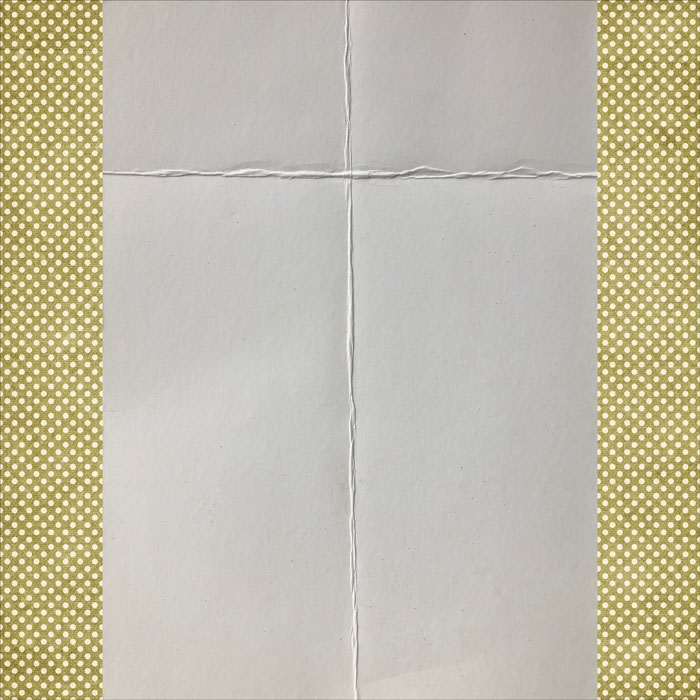
Step Five: Resize the Texture Image
The goal in this step is for the texture image to completely fill the image you’ve put it on top of.
- Press Ctrl T (Mac: Cmd T) to get the Transform options.
- On the image, click and drag on the side handle of the bounding box to stretch the texture to fit the background paper.
- To reposition the texture image, click and drag inside the bounding box.
- Press the checkmark to commit.
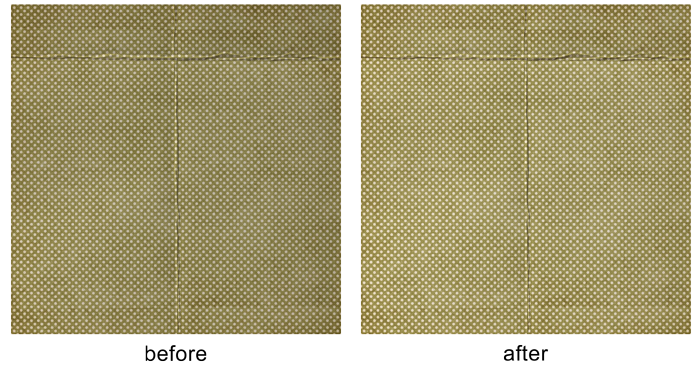
TIP: Make sure the texture image completely covers the background paper as shown below.
Step Six: Blend the Texture Image
- In the Layers panel, change the Blend Mode of the texture image to Multiply.
NOTE: Different combinations of texture images and background papers will provide different results.
TIP: Try other blend modes for slightly different looks.
Step Seven: Adjust the Contrast
This step is optional, but it will add more clarity to the final result.
- In the Menu Bar, choose Image > Adjustments > Brightness/Contrast.
- In the dialog box, move the Contrast slider all the way to the right and then click OK.
You also can soften the effect. To do that:
- In the Layers panel, reduce the Opacity of the texture layer to 50%.
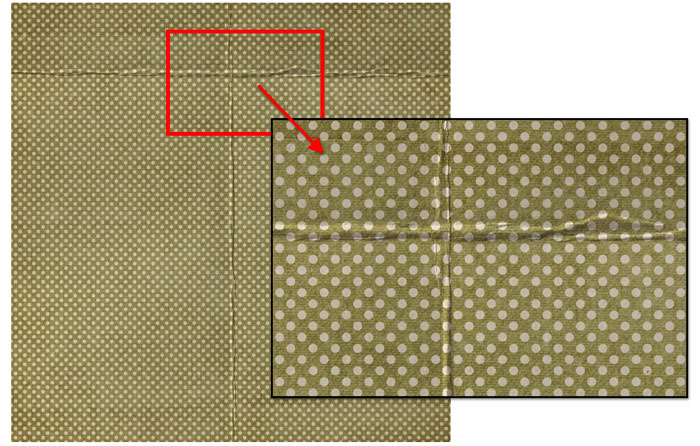
Here’s a closeup of the before and after:

Step Eight: Merge and Save the Textured Paper
Complete this step if you’d like to save your result to use later.
- Save the image (File > Save As) as a high quality file with a unique name.
- Close the working document without saving.
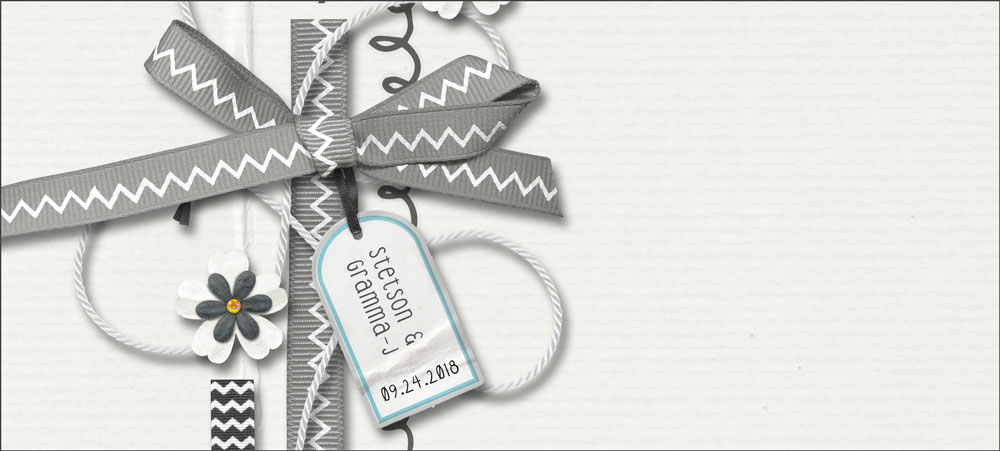
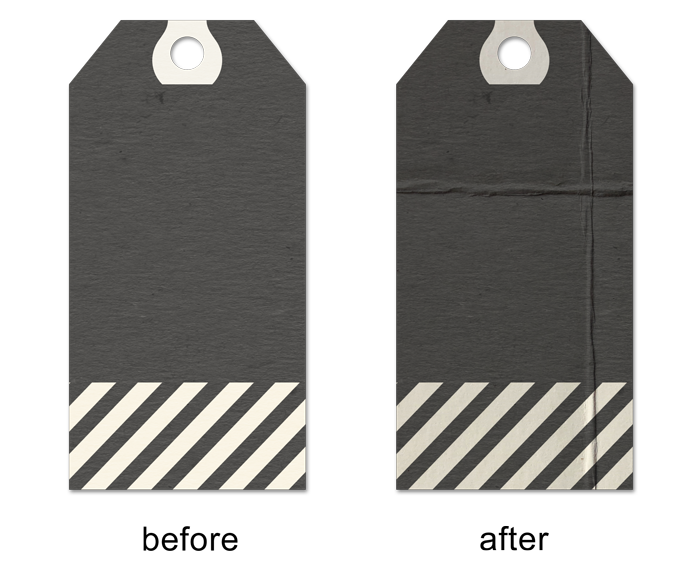
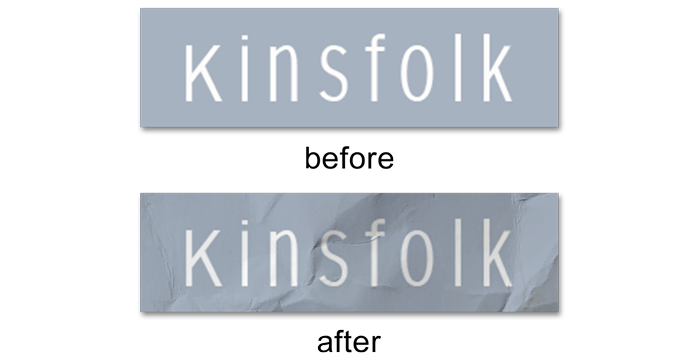
A Variation for This Tutorial
In this example I blended my texture image over a tag. When blending a texture to an image with transparent pixels, you will need to add one more step.
In step six of this tutorial, before blending the texture image:
- In the Menu Bar, choose Layer > Create Clipping Mask.
Tutorial Credits
Paper: Happy Harvest by Susan Bartolini
Tag: Real Life by Calista’s Stuff
Word Strip: ArtPlayPalette Kinsfolk by Anna Aspnes
Page Credits
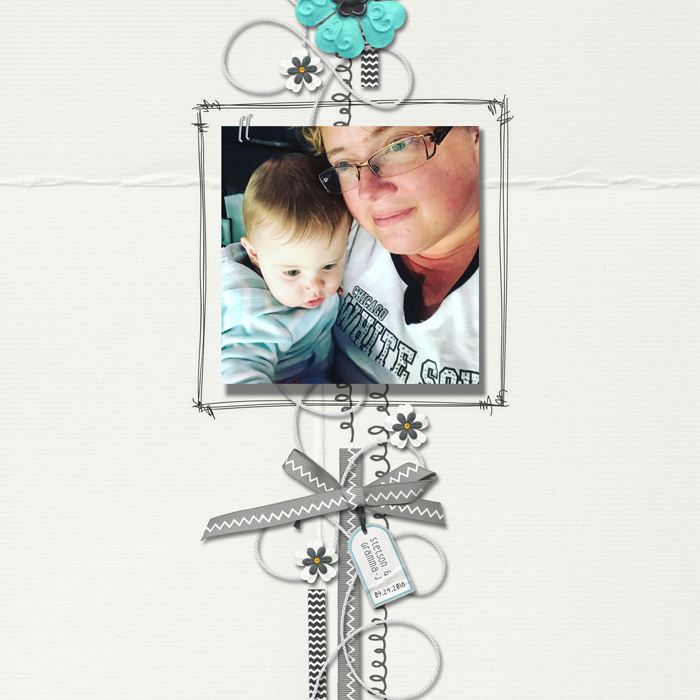
Page: Light of My Life by Jen White
Photo: Jen White
Kit: Bright Spark by KimB Designs
Font: DJB Coffee Shoppe Espresso

Create a scrapbook page using complex photo masks. It’s surprisingly simple, masterfully designed, and freakishly fast.
Save 15% on Beautiful Mess Simplicity Challenge

_____________________________________________
 Author: Jen White | Contact Us
All comments are moderated.
Please allow time for your comment to appear.
8 Responses
Beverly
Thank you! This is excellent. I love to use crinkles, and torn edges when create layouts.
Jen White
Thank you so much for your kinds words, Beverly. Enjoy!
Rhondda James
I tore a postcard and your technique made a great torn edge to any paper! Thanks Jen!
CrimsonCrow
This is super well done! Love it.
donnal
I love this effect. Thanks Jen.
Carol
Oooooooo so neat! Thanks, Jen.
Jenifer Juris
This is awesome! I really LOVE this idea!! 🙂
Vivian
Love this tutorial and can’t wait to make some textures!