Halftone Cartoon Shapes
by Nannette Dalton
KaPow! Wham! Boom! I think cartoon layouts are a lot of fun. They are just right for those moments in your life that seem like they should be in a cartoon strip! My life is just full of laugh-out-loud moments. (I have a crazy family.) Today I want to show you how to how make your own comic book shapes that will explode all over your page.
Step One: Prepare the Workspace
- Open the layered scrapbook page (File > Open) with which you wish to work.
- Press the letter D to reset the Color Chips to the default of black and white.
- In the Layers panel, activate the top layer.
Step Two: Create a Shape
- Get the Polygon tool.
- In the Tool Options, set the Style to None and click on the Create New Shape Layer icon. (Photoshop: In the Options Bar, set the Tool Mode to Shape (Layer), the Path Operations to New Layer, and the Opacity to 100%.) Set the Sides to 3.
- On the document, click and drag to create a triangle shape.
- In the Tool Options, click Simplify. (Photoshop: In the Menu Bar, choose Layer > Rasterize > Shape.)
- Press Ctrl J (Mac: Cmd J) to duplicate the shape.
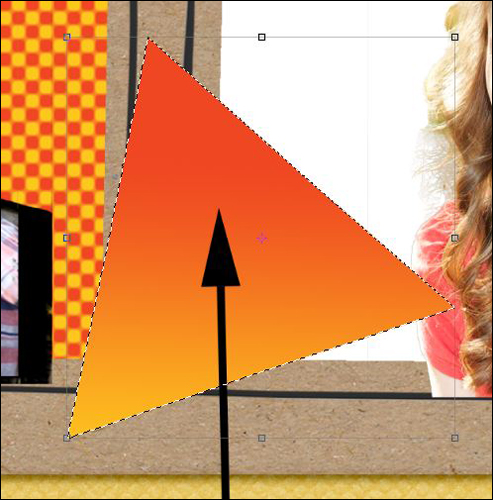
Step Three: Fill with a Gradient
- Click on the Foreground Color Chip to open the Color Picker.
- In the dialog box, choose a color and click OK. I used Hex Code #fec61e.
- Click on the Background Color Chip to open the Color Picker.
- In the dialog box, choose a color and click OK. I used Hex Code #ef4722.
- In the Layers panel, with the duplicate triangle layer active, Ctrl click (Mac: Cmd click) on the thumbnail of the duplicated triangle layer to get a selection outline.
- Get the Gradient tool.
- In the Tool Options, set the Mode to Normal and the Opacity to 100%. Uncheck Reverse and check both Transparency and Dither. Click on the Linear Gradient icon. Open the Gradient Picker and choose Foreground to Background. If you don’t see Foreground to Background, open the drop-down menu and choose Default. (Photoshop: Open the fly-out menu, choose Reset Gradients, and click OK.)
- On the document, click bellow the triangle and drag up to around the middle of the triangle to apply the gradient.
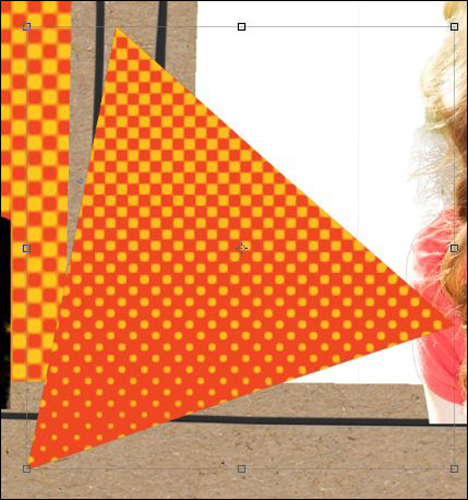
Step Four: Apply the Halftone Filter
- In the Menu Bar, choose Filter > Filter Gallery.
- In the dialog box, open the Sketch folder and choose Halftone Pattern. Set the Size to 6, the Contrast to 35, and the Pattern Type to Dot. Click OK.
- Press Ctrl D (Mac: Cmd D) to deselect.
Note: These filter settings will depend on the size of your shape, so adjust them to your liking.
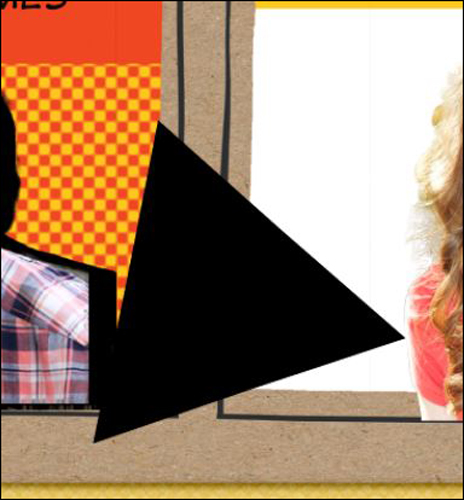
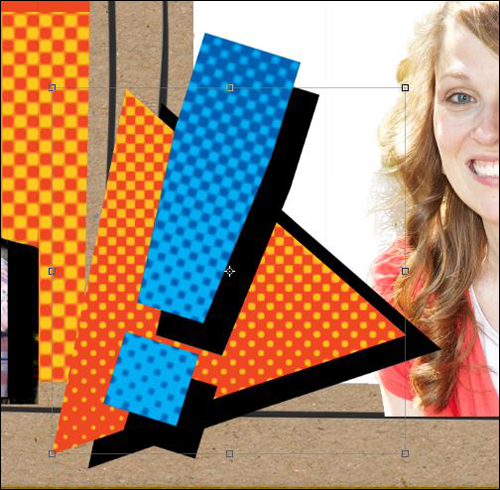
Step Five: Add an Exaggerated Shadow
- In the Layers panel, activate the original black triangle layer.
- Get the Move tool.
- In the Tool Options, uncheck Auto Select Layer. (Photoshop: In the Options Bar, uncheck Auto-Select.)
- On the document, click and drag the black triangle to the right and down to make an exaggerated shadow.
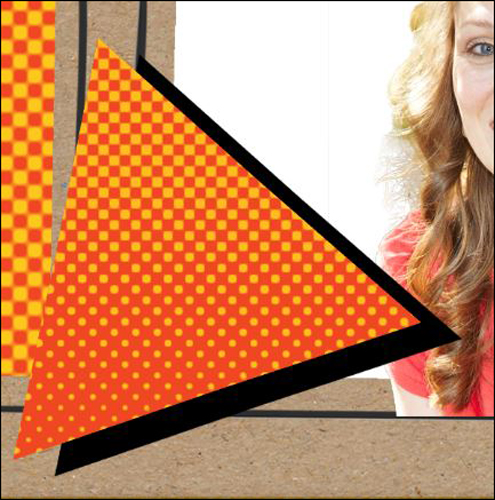
To finish off my cartoon shape, I added an exclamation point, found in the Custom Shape tool, using the same steps as above.
You can also add journaling on top of your shapes to make fun word art. Here are a few comic explosions that I came up with using fonts and different shapes that can be found in Photoshop and Photoshop Elements. The slanted black lines were made by using the Check Mark shape found in the Custom Shape tool and erasing part of the bottom.
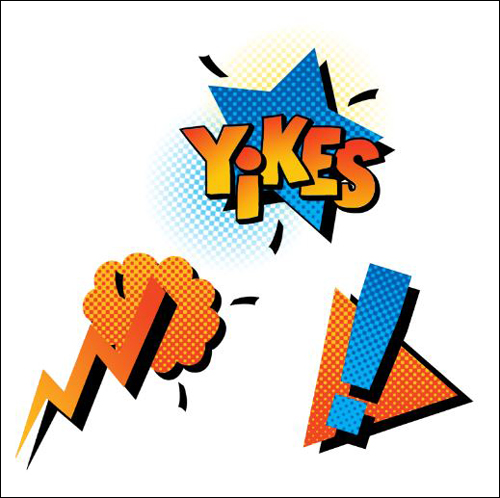
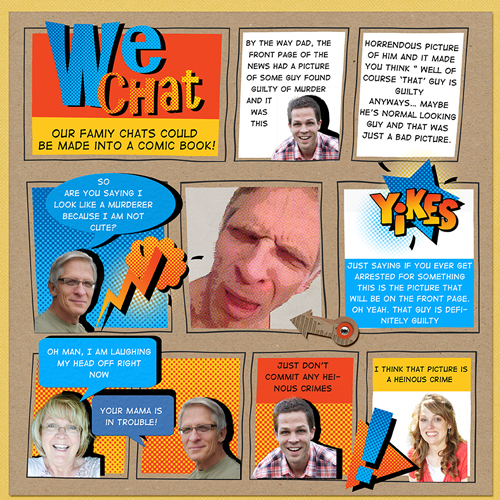
Here is my finished layout. Can you tell that I really liked using this technique? I can’t wait to see how you use it.
Digi Scrap Tutorial: Halftone Cartoon Shapes by Nannette Dalton
Scrapbook page: We Chat by Nannette Dalton
Papers: Cardstock – Lunch Bag and Crisscross – Nautica both by Susie Roberts
Arrow: Lucky Ducky by Miss Mint
Tutorial: Comic Book Layout by Syndee Nuckles
Fonts: Digital Strip, AR Christy
_____________________________________________
Author: Nannette Dalton | Contact Us
All comments are moderated.
Please allow time for your comment to appear.
7 Responses
Cindy
This is such a fun idea and I love your layout, too funny!
Peggy Merton
What a nice addition to Syndee’s tutorial! Thanks for the fun and timely idea.
Nannette
Thank you for all the kind comments.
Scrapgirl
This put a smile on my face. I love how you created this page, so inspiring. I also want to thank you for sharing this with us.
Jen (rfeewjlj)
Totally love this, Nann!! 🙂
Erica
I love, love, love this idea! And really love the layout. So fun! Thank you for sharing.
DorrieH.
Nann, This looks like fun. I’m going to have to give it a try. Thank you for all your work and sharing it.