Trampled Type
by Jen White
Give your type the appearance of being trampled upon or moved aside with the magic of the Liquify Filter.
Step One: Prepare a Workspace
- Create a new document (File > New > Blank File) at 300 ppi with a white background. (PS: Choose File > New.)
- Open a photo (File > Open).
- Get the Move tool.
- Click and drag the photo onto the new document.
- Press the letter D to reset the Color Chips to the default of black and white.
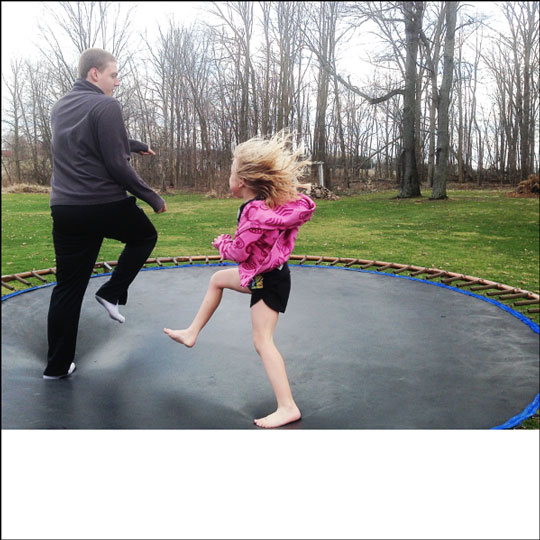
Here is the photo I’m using. If you’d like to be able to follow along without having to go look for an appropriate photo, you can download mine by clicking HERE.
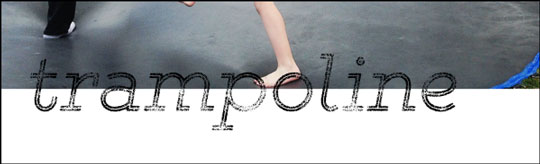
Step Two: Add a Word
- Get the Horizontal Type tool.
- On the document, click to place the cursor and type a word.
- Click the checkmark to commit.
- Make sure you still have the Type tool.
- In the Tool Options, adjust the Font and Size as needed. I’m using Gist Rough Light Three at 113 pt.
- To reposition the word, press the Ctrl key (Mac: Cmd key) and click and drag directly on the word.
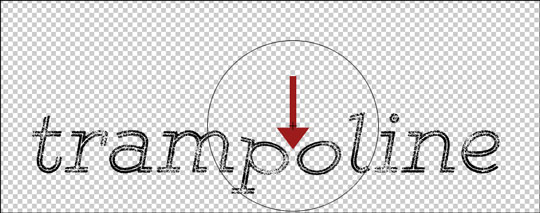
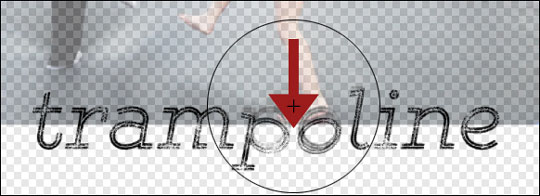
Step Three: Liquify the Word
I want my type to look like it’s being pressed down by the little girl’s foot.
- Photoshop Elements Only:
- In the Menu Bar, choose Layer > Simplify Layer.
- Take note of what part of the title you’d like to press down. I’m concentrating on the right side of the p and the left side of the o.
- In the Menu Bar, choose Filter > Distort > Liquify.
- In the dialog box, get the Forward Warp tool. Set the Brush Size to 1000 and the Brush Pressure to 100.
- On the image, click and drag to warp the type.
- Photoshop Elements Only (cont’d):
- Click OK.
- Repeat the instructions if you need more compression.
- Adobe Photoshop Only:
- In the Menu Bar, choose Layer > Rasterize > Type.
- In the Menu Bar, choose Filter > Liquify.
- In the dialog box, check Advanced Mode. Then check Show Backdrop in the View Options.
- Get the Forward Warp tool. Increase the Brush Size to 1000 and the Brush Pressure to 100.
- On the image, click and drag to warp the type.
- Adobe Photoshop Only (cont’d):
- Click OK to commit the change.
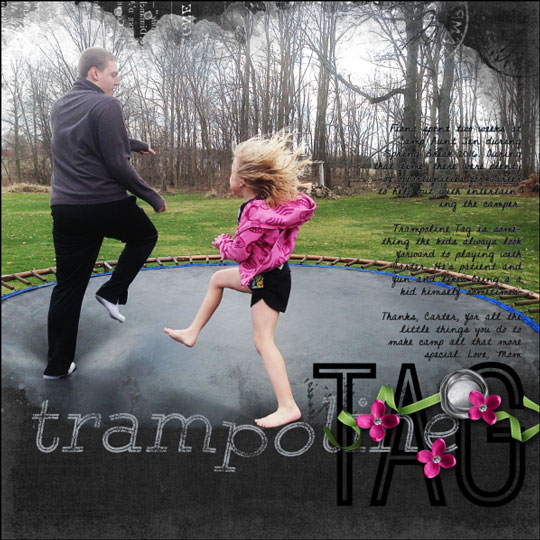
Here is my finished page using this technique. I’d love to see YOUR inspired pages in the Digi Scrap Tutorial Gallery.
Credits:
Page & Photo: Jen White
Kits: Photo Mask Freebie by Susie Roberts, Chalkboard Paper by Susie Roberts, Dear Mom by Kristin Cronin-Barrow
Fonts: DJB Donnascript, Gist Rough Light Three, Ostrich Sans Inline

_____________________________________________
 Author: Jen White | Contact Us
All comments are moderated.
Please allow time for your comment to appear.
4 Responses
Jenifer Juris
I agree – this is so clever and so FUN!! Awesome tut!! 🙂
Donna
I love this layout, Jen, and the technique! Thanks!
CynD
Thanks for this tutorial, it’s a cool tip.
Terri
What a fun idea!! So clever.