Dramatic Flair with Filters
by Nannette Dalton
Turn a lens flare into an element that can be easily manipulated.
Step One: Create a Workspace
- Create a new 12 x 12 inch document (File > New > Blank File) at 300 ppi with a white background. (PS: Choose File > New.)
- Open a background paper (File > Open). I’m using a paper from Anna Aspnes.
- Get the Move tool.
- Holding down the Shift key, click and drag the paper onto the new document.

- Close the original background paper. The new document should now be the active document.
- Press the letter D to reset the Color Chips to the default of black and white.
Step Two: Create a Black Layer
- In the Layers panel, make sure the paper layer is the active layer.
- Click on the Create a New Layer icon.
- Press Alt Backspace (Mac: Opt Backspace) to fill the new layer with the Foreground Color Chip of black.
Don’t worry. I know this looks a little scary, but the black will all disappear.

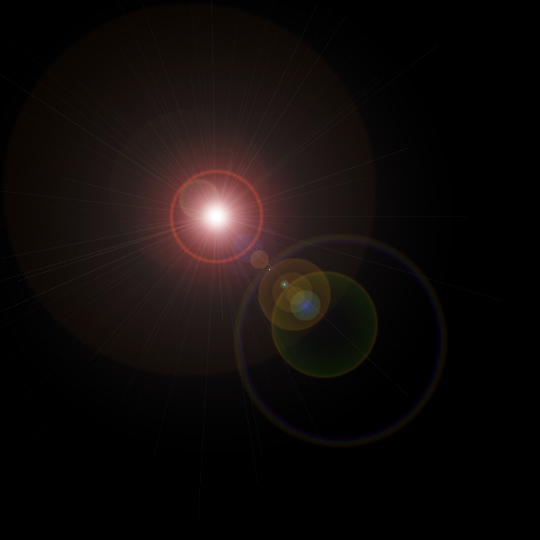
Step Three: Apply the Lens Flare Filter
- In the Menu Bar, choose Filter > Render > Lens Flare.
- In the dialog box, set the Brightness to 100% and choose the 50-300 mm Zoom. Click OK.
Note: I used the 50-300mm Zoom option on my layout, but any of them will work with this tutorial.
Step Four: Change the Blend Mode
- In the Layers panel, change the Blend Mode of the flare layer to Screen.
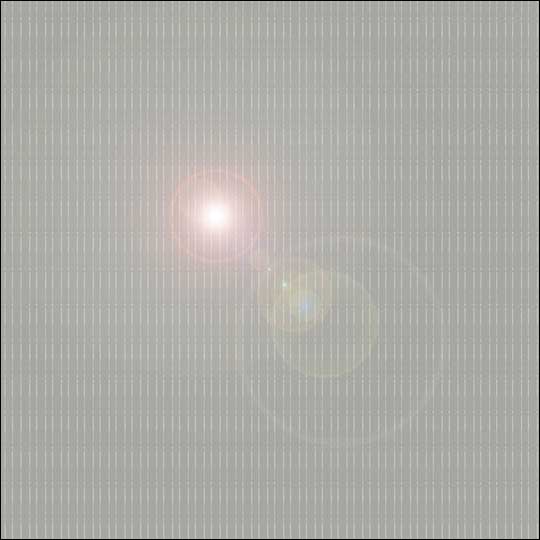
Step Five: Edit the Flare Layer
- Lower the Opacity.
- Move it around.
- Transform the size.
- Mask or erase parts of the flare.
- Etc.
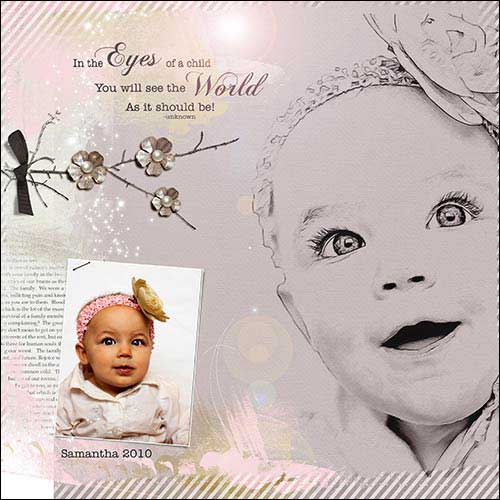
Here’s a scrapbook page I made using this tutorial.
I also used the Lens Flare Filter on this word art to give it a little more shine. (Told you I want to use it everywhere!)

Have fun with this dramatic little tool and show us what you did with it in the Digi Scrap Tutorial Gallery.
Credits:
Scrapbook Page: “Eyes” by Nannette Dalton
Kits: “Art Play Palette Family” by Anna Aspnes, Striped Overlays by Anna Aspnes
Fonts: Chopin Script, American Typewriter
Sketch created with Akvis Sketch filter PlugIn
Software: Adobe Photoshop and Photoshop Elements
Originally published June 2012.

_____________________________________________
Author: Nannette Dalton | Contact Us
All comments are moderated.
Please allow time for your comment to appear.
5 Responses
Shirl/grambie
Sorry that I am deliquent in downloading. I always appreciate your tuts. My sincere thanks to you. Hugs.
(My granddaughter’s Internet is the pits. The majority of the times it is down. I hope I can talk her into a change. LOL)
Terri
Nann: I always love your tutorials! I just gave it a try and it just can’t get any easier that this. Really a great little addition to a page.
Nann
Thanks so much Terri you are such a dear!
Molly Downing
Thank you so much for this quick and oh so easy tutorial! Just played with it and love the outcome.
Su Hall
Hi, there!
This is so cool! I thank you for the tut!
I saw a tut that allows one to control exactly where the Flare will end up. Say you want the Flare over a sun in your layout, for example. Hover over the sun with your mouse and note the coordinates in the Info panel. Then, when you apply the Flare, plug in those coordinates and the Flare will be set exactly on the sun.
I so appreciate all of you ladies’ tutorials! Thank you!
Su