Conversation Hearts 4U
by Nannette Dalton
“Hey Cutie” do you want to “Play Now”?
It will be “So Fine.”
“Me+You” = a fun tutorial!
“You Rock”
“Wink Wink”
“See Ya”
How do you like my conversation heart message 2U? Hopefully you got the meaning that I have another fun tutorial for you.
Nothing says Valentine’s Day more than those sweet little conversation hearts. Let me show you how to make your own customizable little sweet hearts!
Follow along with me and I hope that by the end of this tutorial you will be ready to “REACH 4IT”.
Sorry, I’ll stop now.
Step One: Prepare the Workspace
- Open a scrapbook page (File > Open) with which you wish to work.
Or, create a new 12 x 12 inch document (File > New > Blank File) at 300 ppi with a white background. (Photoshop: Chose File > New.) - In the Layers panel, click on the top layer to activate it.
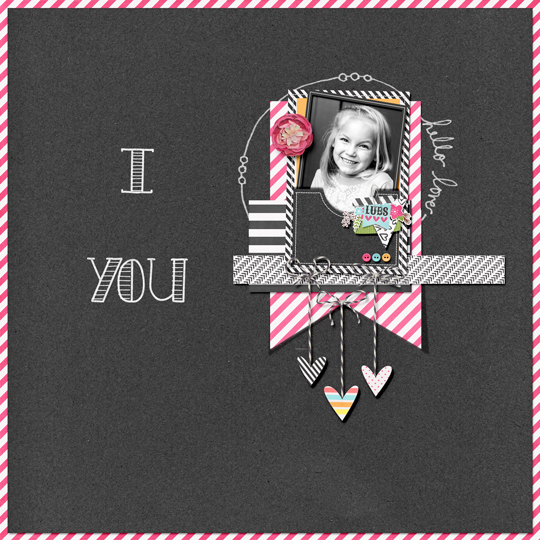
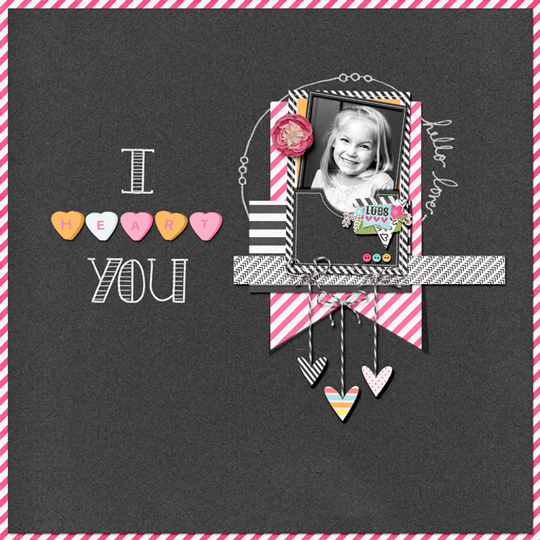
Here is my layout. It is crying out for some colorful candy hearts.
Step Two: Make a Heart Shape
- Click on the Foreground Color Chip to open the Color Picker.
- In the dialog box, choose a color for your heart and click OK. I’m using Hex Code #fbbb65.
- Get the Custom Shape tool.
- In the Tool Options, set the Style to None and click on the Create New Shape Layer icon. (Photoshop: Set the Tool Mode to Shape, the Fill to Solid Color, the Stroke to None, and the Path Operations to New Layer).
- Open the Geometry Options and choose Fixed Size. Set the Width to .68 in and the Height to .68 in.
- Open the Custom Shape Picker and choose the Heart shape. If you do not see the Heart shape, open the fly-out menu and choose Large List. Then, open the drop-down menu and choose All Elements Shapes. (Photoshop: Open the Menu, choose All, and click OK.)
- On the document, click and drag to create the heart shape.
- In the Tool Options, click Simplify. (Photoshop: In the Menu Bar, choose Layer > Rasterize > Shape.)
Note: There are two heart type shapes in the Custom Shape Picker make sure that you pick the Heart shape and not the Heart Card shape.
Step Three: Round the Point
- Get the Eraser tool.
- In the Tool Options, open the Brush Picker and choose a Hard Round brush. If you don’t see a Hard Round brush, open the drop-down menu and choose Default Brushes. (Photoshop: Open the fly-out menu, choose Reset Brushes, and click OK.)
- Set the size to 30 px, the Opacity to 100% and Mode to Brush. (Photoshop: Also, set the Flow to 100%.)
- On the Document, carefully erase the bottom tip of the heart shape.
Note: You will most likely need to zoom into the shape. To do so, press Ctrl + (Mac: Cmd +).
Step Four: Make the Heart 3D
- Press Ctrl J (Mac: Cmd J) to duplicate the heart layer.
- Click on the Foreground Color Chip to open the Color Picker. Choose a color that is a few shades darker than the heart shape and click OK. I’m using Hex Code # d89945.
- In the Layers panel, click on the bottom heart layer to activate it.
- Press Alt Shift Backspace (Mac: Opt Shift Delete) to fill the shape with color.
Note: At this point you should see no change on the document.
- Get the Move tool.
- Press the Right Arrow key to nudge the shape in place. I nudged mine about 20 times.
Step Five: Add Some Type
- In the Layers panel, click on the top heart layer to activate it.
- Click on the Foreground Color Chip to open the Color Picker. Choose a color for the type and click OK. I’m using Hex Code #f081bf.
- Get the Horizontal Type tool.
- In the Tool Options, choose a Font and Size. I’m using Arial Regular at 22 pt. (In earlier versions of PSE, set the Style to None.) Set the Alignment to Center.
- On the document, click once in the center of the heart and type your preferred letter or short phrase. Click on the checkmark to commit the type. If necessary, adjust the size of the type.
- Get the Move tool.
- Use the keyboard arrow keys to nudge the letter or phrase into position.

Step Six: Quickly Create Additional Hearts
Create a New Heart:
- In the Layers panel, click on the top type layer to activate it. While holding down the Shift key, click on the base heart layer to activate all three layers.
- In the Menu Bar, choose Layer > Duplicate Layers and click OK. The three layers should still be active in the Layers panel.
- With the Move tool, on the document click directly on the candy heart and drag the duplicated layers to a different position.
Change the Type:
- In the Layers panel, double click on the thumbnail of the top type layer to activate the type.
- Type a new letter or short phrase and click the checkmark to commit the type.
Change the Color of the Heart:
- Click on the Foreground Color Chip to open the Color Picker. Choose a color and click OK.
- In the Layers panel, click on the heart layer you want to recolor.
- Press Alt Shift Backspace (Mac: Opt Shift Delete) to fill the shape with the new color.
- Repeat for the bottom heart layer with a darker shade.
Here are some more delicious candy colors that you could use if you like:
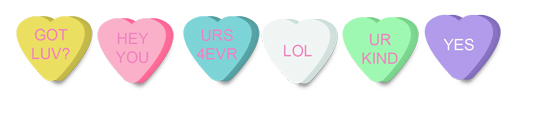
Yellow: # febf69, # b27c34; White: # f0f5f4, # d2e1de; Pink: # fab0c9, # fd6c9a; Green: # 9ef8b1, # 7dd790; Blue: # 7dd4d7, # 58a4a7; Purple # b19beb, # 8973c1
Final Note: Add a drop shadow to the bottom heart layer to give your candy depth.
OK, it is your turn to have a bit of fun. See what you can create, then post your creations in the Digi Scrap Tutorial Gallery. I’d love to see them!
Credits:
Layout and Photo: Nannette Dalton
Tutorial: Pocket Postcards by Jen White
Kit: Story Teller Quinn by Just Jamee
Fonts: Bistro Serif, Arial Regular
Software: Photoshop CC, Photoshop Elements 14

_____________________________________________
 Author: Nannette Dalton | Contact Us
All comments are moderated.
Please allow time for your comment to appear.
4 Responses
Jo Campbell
Love this! Thank you.
Daneen Thurman
Simply adorable…Thank you for sharing (again!)
Shirl
The candy hearts are just too cute in their fun-loving colors. Thank you for another wonderful tutorial. Hugs. 🙂
Nann Dalton
Thanks Shirl, You always have a kind word to say. I love that about you.