Artistic Decorative Text
by Lydia Tarbox
Have you dipped your toes into the world of Art Journaling? I have to admit that I was a little hesitant to try my hand at this style of scrapping. Not only was I unsure of my ability to make it look good, but in addition, I wasn’t sure that I wanted to use scrapping as a method for recording my innermost thoughts and feelings. I know that for some people, Art Journaling is a really wonderful way to express their emotions while being creative. And, I think that’s fabulous. But, I just wasn’t sure that was the road I wanted to take for my own personal journal.
However, throughout my life, I’ve amassed quite a collection of quotes, poems, and song lyrics that are meaningful to me and that I want to remember. So, I decided to use Art Journaling as a way to beautifully preserve some of these thoughts and quotes that I really love. And, so I just dove in and gave it a shot. And, I LOVE it. Playing with paint and stamps and blending can be so fun and freeing . . . it’s hard to mess it up. And, since the Art Journaling style is quite different from my normal scrapping style, I really enjoy breaking out of my comfort zone and trying something new every once in a while.
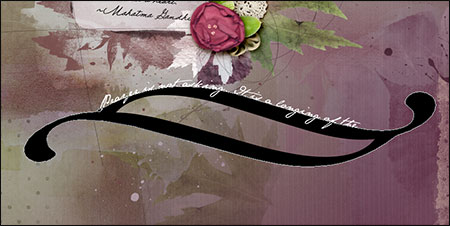
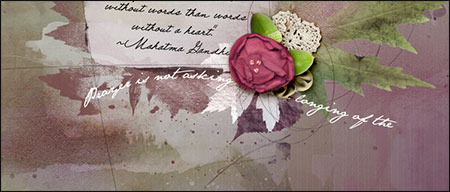
Today I wanted to show you one of my favorite tricks for adding a little decorative flair to my Art Journaling layouts. All you need to do is use a Custom Shape as a path for text and then play with the Blending Mode and Opacity until you get the look you like the best. Let me show you how easy it is to do!
Note: Since this tutorial depends on text paths, those who use Photoshop Elements 9 or earlier will not be able to complete this tutorial.
Step One: Prepare the Workspace
- Open a layered scrapbook page (File > Open).
- Press the letter D to reset the Color Chips to the default of black and white.
- In the Layers panel, activate the layer on which you want your text to appear.
Step Two: Add a Custom Shape
- Get the Custom Shape tool.
- In the Tool Options, open the Custom Shape Picker and choose Ornament 1. If you don’t see Ornament 1, open the drop-down menu and choose All Elements Shapes. (Photoshop: Open the fly-out menu, choose All, and click OK.) Click on the Create New Shape Layer icon. (Photoshop: Set the Tool Mode to Shape (Layer) and the Path Operations to New Layer.) Open the Geometry Options and choose Unconstrained.
- On the document, click and drag to draw the ornament shape. Hold down the Space bar to reposition while dragging.

Step Three: Add the Text
- Get the Text on Shape tool. (Photoshop: Get the Horizontal Type tool.)
- In the Tool Options, choose a Font and set the Size and Color to your liking.
- In the Layers panel, make sure the Shape layer is active.
- On the document, hover your cursor over the edge of the ornamental shape in the place where you would like your text to begin. When you see the cursor change into the Text on Path icon, click once and type your text. Click on the checkmark to commit the text.
- In the Layers panel, click on the Visibility icon of the Shape layer to hide it.
- Activate the Type layer.
- Get the Move tool.
- In the Tool Options, uncheck Auto Select Layer. (Photoshop: Uncheck Auto-Select.)
- On the document, click and drag the text into the desired position on your page.
Step Four: Add the Artistic Effects
- In the Layers panel, change the Blending Mode to Soft Light.
- If desired, reduce the Opacity to your liking.
Step Five: Add More Lines of Text
- In the Layers panel, click on the Visibility icon of the Shape layer to make it visible again.
- Follow the instructions in Steps Three and Four to add additional lines of text and position them on your page.
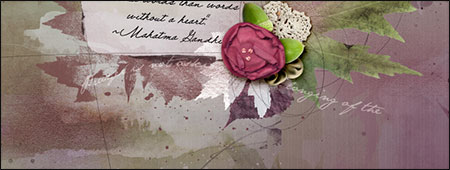
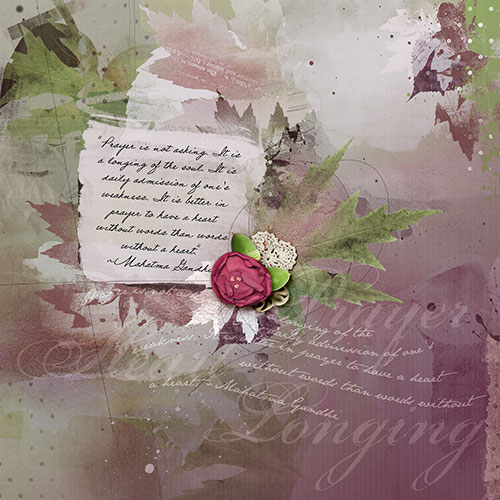
Here’s my finished layout. I love the added decorative effect that the artistic text adds to the feel of the layout.
Credits:
Digi Scrap Tutorial: Artistic Decorative Text by Lydia Tarbox
Originally published 11-25-2013
Layout: Gandhi Prayer Quote by Lydia Tarbox
Kit: ArtPlay Pallette Give Thanks by Anna Aspnes; November 2013 Premier kit
Fonts: SNF Grandma Betty, Jane Austen, and Porcelain

If you enjoyed this tutorial, you might also like:

Circular Sentiments
by Jen White
Pen your sentiments in a circular format to add creativity and interest to your cards and scrapbook pages. Lots of inspiration included.
Video Release Date: February 2014
Filmed with Photoshop Elements 12
_____________________________________________
 Author: Lydia Tarbox | lydia@digitalscrapper.com
All comments are moderated.
Please allow time for your comment to appear.
Leave a Reply